
A Classic Goal Clearance Pattern from a 3-1: Using the Pivo
Because a back-pass is not allowed on a goal clearance, it is important to enter the attacking half easily and make effective use of the throw.
This time, I will explain the goal clearance in the video below, which is very widely used and makes it easy to break into the attacking half and go straight to goal.
The opening created by the goalkeeper's throw is extremely important for making a goal clearance work.
Goalkeeper throws can be divided broadly into the following three types:
- underarm throw
- sidearm throw
- overarm throw
If those three terms do not immediately make sense, watch the following video.
For passes to players on the first line (in your own half), an underarm throw is basically fine. But for passes to the pivo or into the space behind, do not mindlessly choose an overarm throw. If the passing lane is completely open, a sidearm throw can be effective.
A sidearm throw is easier to control, but it also increases the risk of an interception, so you need to choose between them depending on the situation.
If the defender watches the goalkeeper's eyes and moves to close the space where a pass seems likely, you can use that against them and throw to the opposite side, making it easier for a teammate to receive in space.
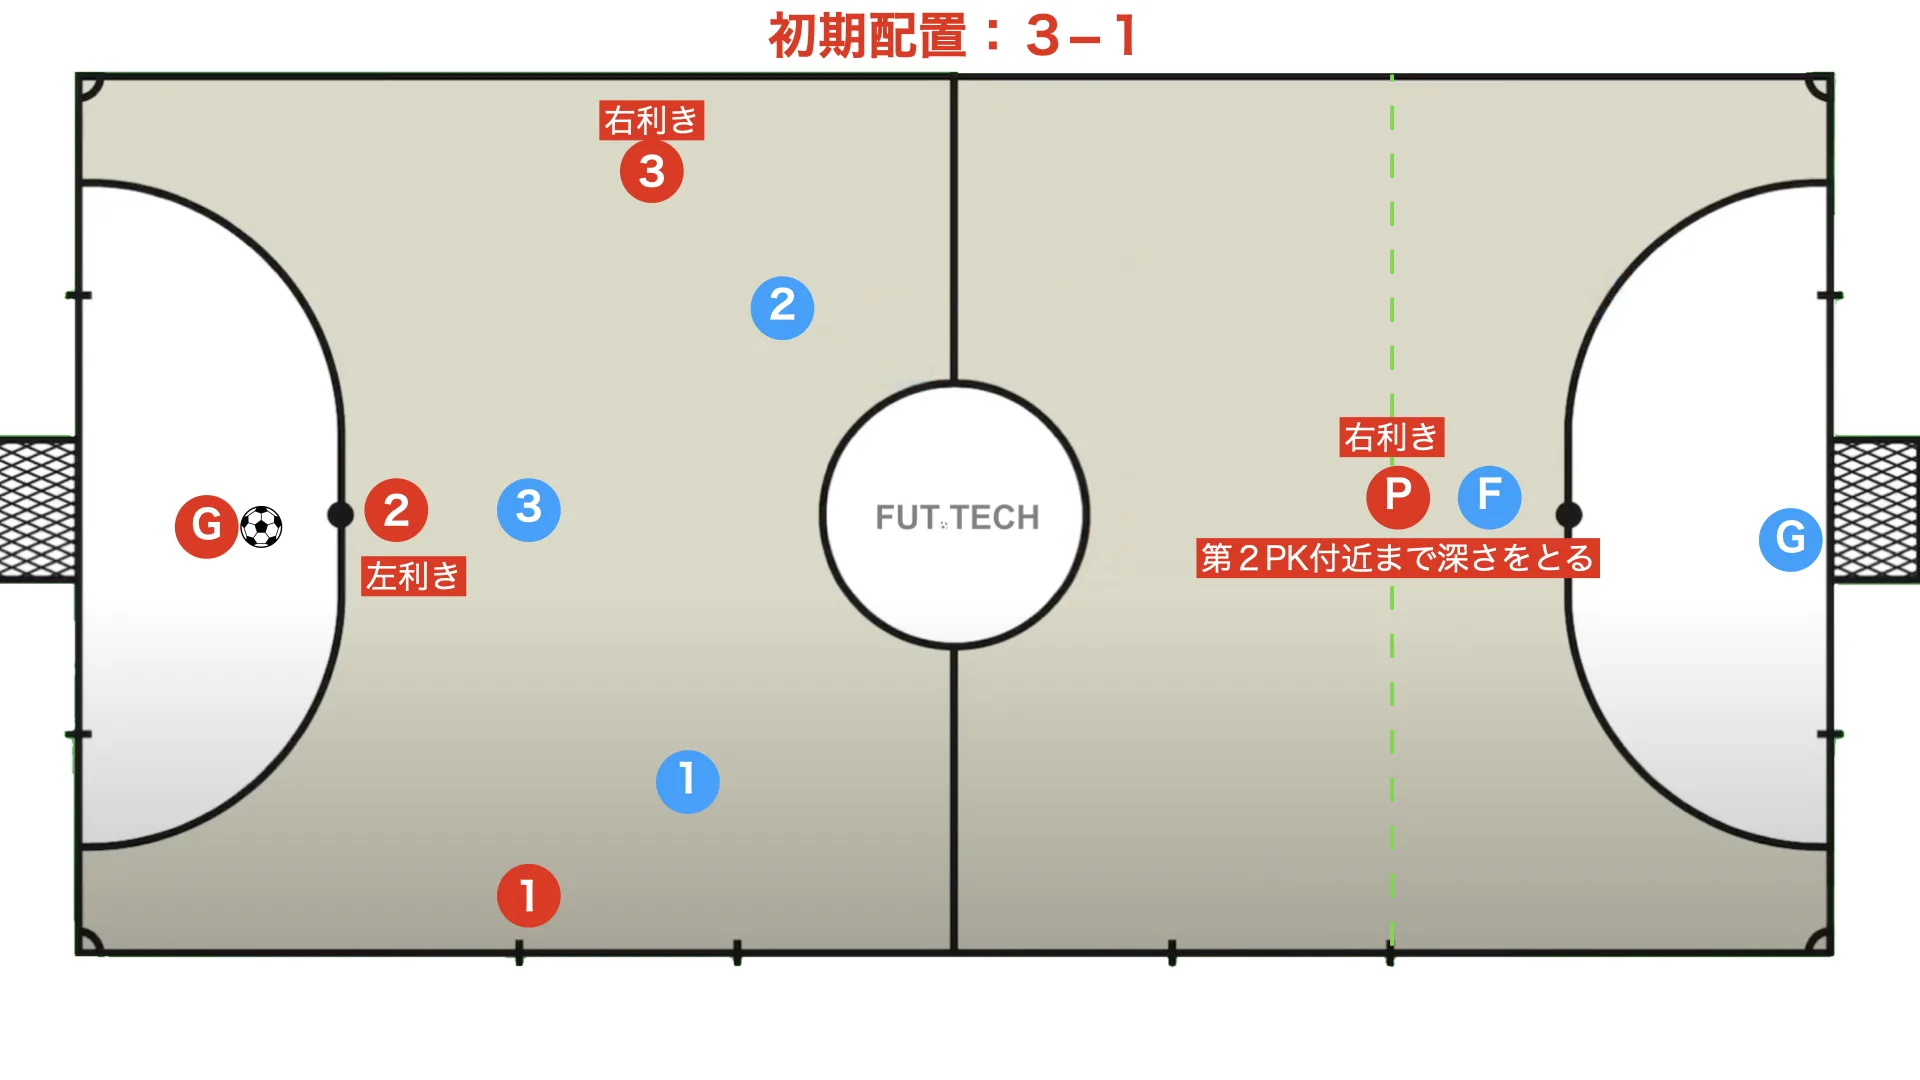
The initial shape is a standard 3-1, but it is important to set up quickly while being conscious of who should be placed where.
- The pivo takes depth around the second penalty mark line and positions centrally
- On the side opposite the pivo's stronger foot, place an ala whose stronger foot is opposite to the side of the initial positioning
- The fixo should be a player whose stronger foot is opposite to the pivo's
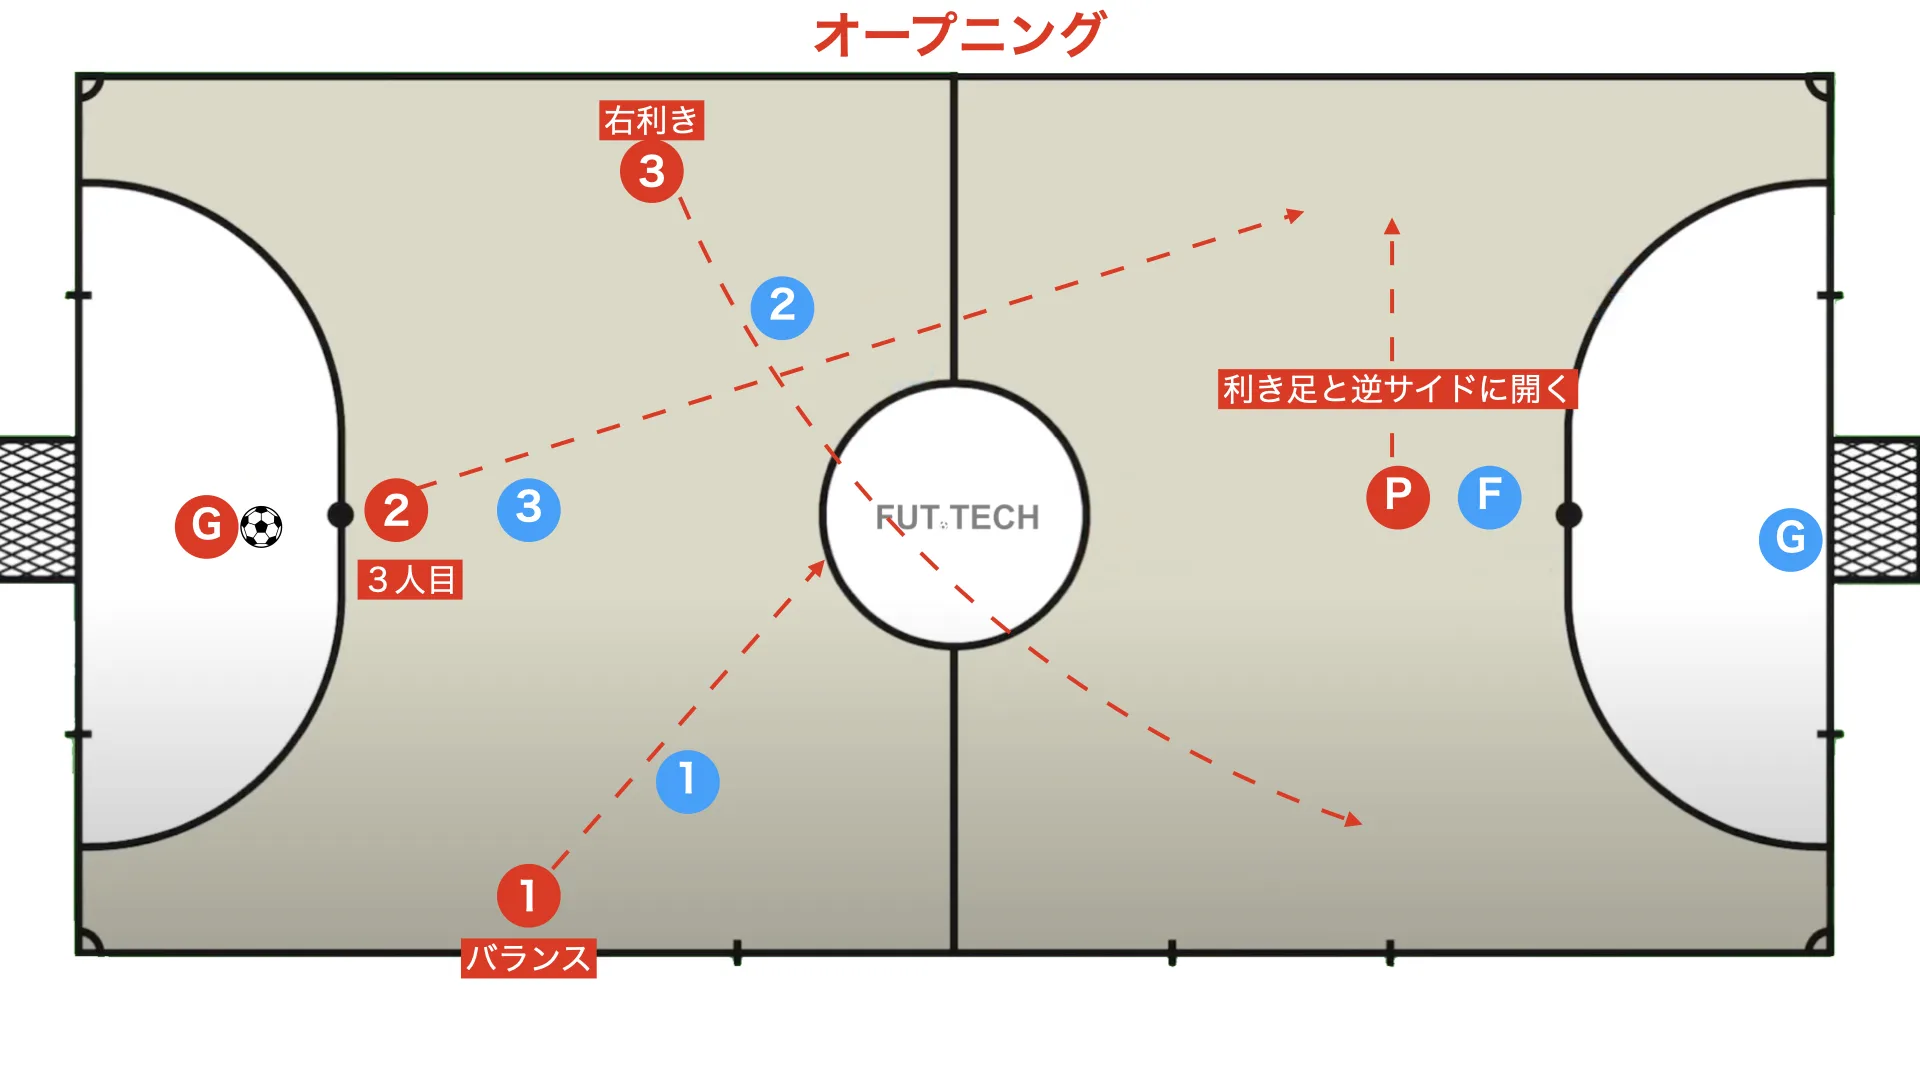
- The pivo moves wide to the side opposite their stronger foot
- Red No. 3 runs into the side the pivo has vacated (ala cut)
- The fixo joins the attack as the third outfield player (support for the pivo or for the rebound)
- Red No. 1 keeps the balance

- Red No. 3 receives behind the defence and becomes the shooter
- The pivo attacks the second post
- Red No. 2 attacks the rebound
- Red No. 1 stays near the center circle to keep the balance
At this moment, it is crucial that the goalkeeper can throw a ball that is easy for the outfield player to control, and ideally the throw should have a slight inward spin.
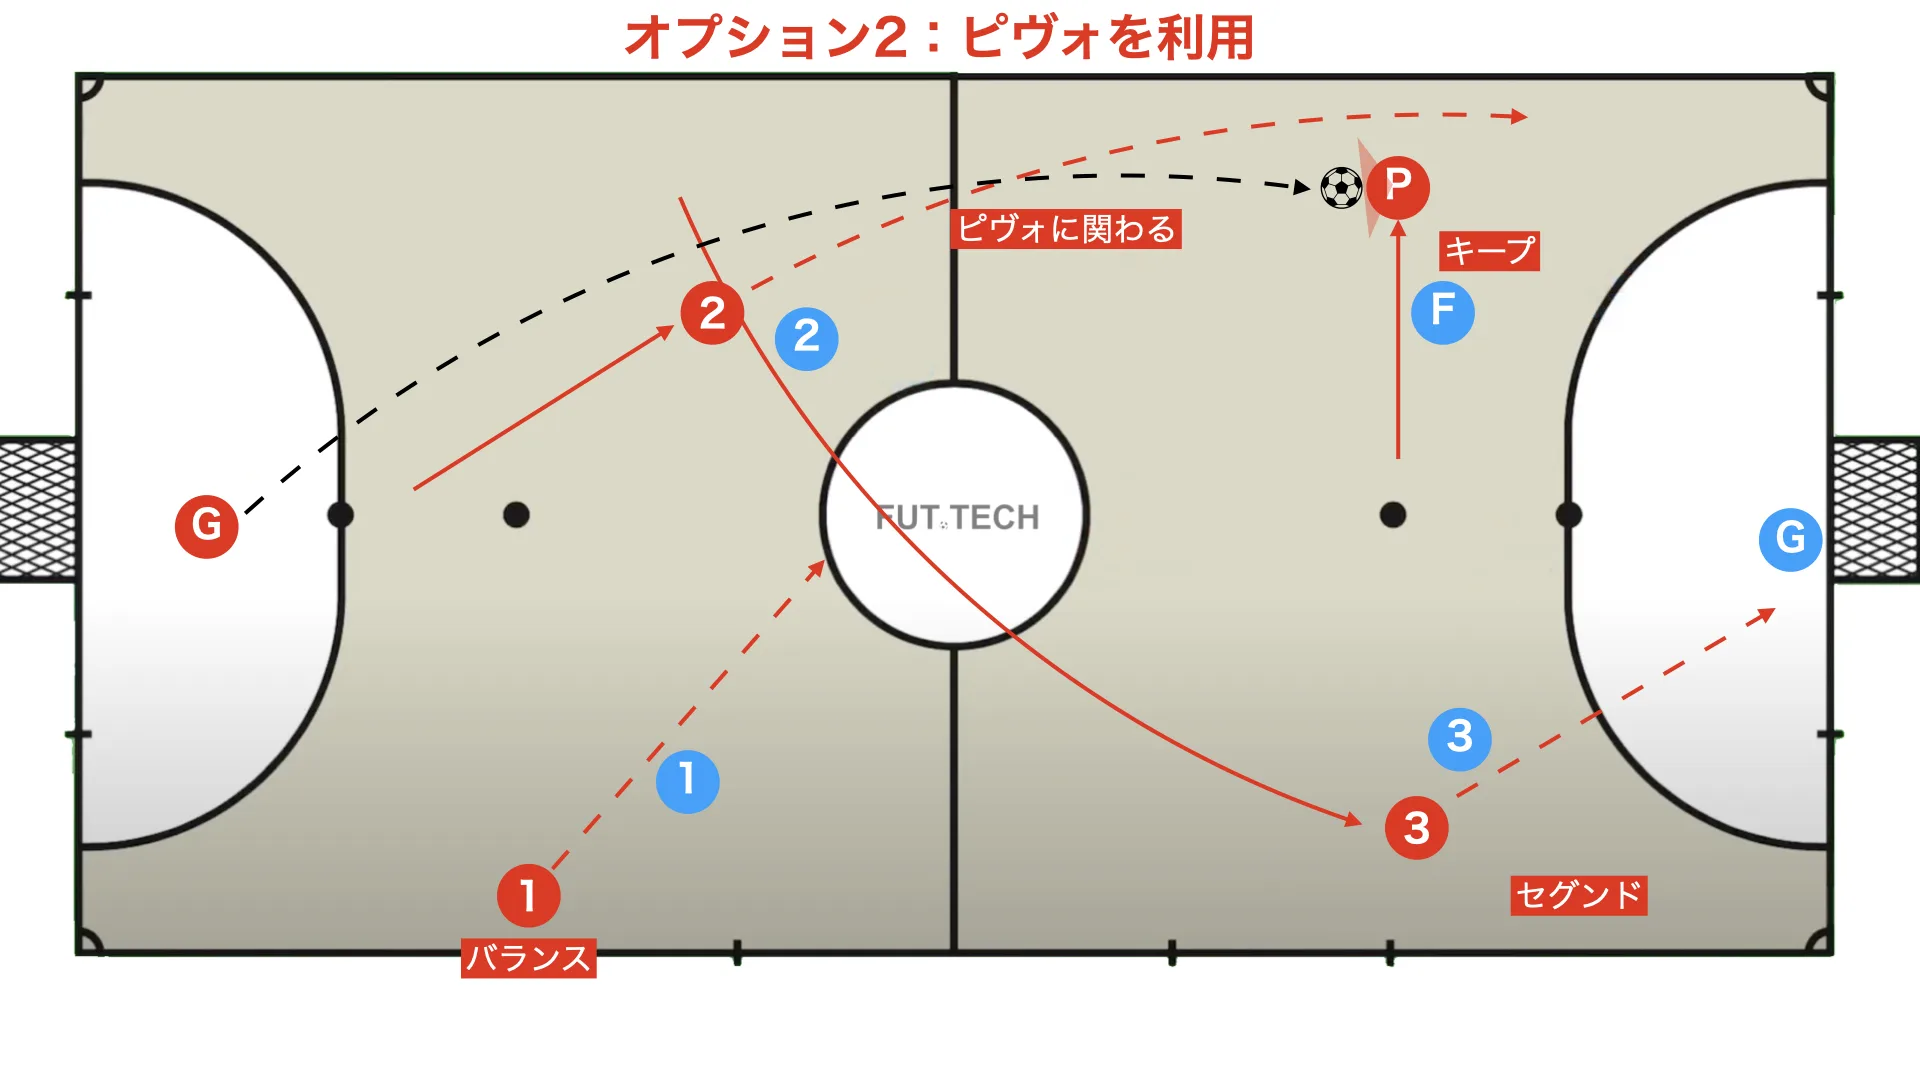
- The pivo receives on the side, protects the ball, and turns if a turn is on
- Red No. 3 attacks the second post
- Red No. 2 gets involved around the pivo (layoff, overlap, block)
- Red No. 1 keeps the balance
This has the same idea and structure as the very famous attacking pattern called L, which also uses the pivo.
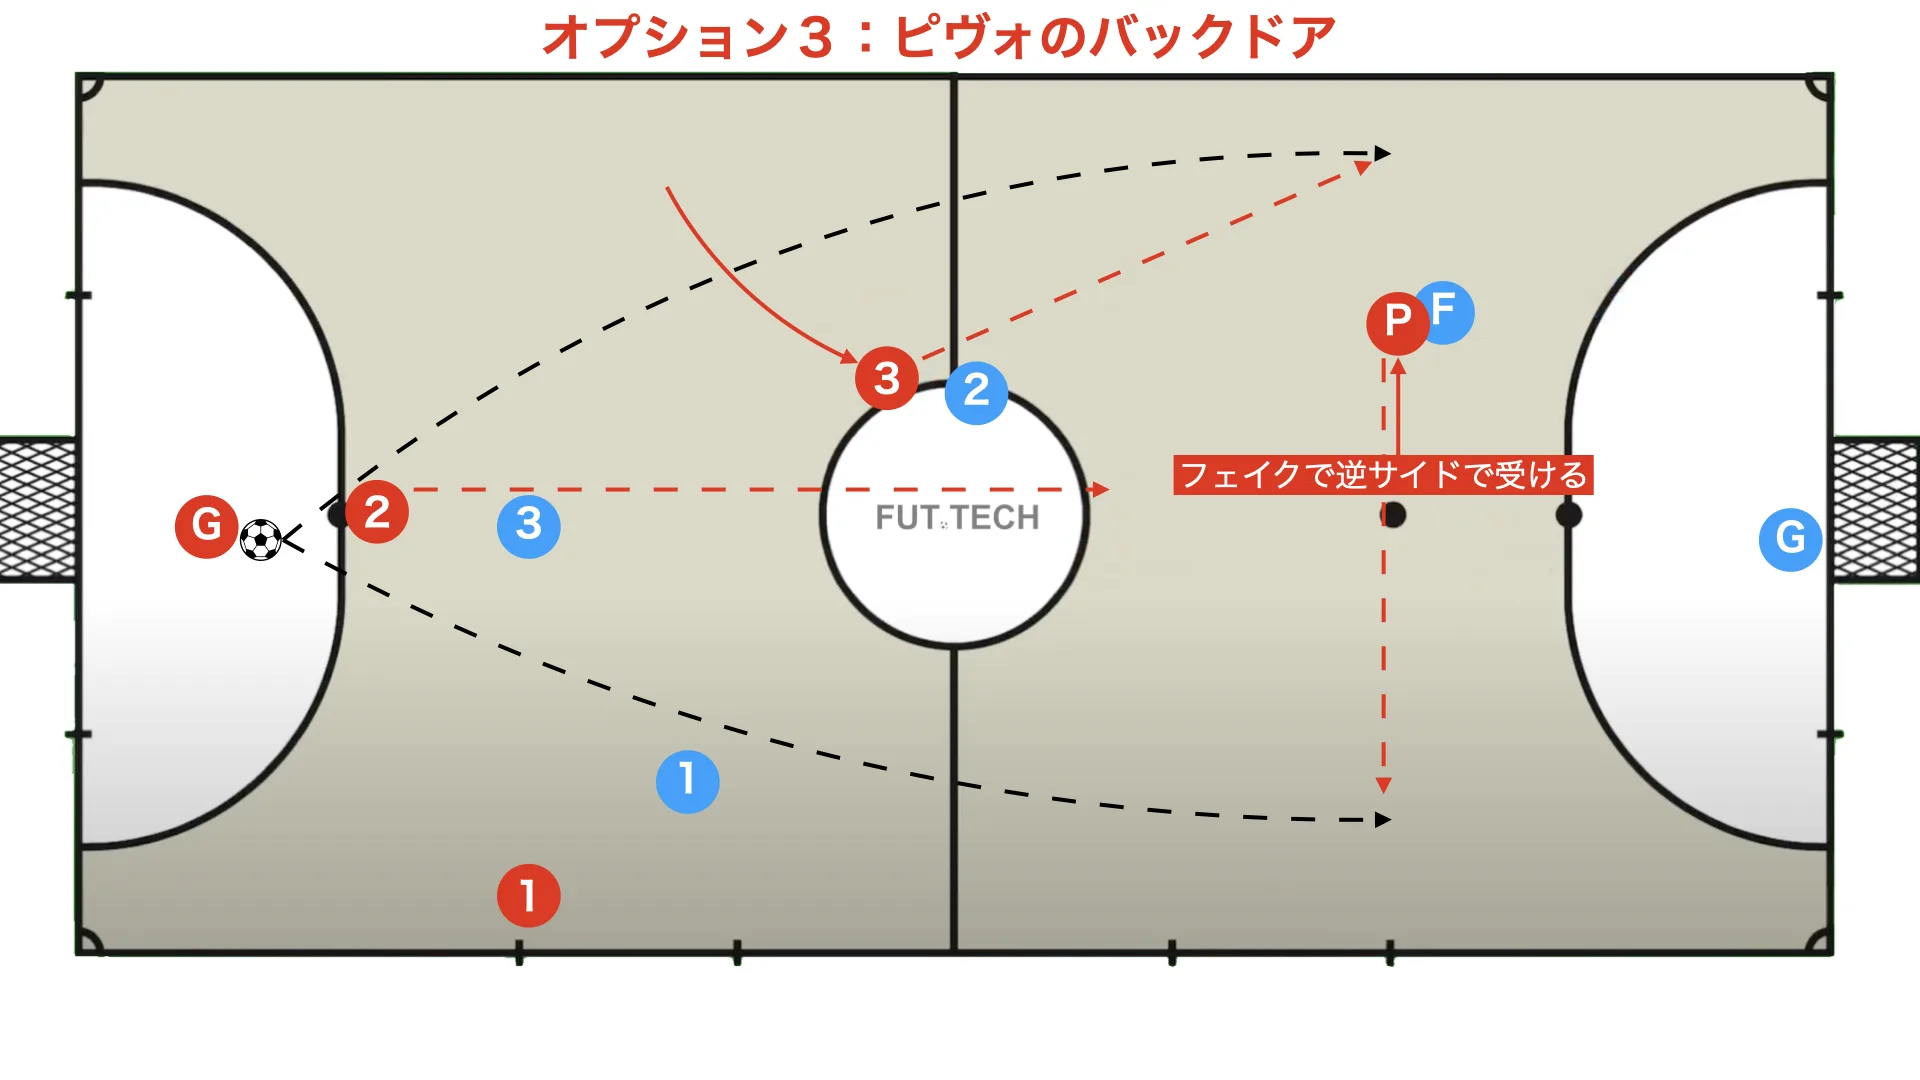
- The pivo feints as if they will receive on the side opposite their stronger foot, then instead receives on their stronger-foot side
- Red No. 3 fakes the ala cut and runs into the space the pivo has created
- Red No. 2 attacks the rebound
- Red No. 1 keeps the balance
The attacking variations after this are the same as in Option 1 and Option 2, so I will omit them here.
What did you think?
Rather than choosing the options mechanically by number, I recommend selecting them flexibly based on the positioning of the opposing defenders.
If your team often gets trapped by the opponent's high press on goal clearances and struggles to escape, I strongly recommend introducing at least one designed pattern like this into your team.