
How to Defend Against Quatro (4-0): The Rotating Box
Published: 2021.05.09Updated: 2026.05.04
Most players who are still fairly new to futsal probably only know one way to defend against quatro / zero (4-0): pure man-to-man marking.
But against opponents who are comfortable playing quatro, trying to deal with it through man-to-man defending without switching marks will lead to a lot of goals conceded.
For teams without strong individual defenders, playing pure man-to-man is extremely dangerous because you get exposed in behind and leave space for the opponent to exploit.
There are several ways to defend against quatro, but in practice, the safest option is usually to defend with a man-oriented rotating box.
If the whole team can master this defensive structure, quatro stops being something to fear.
To understand this article, the concept of building multiple defensive lines is extremely important.
If you have not read the article below yet, read that first before continuing.
関連記事

Zone Defence Basics: Building Multiple Defensive Lines and the Ala-to-Ala Pass
A guide to a core concept in futsal zone defence: building multiple defensive lines. This article ex…
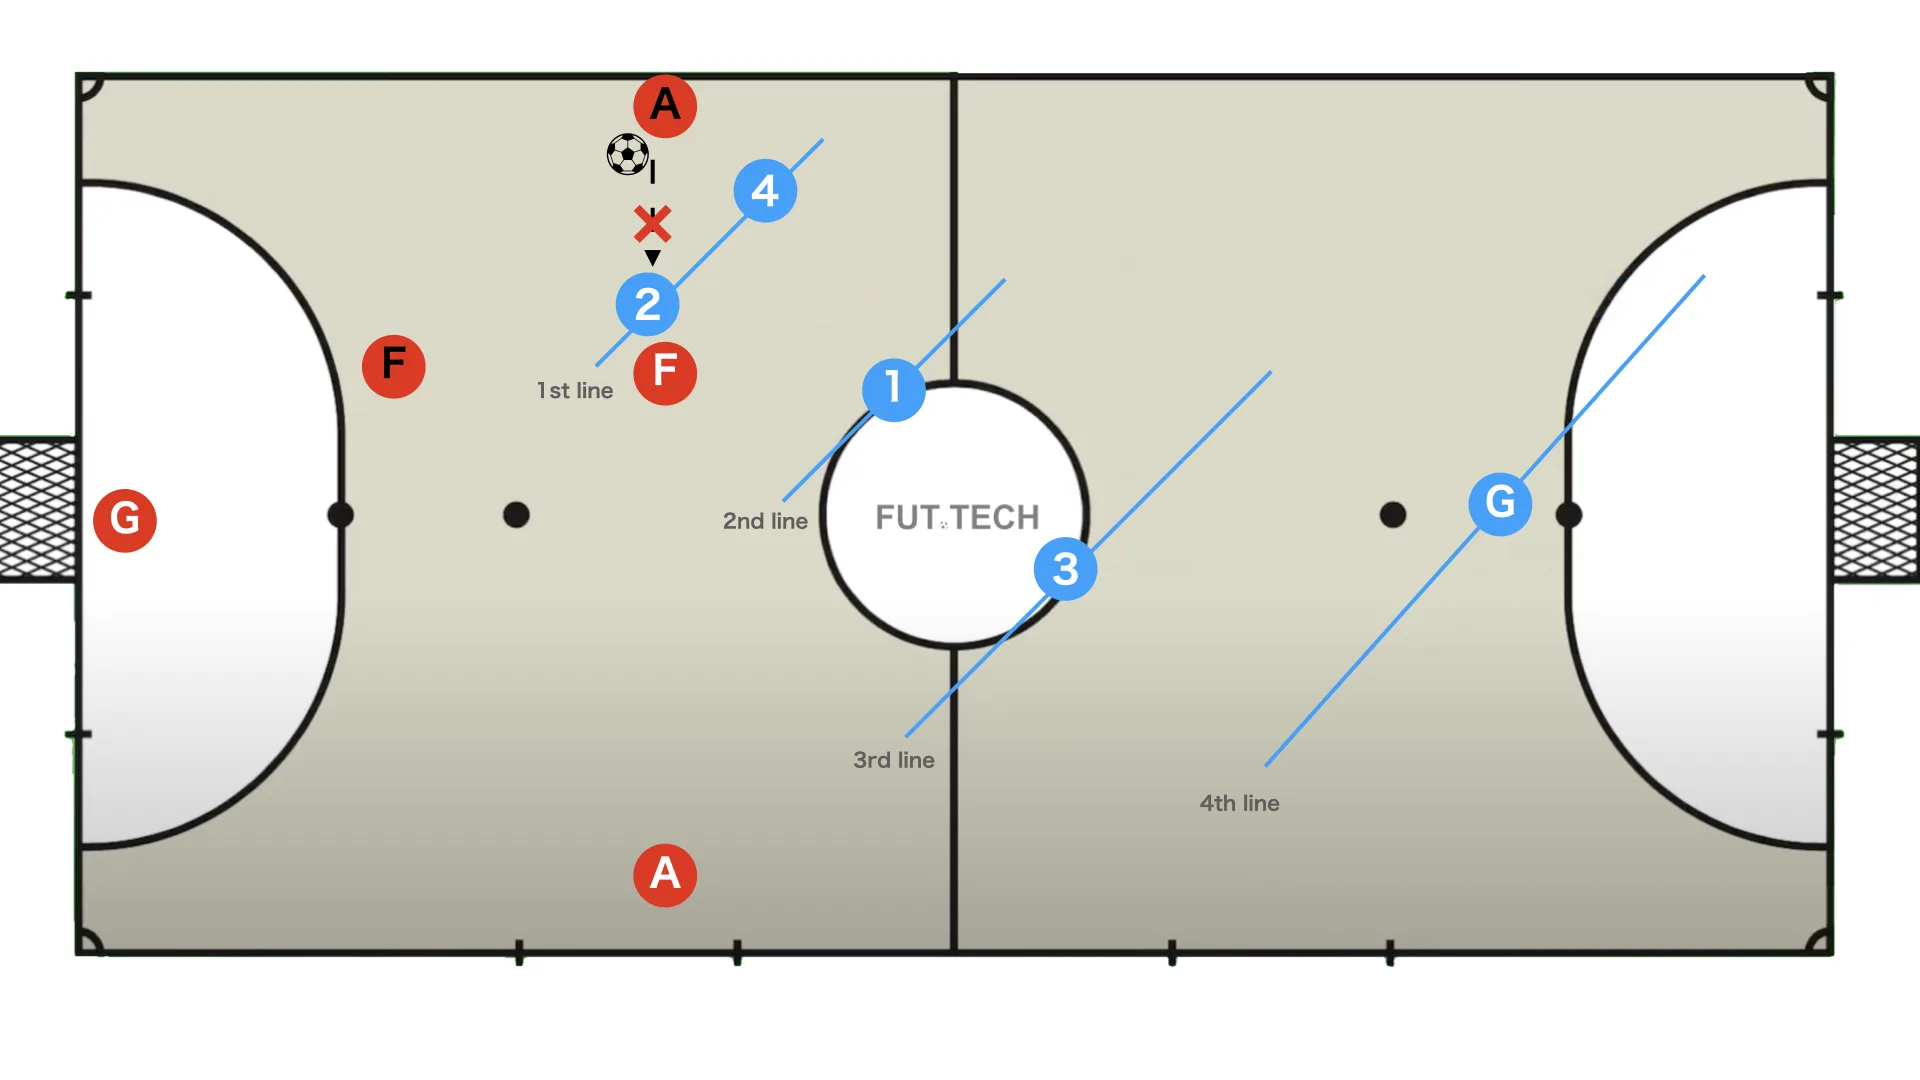
続きを読む →Blue 4 should not stick tightly to the ala. As shown above, it is important to keep the distances between the defensive lines compact.
Also, if the four defenders maintain a shape like a parallelogram (diamond), it becomes much easier to deal with the fixo making a run through.
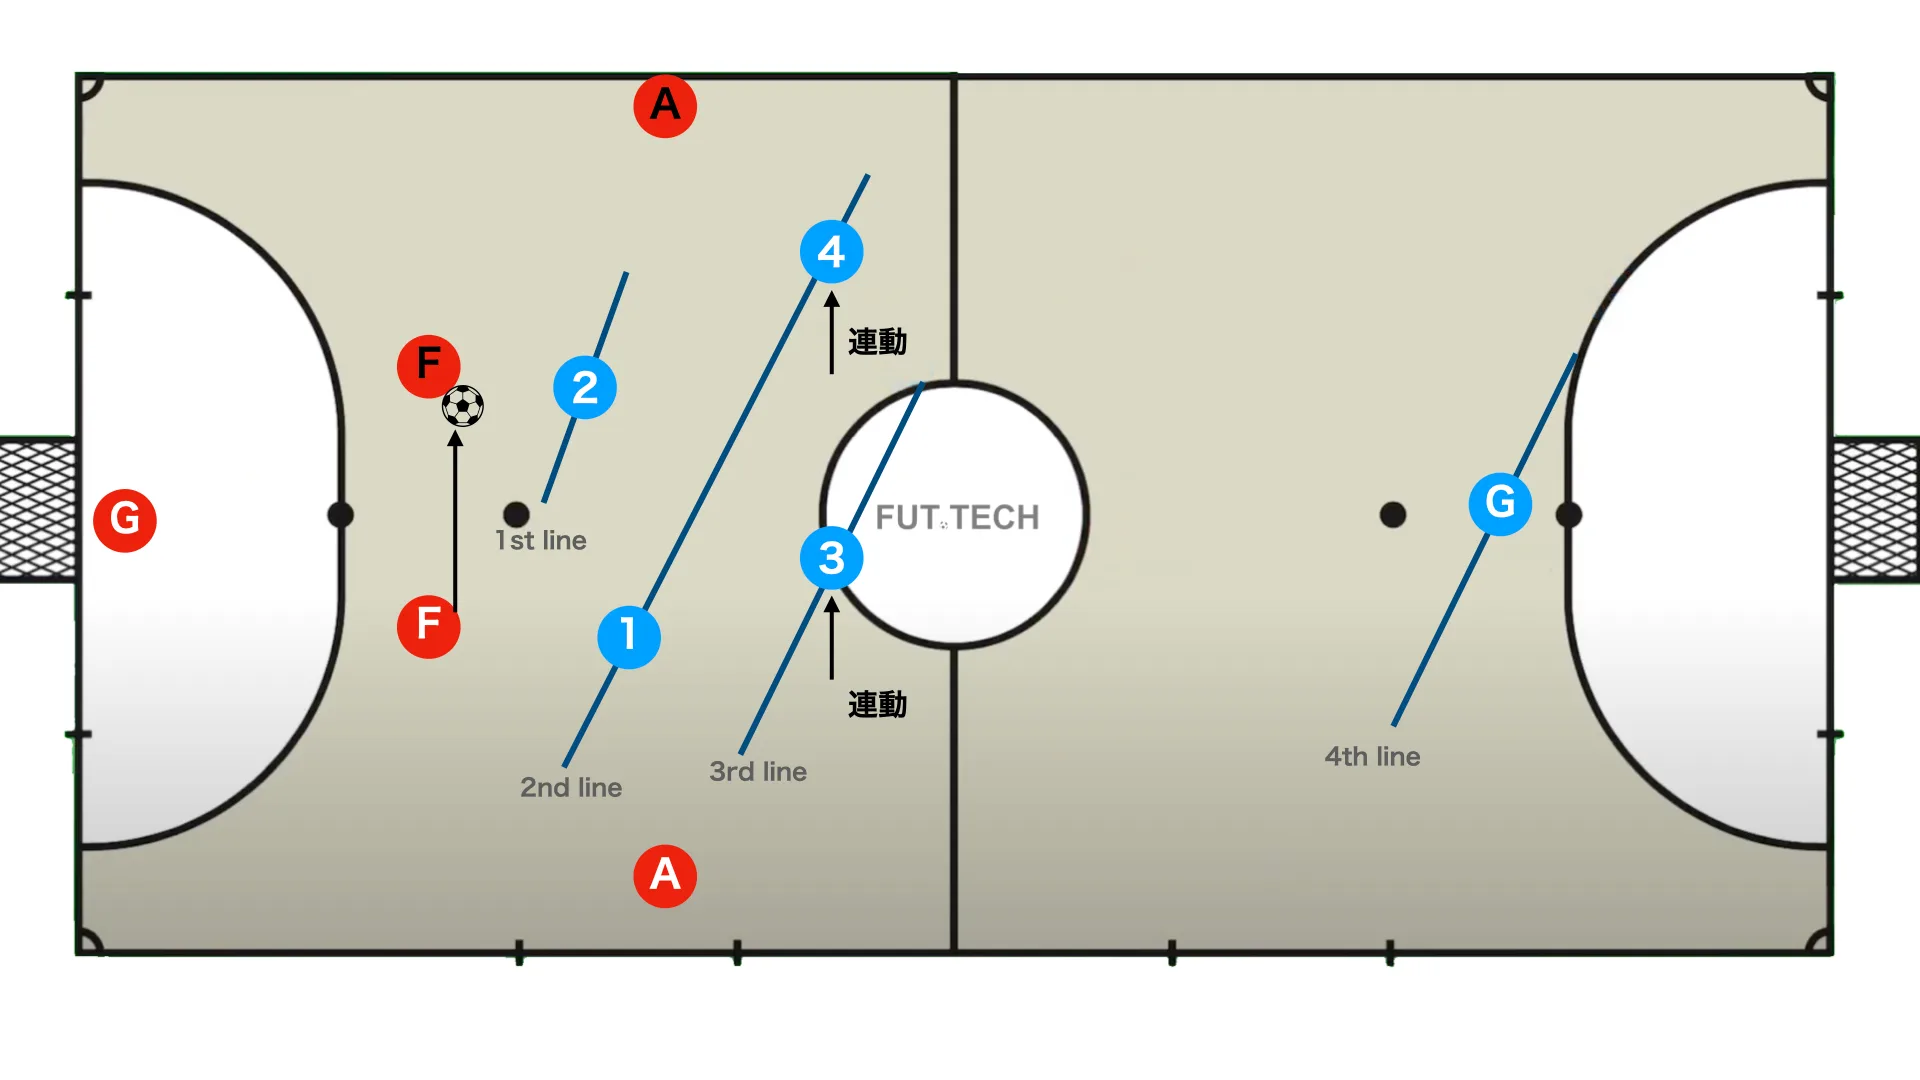
When the ball moves, the defence must move together, while continuing to focus on these two points:
- Cut the skip pass from the fixo to the ala
- The weak-side second-line defender should tuck in
If those two points are in place, the shape will not be broken down easily.
The most common way to defend against quatro is with a box (2-2) shape, so this article explains the box defence.
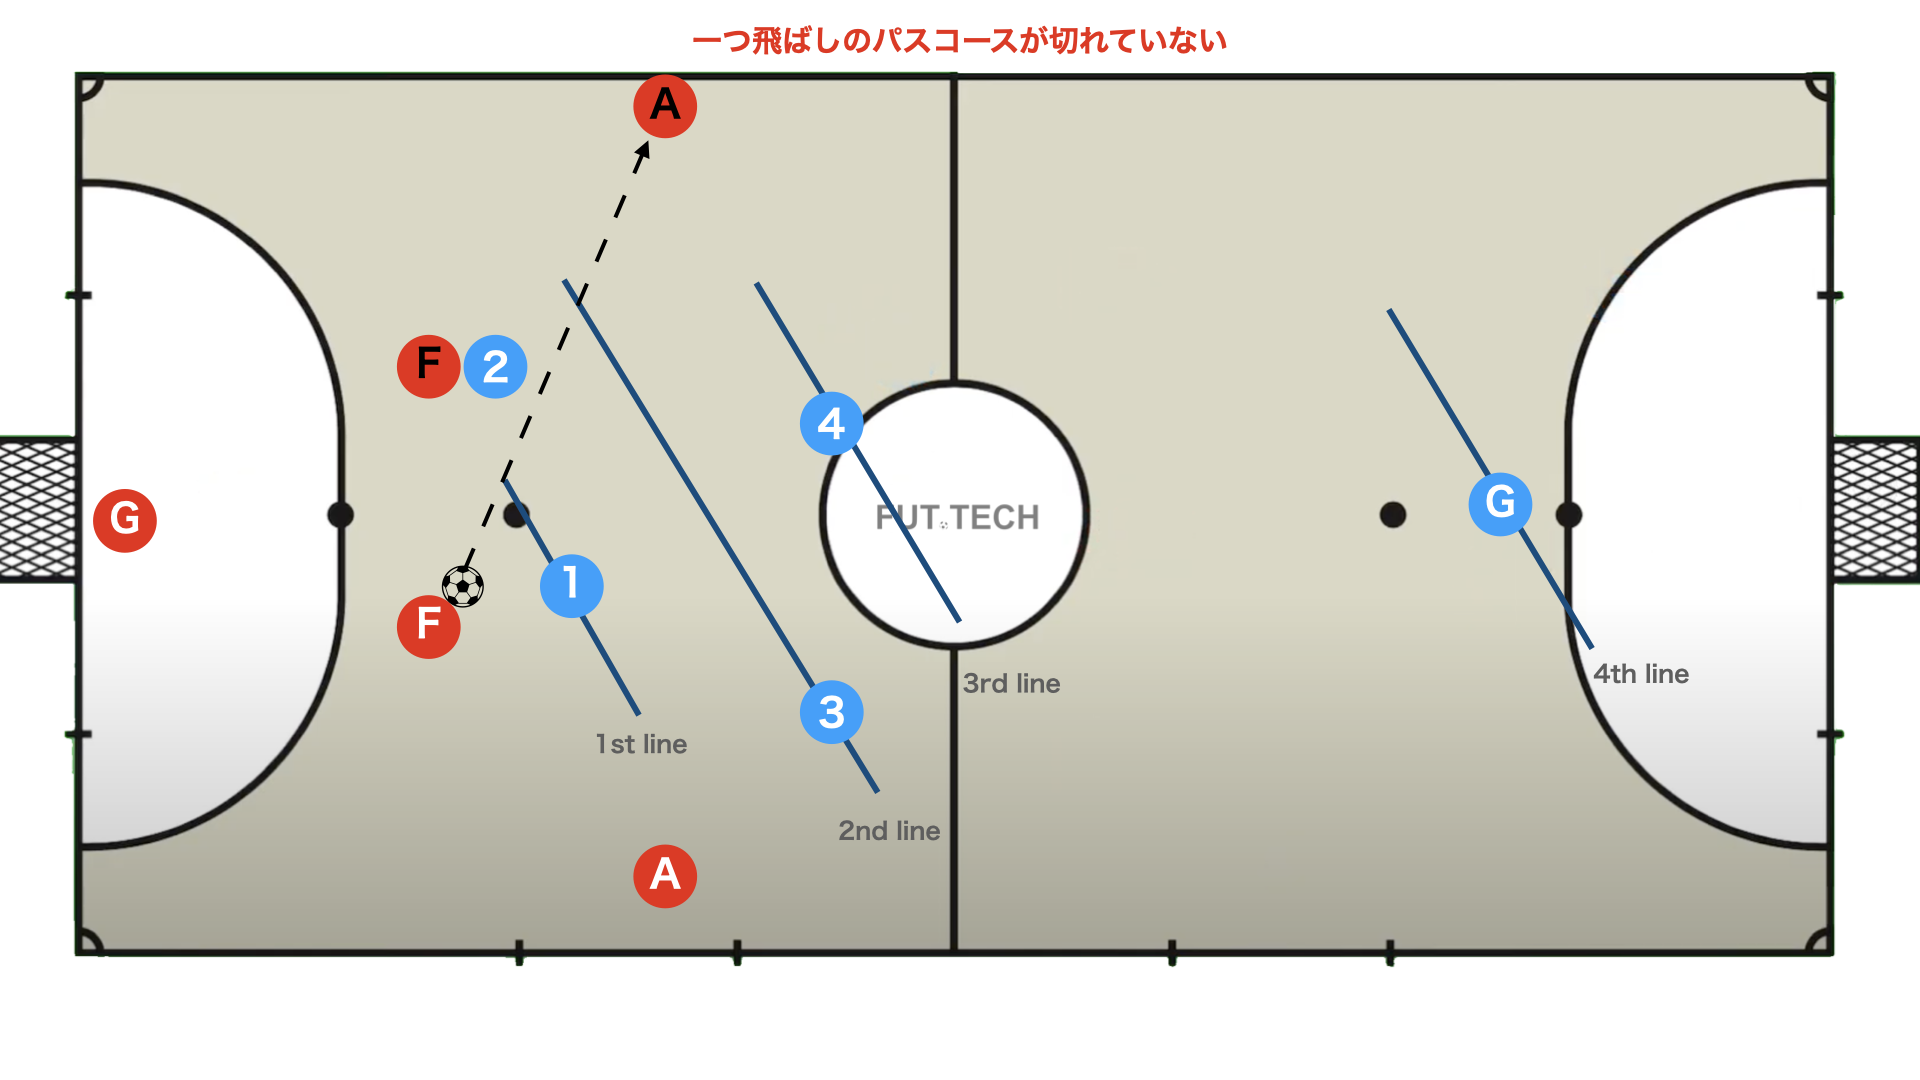
When the ball is with the fixo, the weak-side second-line defender (Blue 4) should not stay tight to the opponent. As shown above, it is important to tuck in and manage the distance between the 2nd line and 3rd line.
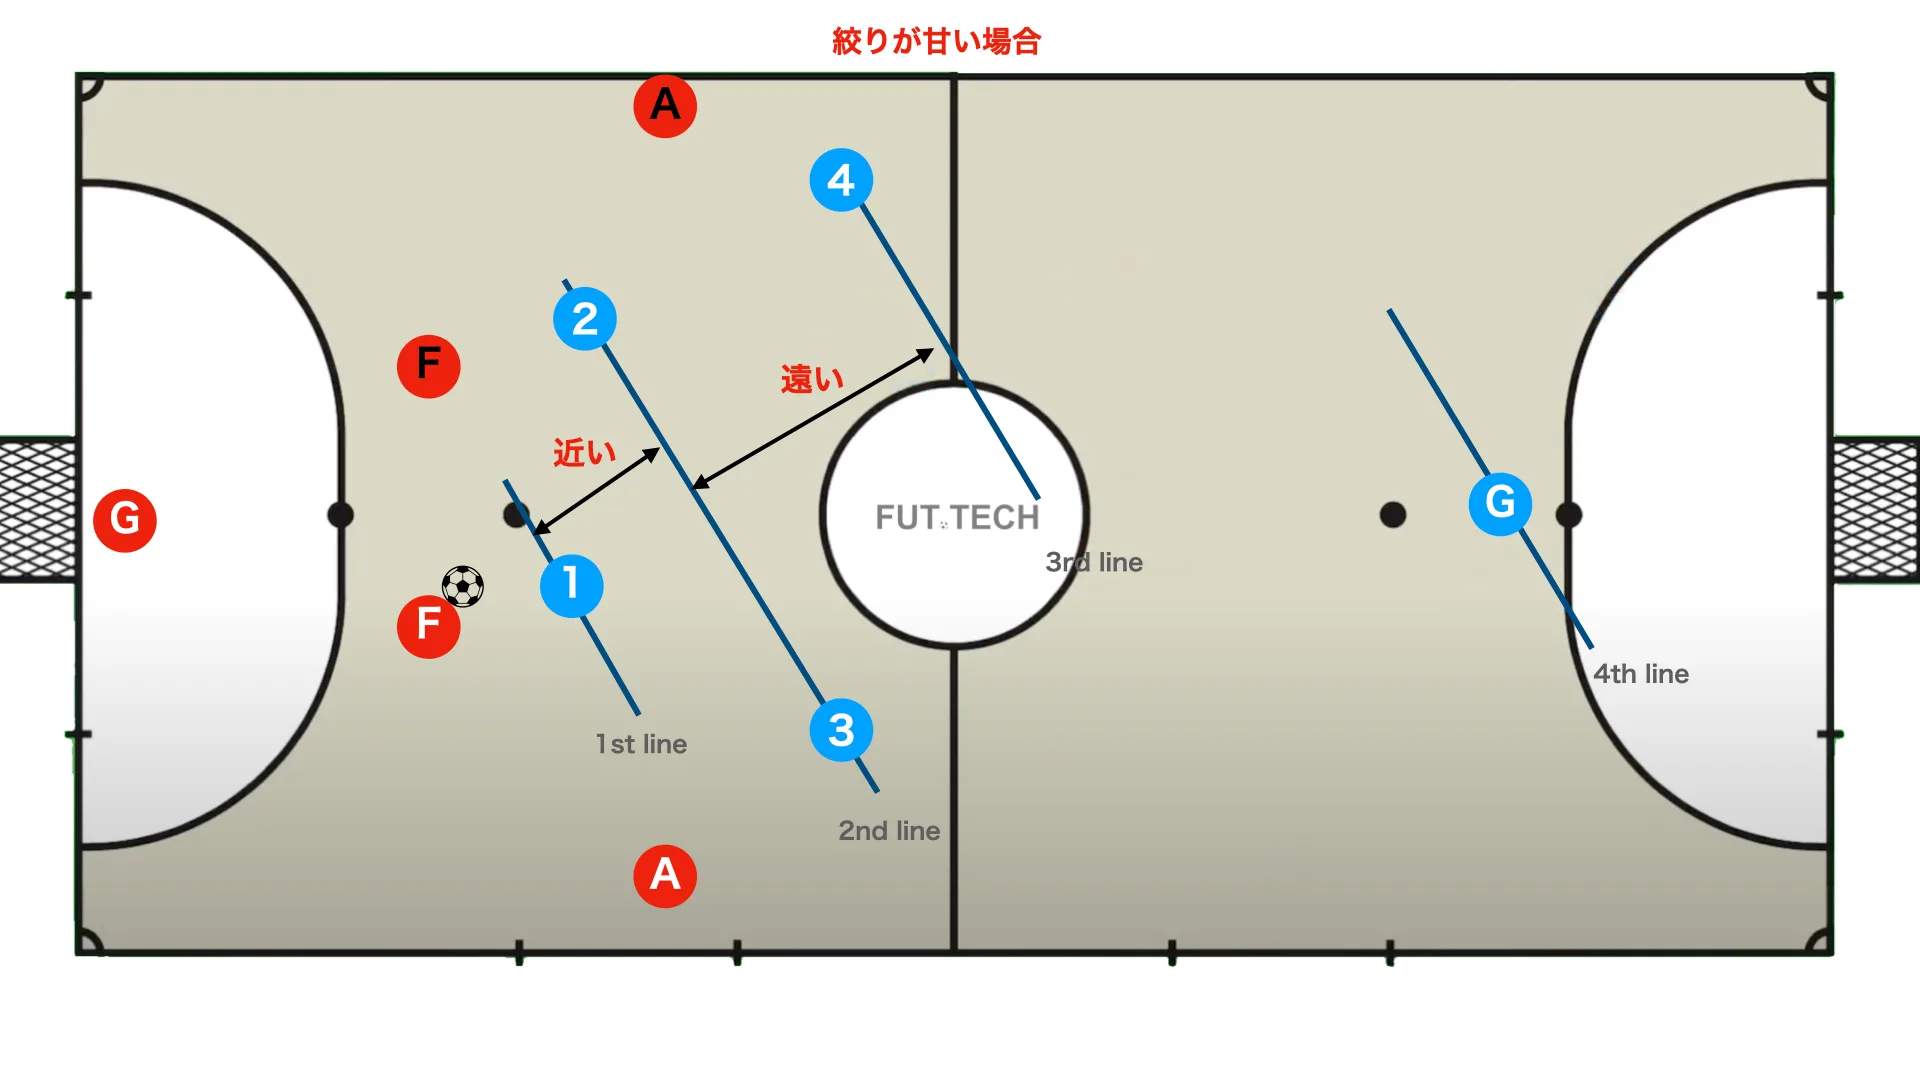
This is a typical beginner mistake: matching the opponent's shape too closely, turning the defence into a trapezoid, and neglecting protection of the space in behind.
If you defend like this, the pair of fixos can use the space between the lines with combinations such as central parallel or a central one-two, and they will be able to get to a shot very easily.
That is how easily the opponent can get all the way to goal.
Against a quatro where all four players are spread across the width, neglecting the space in behind will lead to goals very easily.
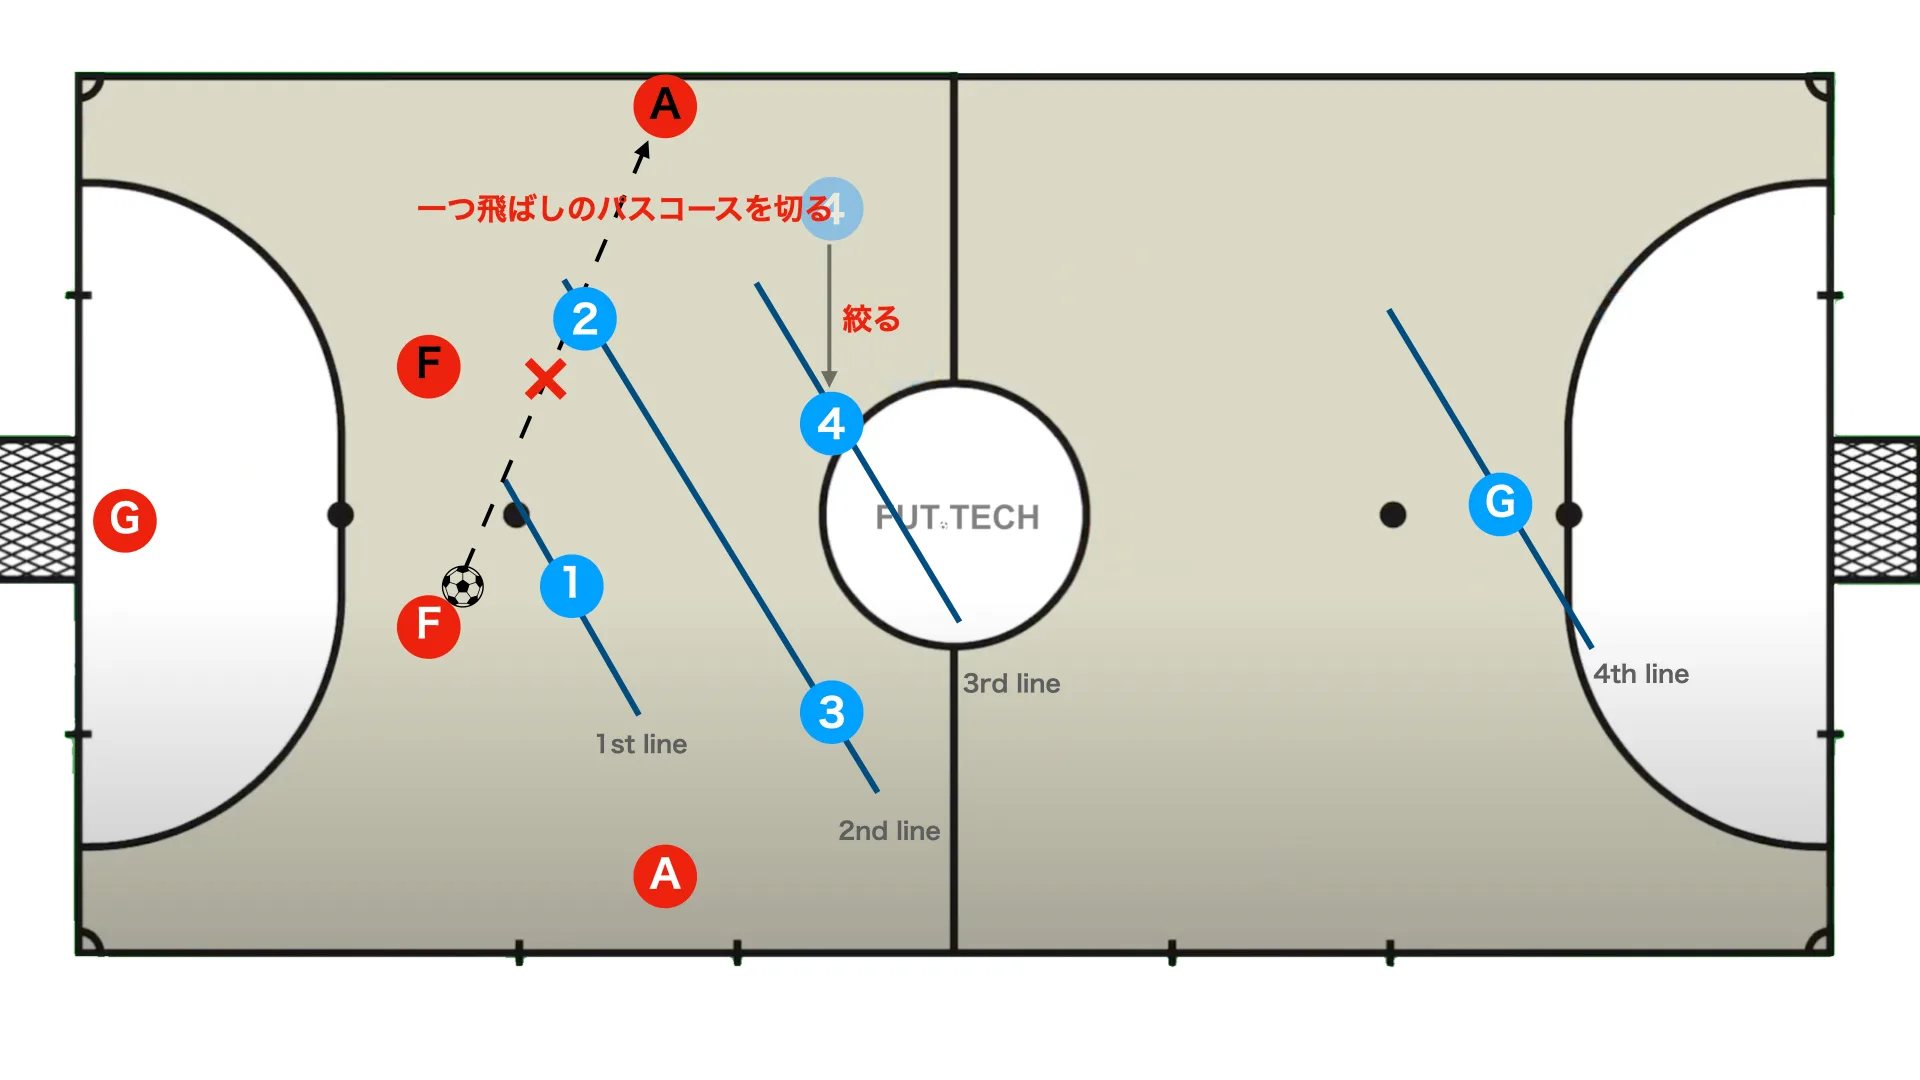
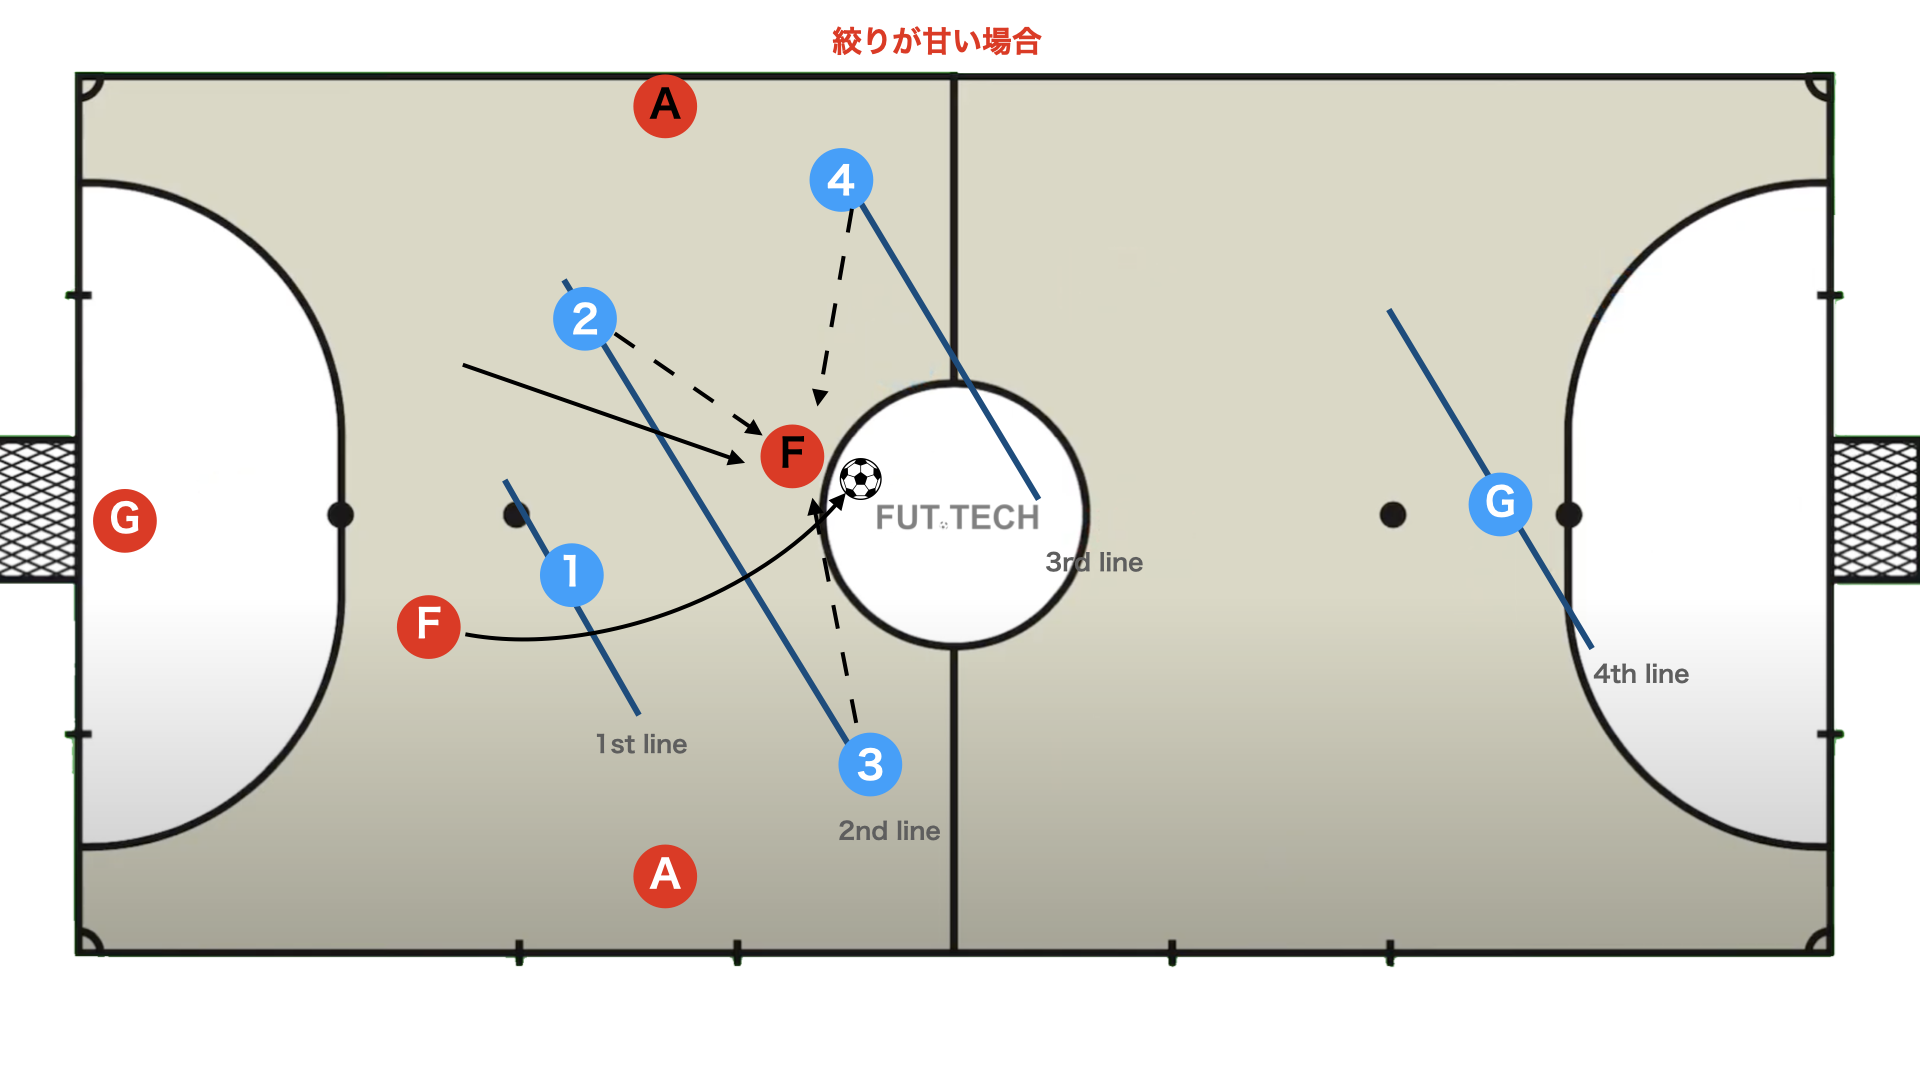
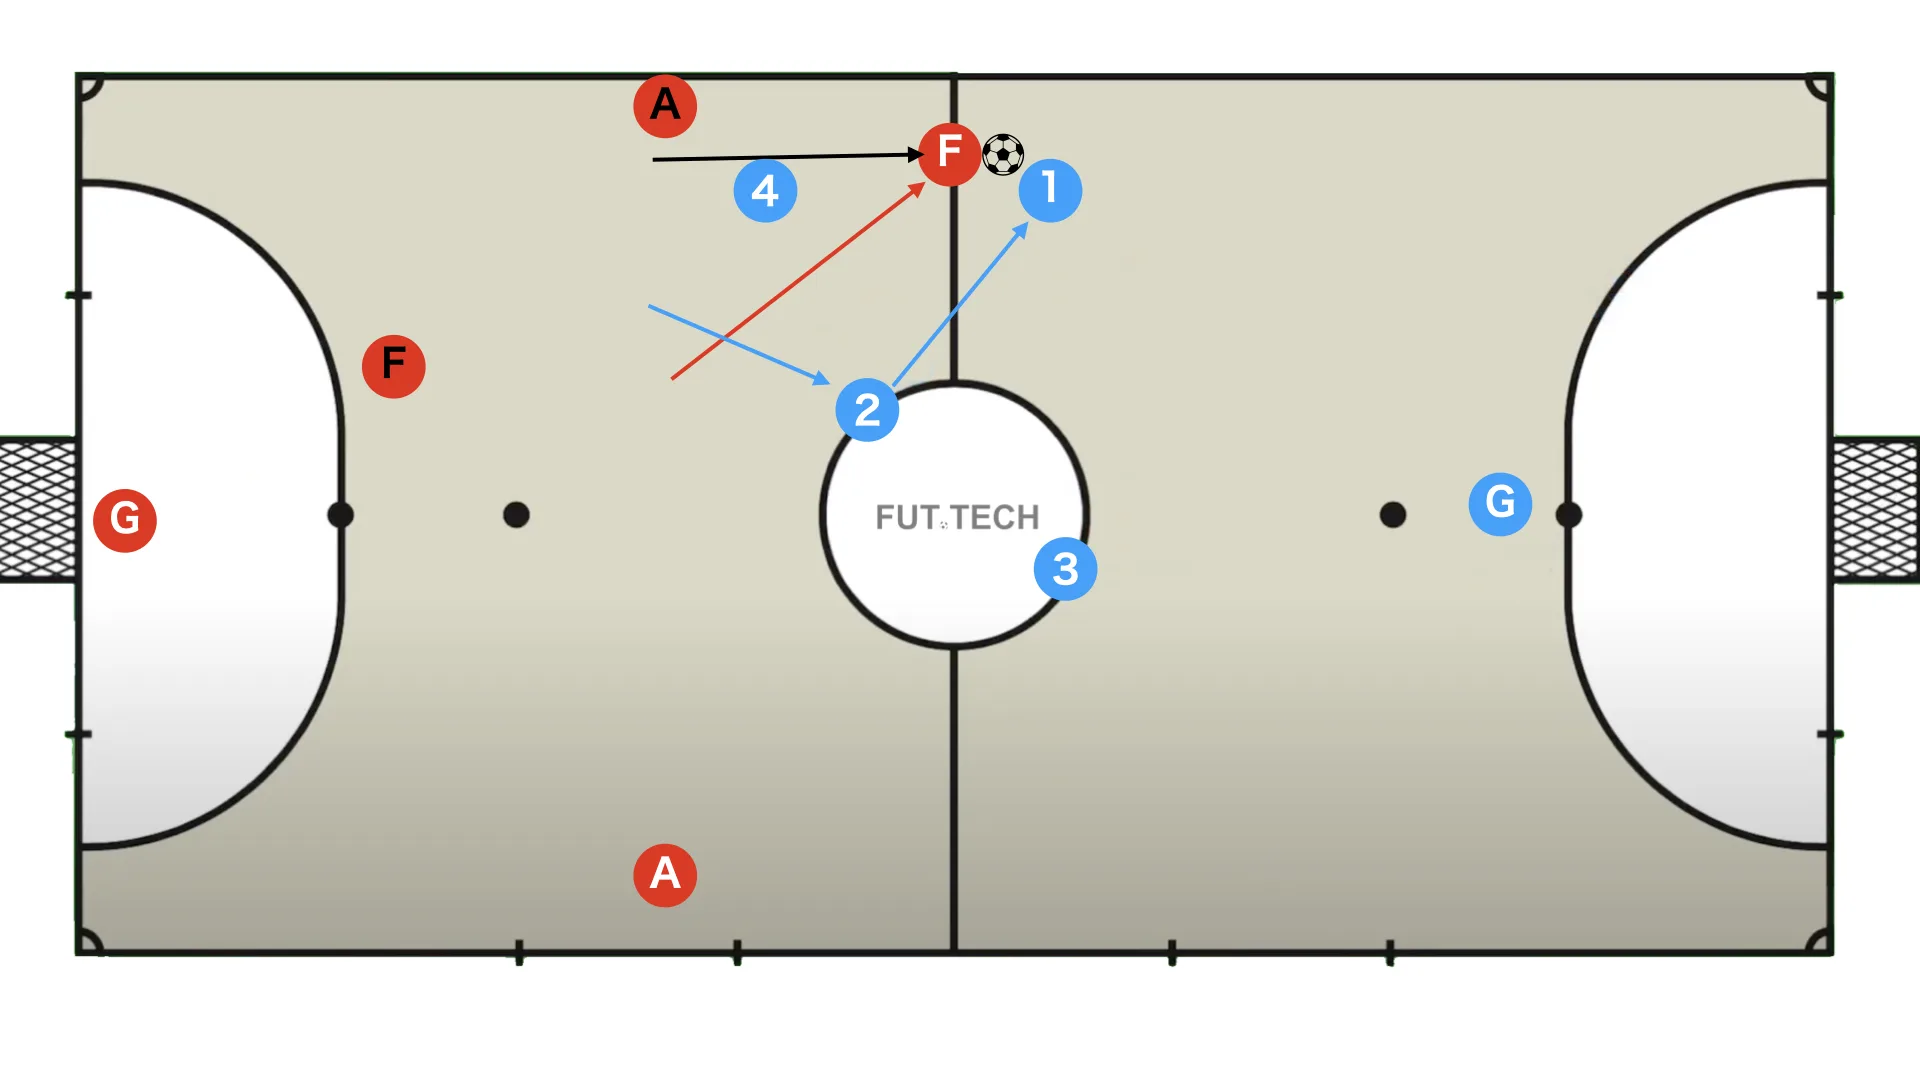
In reality, the problem is not simply allowing the skip pass itself. The real issue is when Blue 2 positions himself too tightly to the opponent's fixo, as shown above, because that creates confusion if the fixo runs through.
Blue 4 then has to pick up the fixo who made the run, while Blue 2 must go press the ball carrier (the ala). But from that starting position, the distance is too large, and the opponent may be able to carry the ball forward.
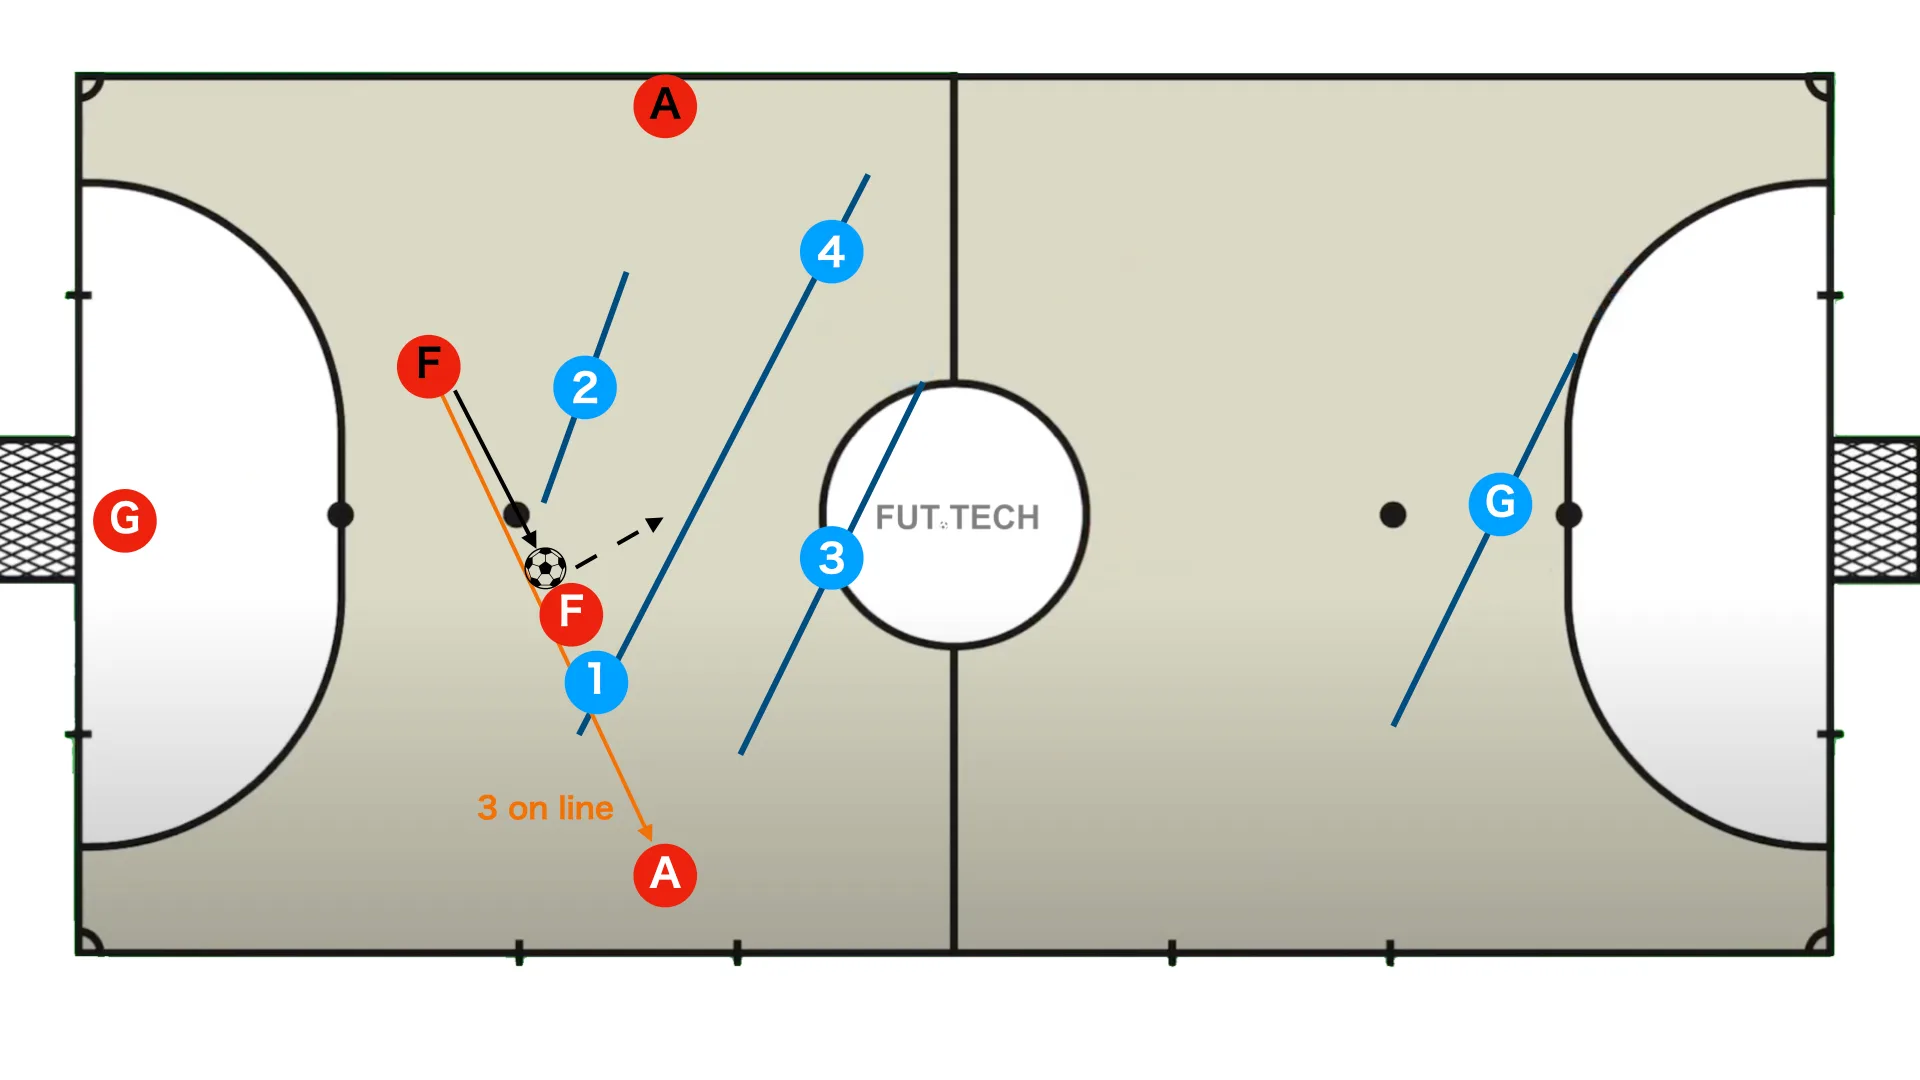
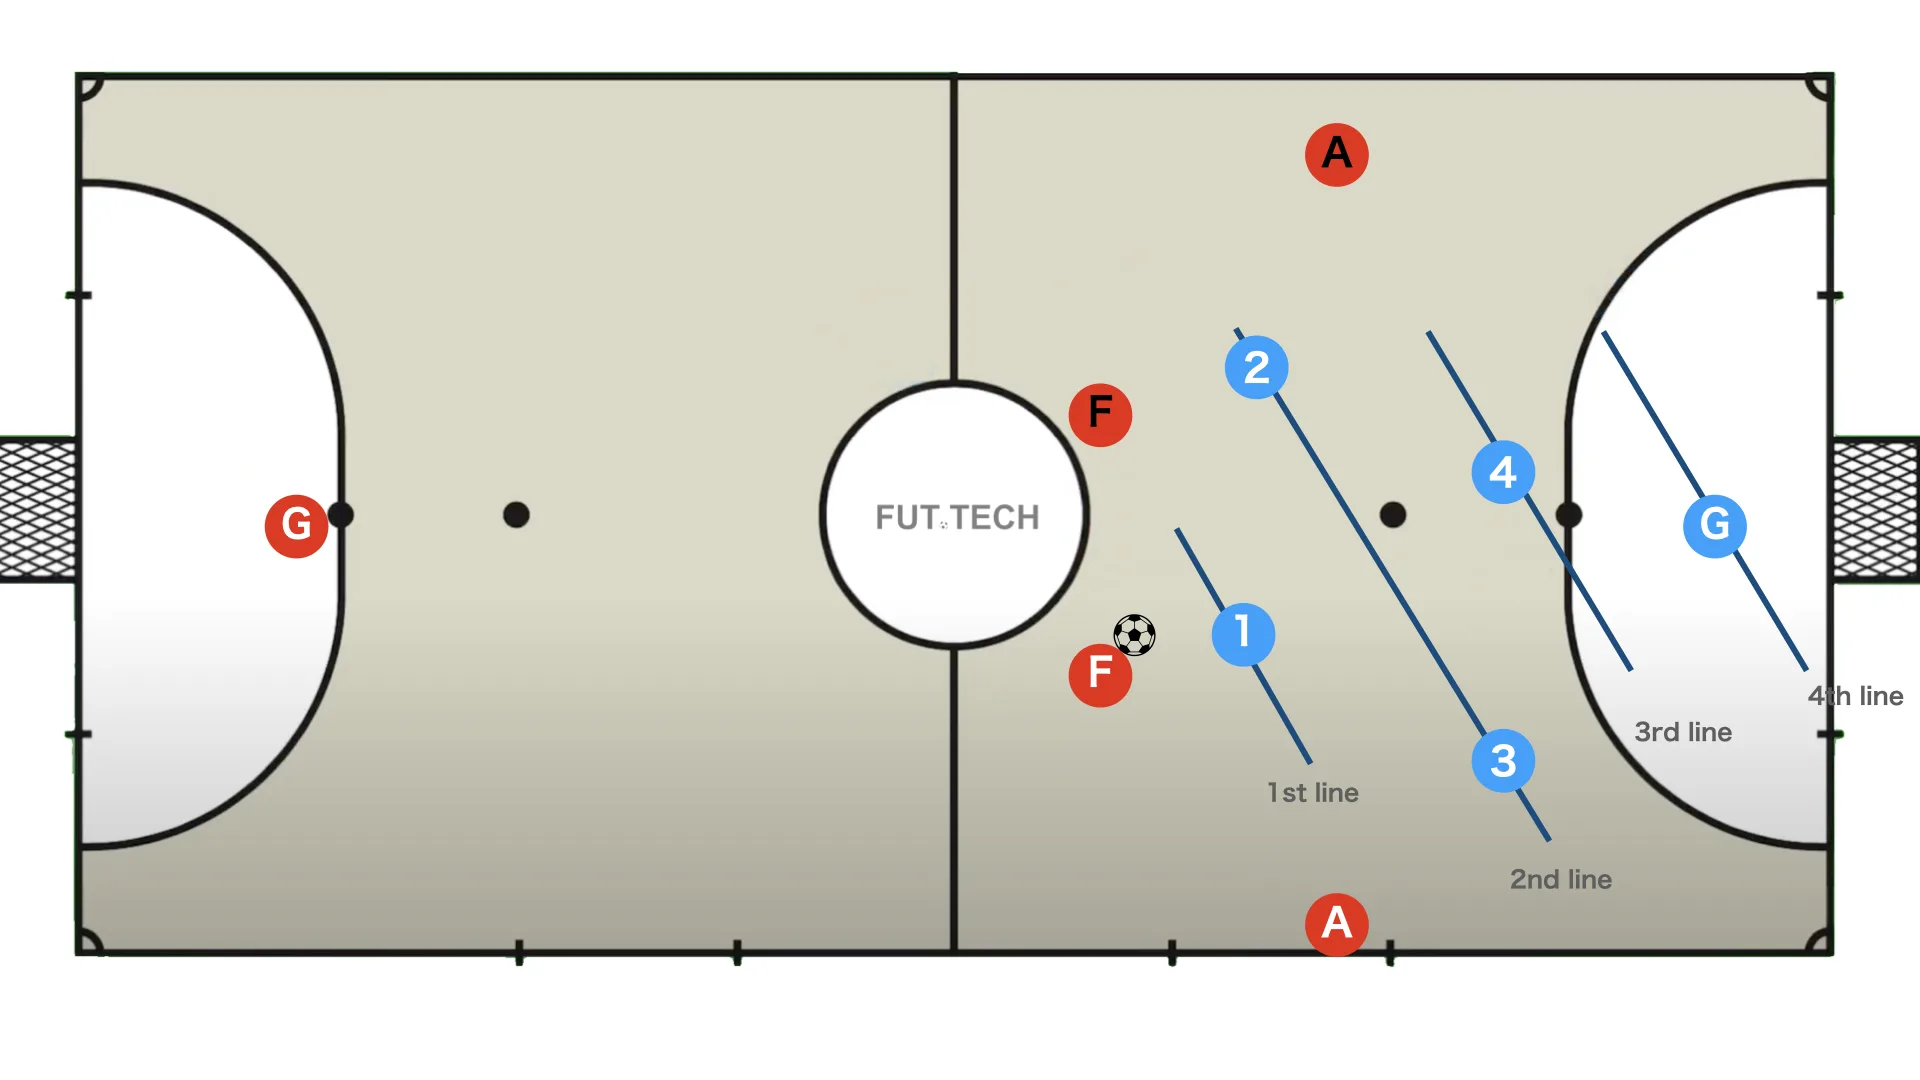
In futsal attacks, especially in quatro, teams often deliberately create a 3 on line shape in order to absorb multiple defensive lines.
Defending this 3 on line is extremely difficult. It is one of the most interesting situations in futsal because it creates so many attacking and defensive trade-offs.
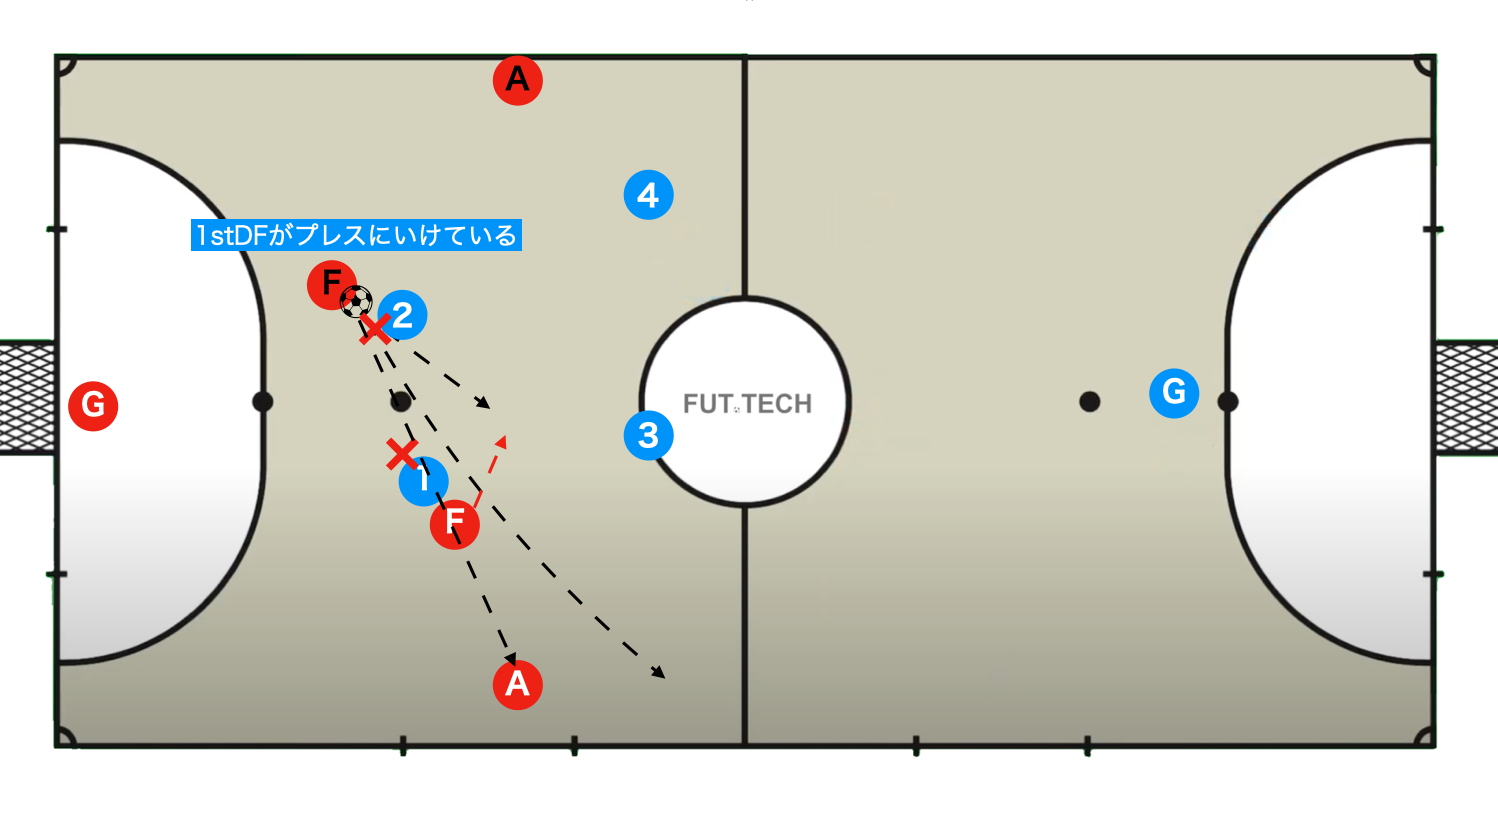
If the 1st defender is able to press the ball carrier properly, the opponent cannot play in behind, so the defenders should screen the remaining passing lanes.
As shown above, Blue 1 steps in front of the opponent and blocks the passing lane to the two players behind.
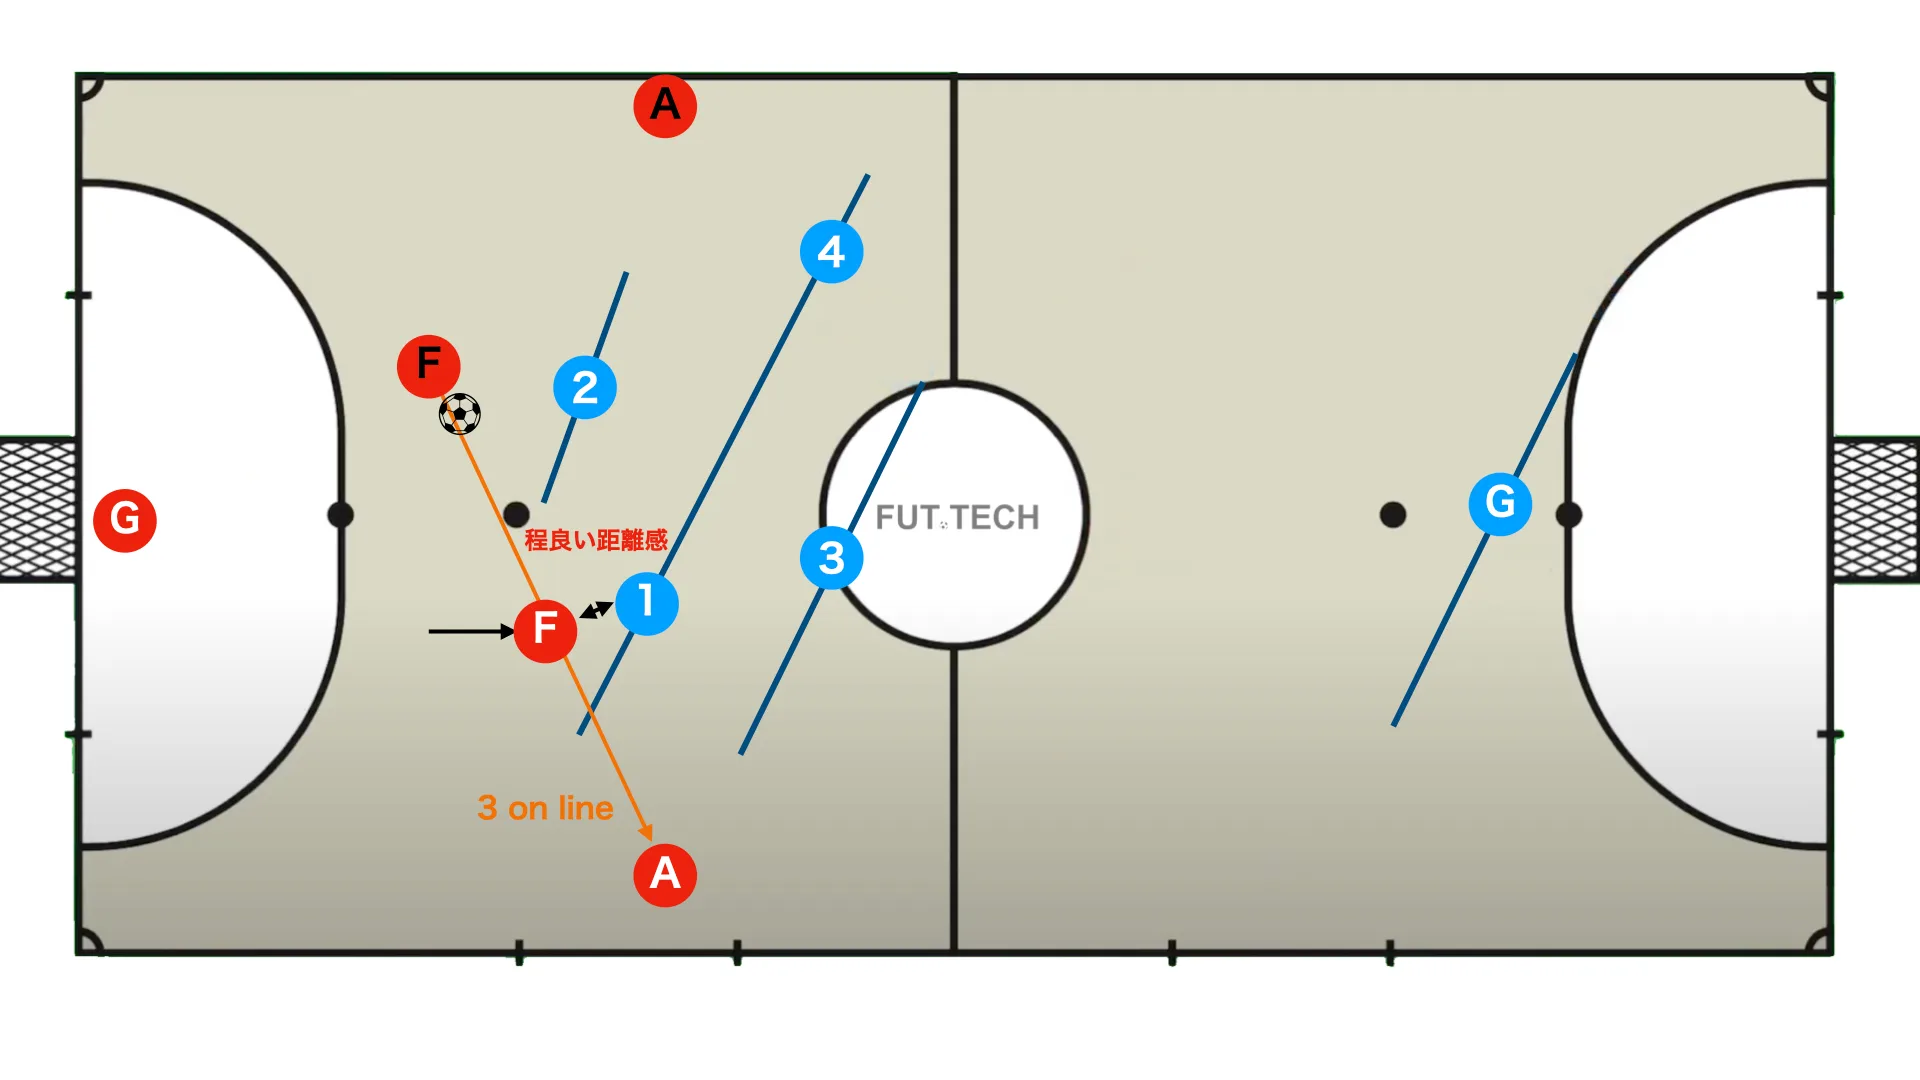
Against the middle player in the 3 on line, it is important to keep an appropriate distance and position yourself between the opponent and the goal.
So what exactly is this "appropriate distance"?
It is a distance that respects these two points:
- Close enough to cut the skip pass at the last moment
- Not so tight that the opponent can use an ala corta to exploit the space between the lines
If you overcommit to cutting the skip pass, the opponent can break into the space between the lines with an ala corta, as shown above.

If you stand too directly in front to stop the ala corta, the opponent can loop around behind you and use the space between the lines.
And if Blue 3 stays too tightly attached to the ala, as in the earlier example, he will no longer be able to deal with the fixo running in behind.
So while you do not want to allow the skip pass that pushes the line back, trying too hard to take it away creates even bigger risks. In that sense, you have to accept it to some extent.
That is exactly why 3 on line is such a troublesome and powerful tactical pattern.

If the skip pass is played in a 3 on line situation, the basic rule is to hand the running fixo over to the deeper defender (Blue 3), and then have Blue 1 press the ala.
As I have said several times, if you refuse to switch marks in this situation, you leave a huge space in the center lane, which is extremely risky.
See the example below, where failing to switch marks against 3 on line leads to a goal from a central parallel in the center lane.
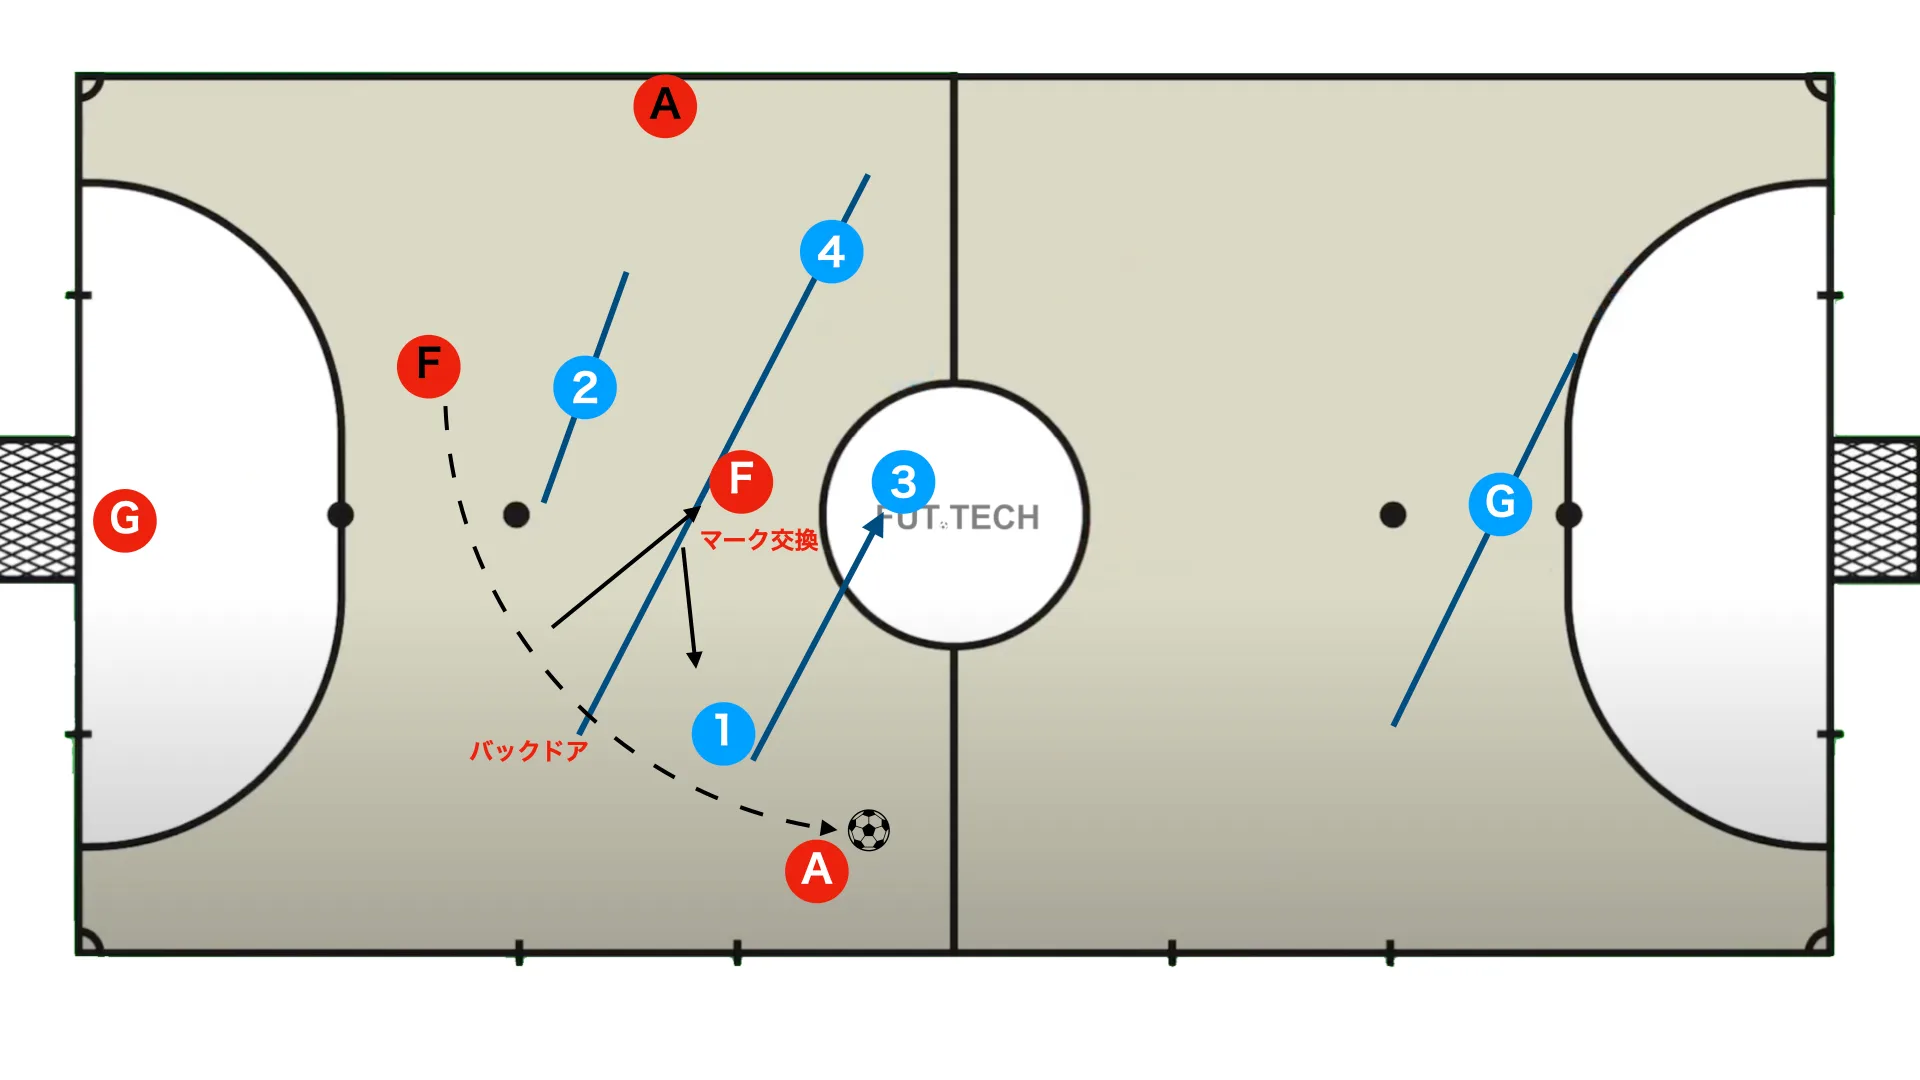
The higher the level, the more teams will exploit this mark switch with a backdoor run from the ala.
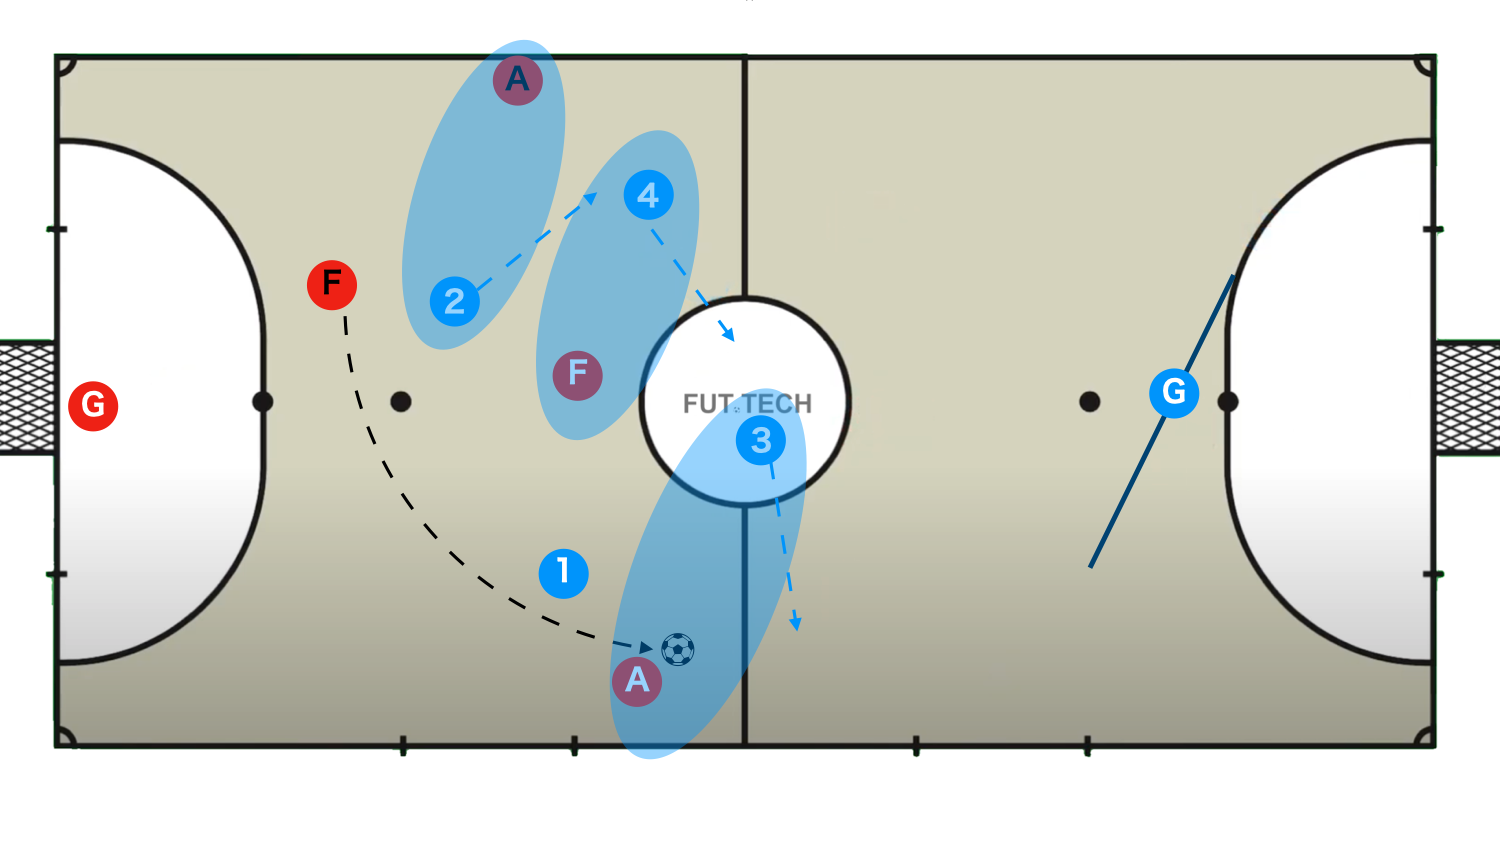
If the side is broken down, Blue 3 should slide across as shown above, while the rest shift one mark at a time into the open spaces and rotate the defence.
This section uses the backdoor as the example, but the same emergency response also works when the defence is broken by an ala dribble or two-player combinations such as a one-two or parallel.
In quatro attacks, if there is no good option on the strong side after creating a 3 on line, the ball is often switched to the weak side to form a triangle.
In this situation, the two main ways the attack can break the defence's 2nd line are:
- Break it with a two-player combination between the ball carrier and the player between the lines
- A weak-side ala backdoor run

Handling this in a man-oriented way has the advantage of constantly making the opponent feel the pressure of being marked, but the downside is that cover in behind becomes thinner.
The key point here is that Blue 3 must cover while anticipating that the defence's 2nd line may be broken.
関連記事
Man-to-Man Defence in Futsal: Simple in Theory, Difficult in Practice
A detailed explanation of man-to-man defending in futsal. This article breaks down the principles, c…
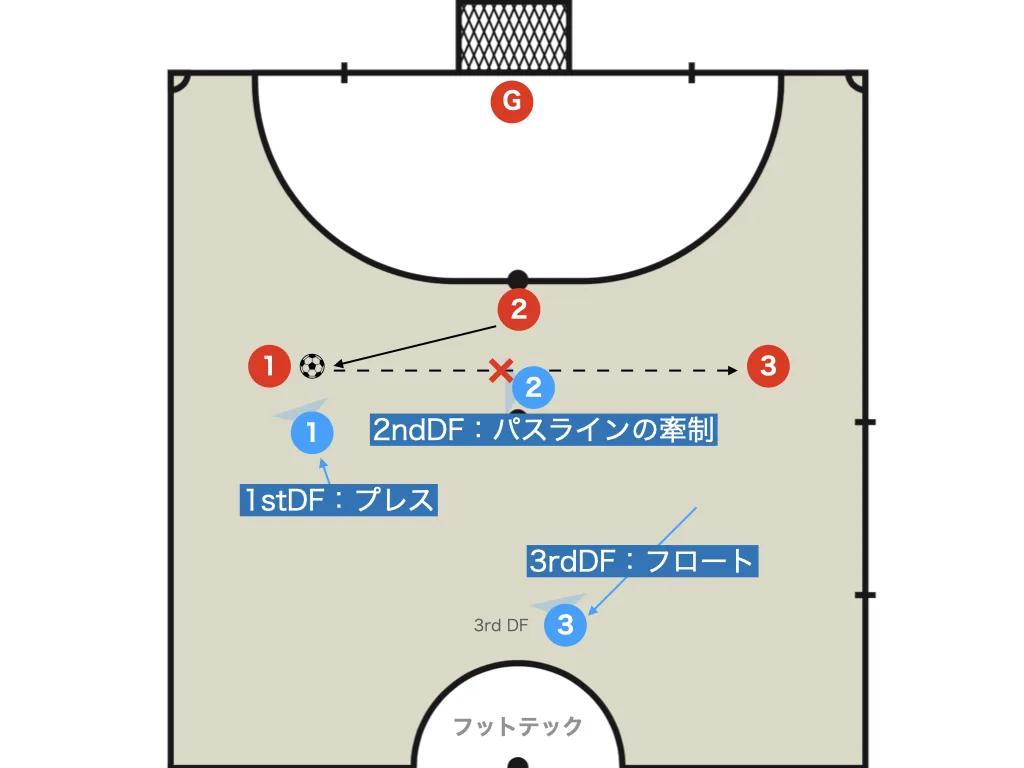
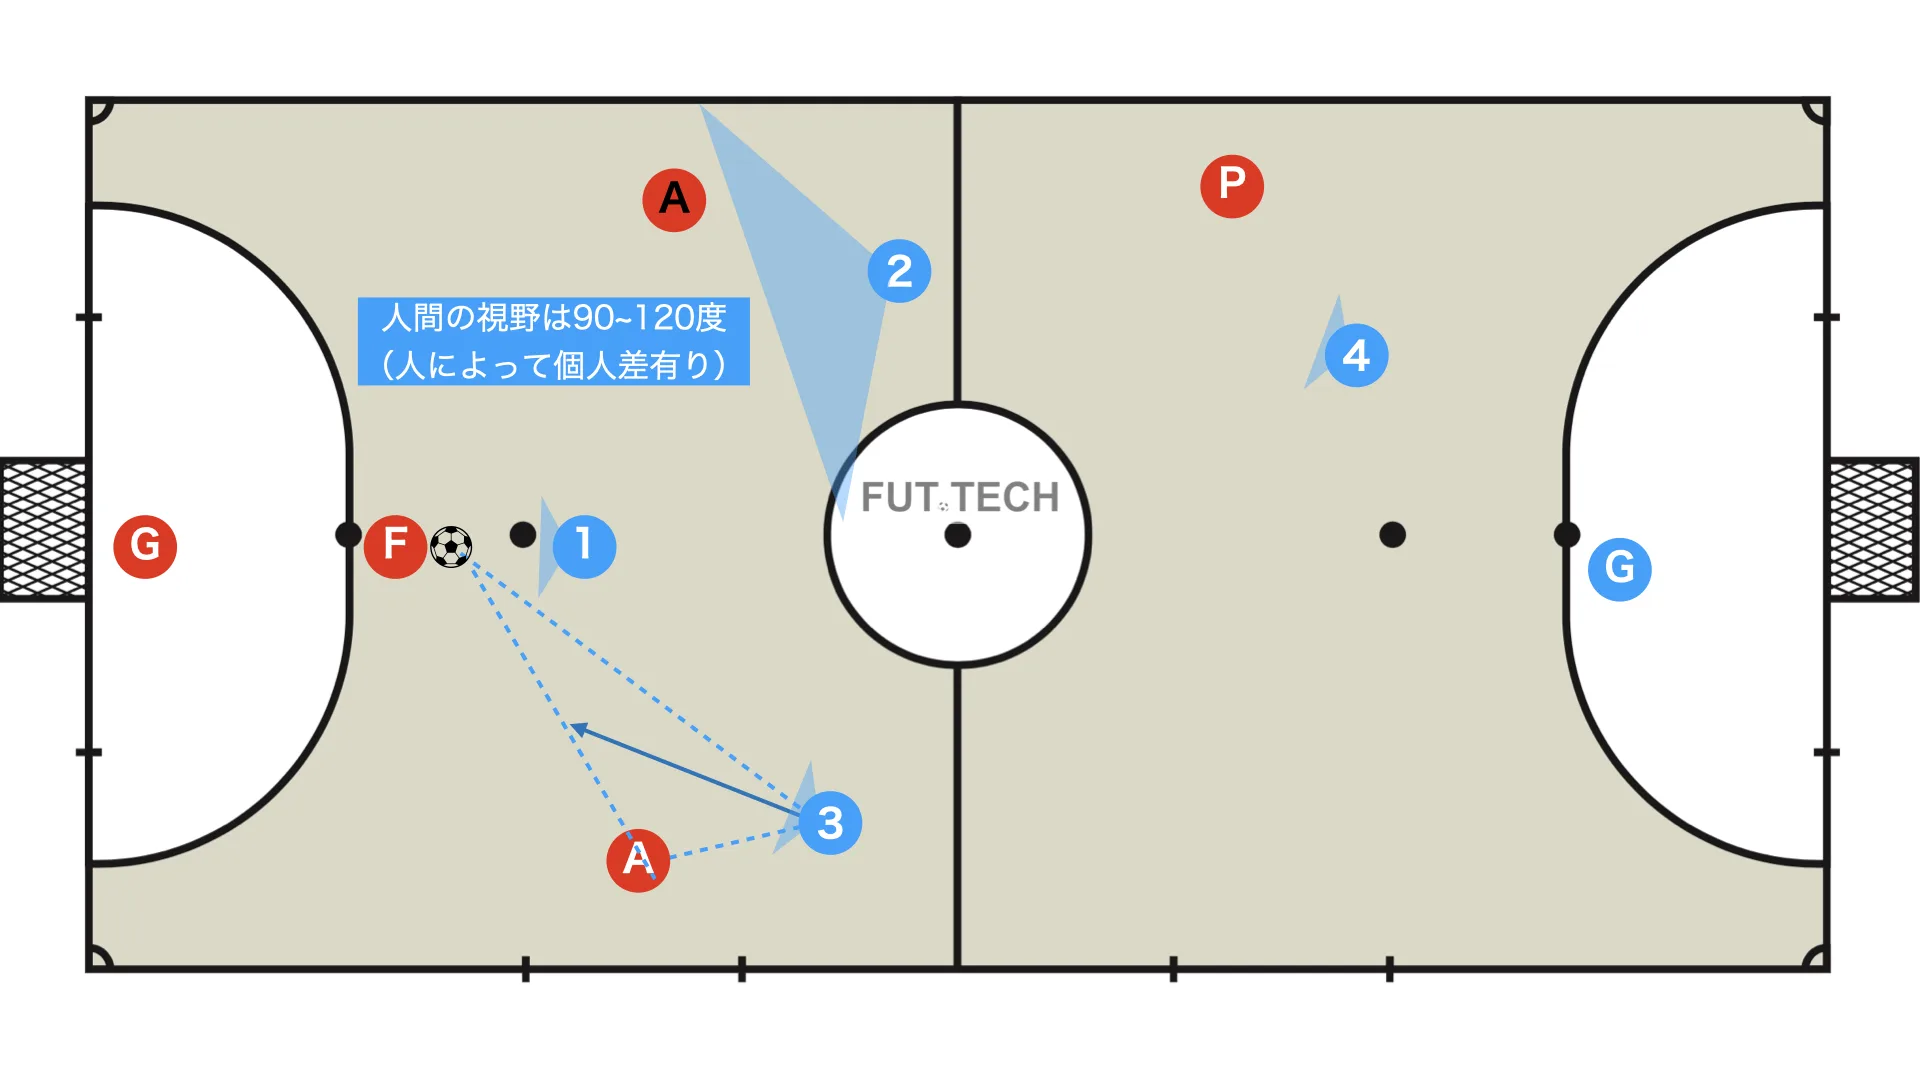
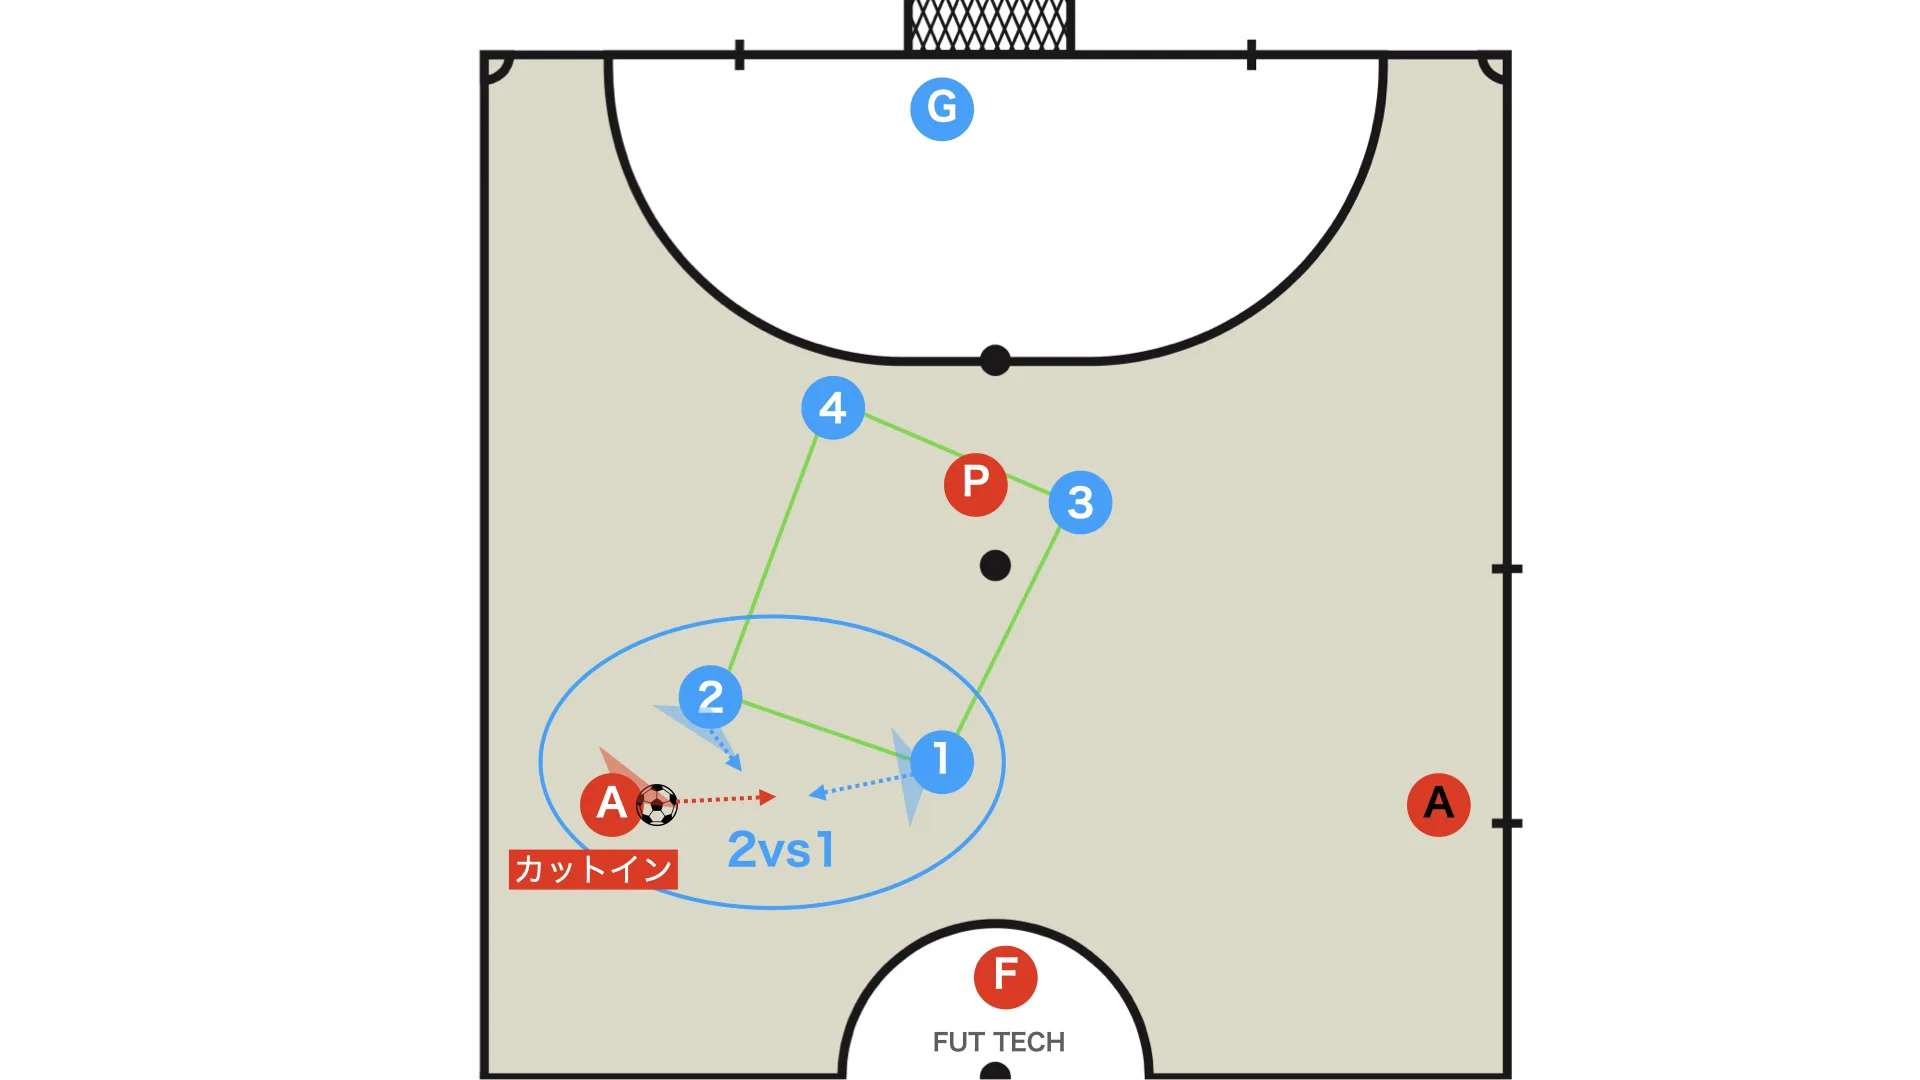
続きを読む →This is slightly outside the main focus of the article, but I will also explain a more zone-oriented response based on building multiple lines.
- Blue 4 goes to press = 1st defender
- Blue 2 screens the space between the lines and the skip pass = 2nd defender
- Blue 1 floats (forms the 2nd line) = 3rd defender
If the 1st line is broken by a parallel or a one-two, the floating Blue 1 responds and provides cover.
Using this selectively alongside man-to-man defence is also one valid option.
The defensive ideas explained in this article can also be applied to a half-court defence that sits deeper in your own half.
関連記事
Half-Court Defence and the Rotating Diamond
A detailed explanation of the rotating diamond, the most orthodox defensive shape for half-court fut…
続きを読む →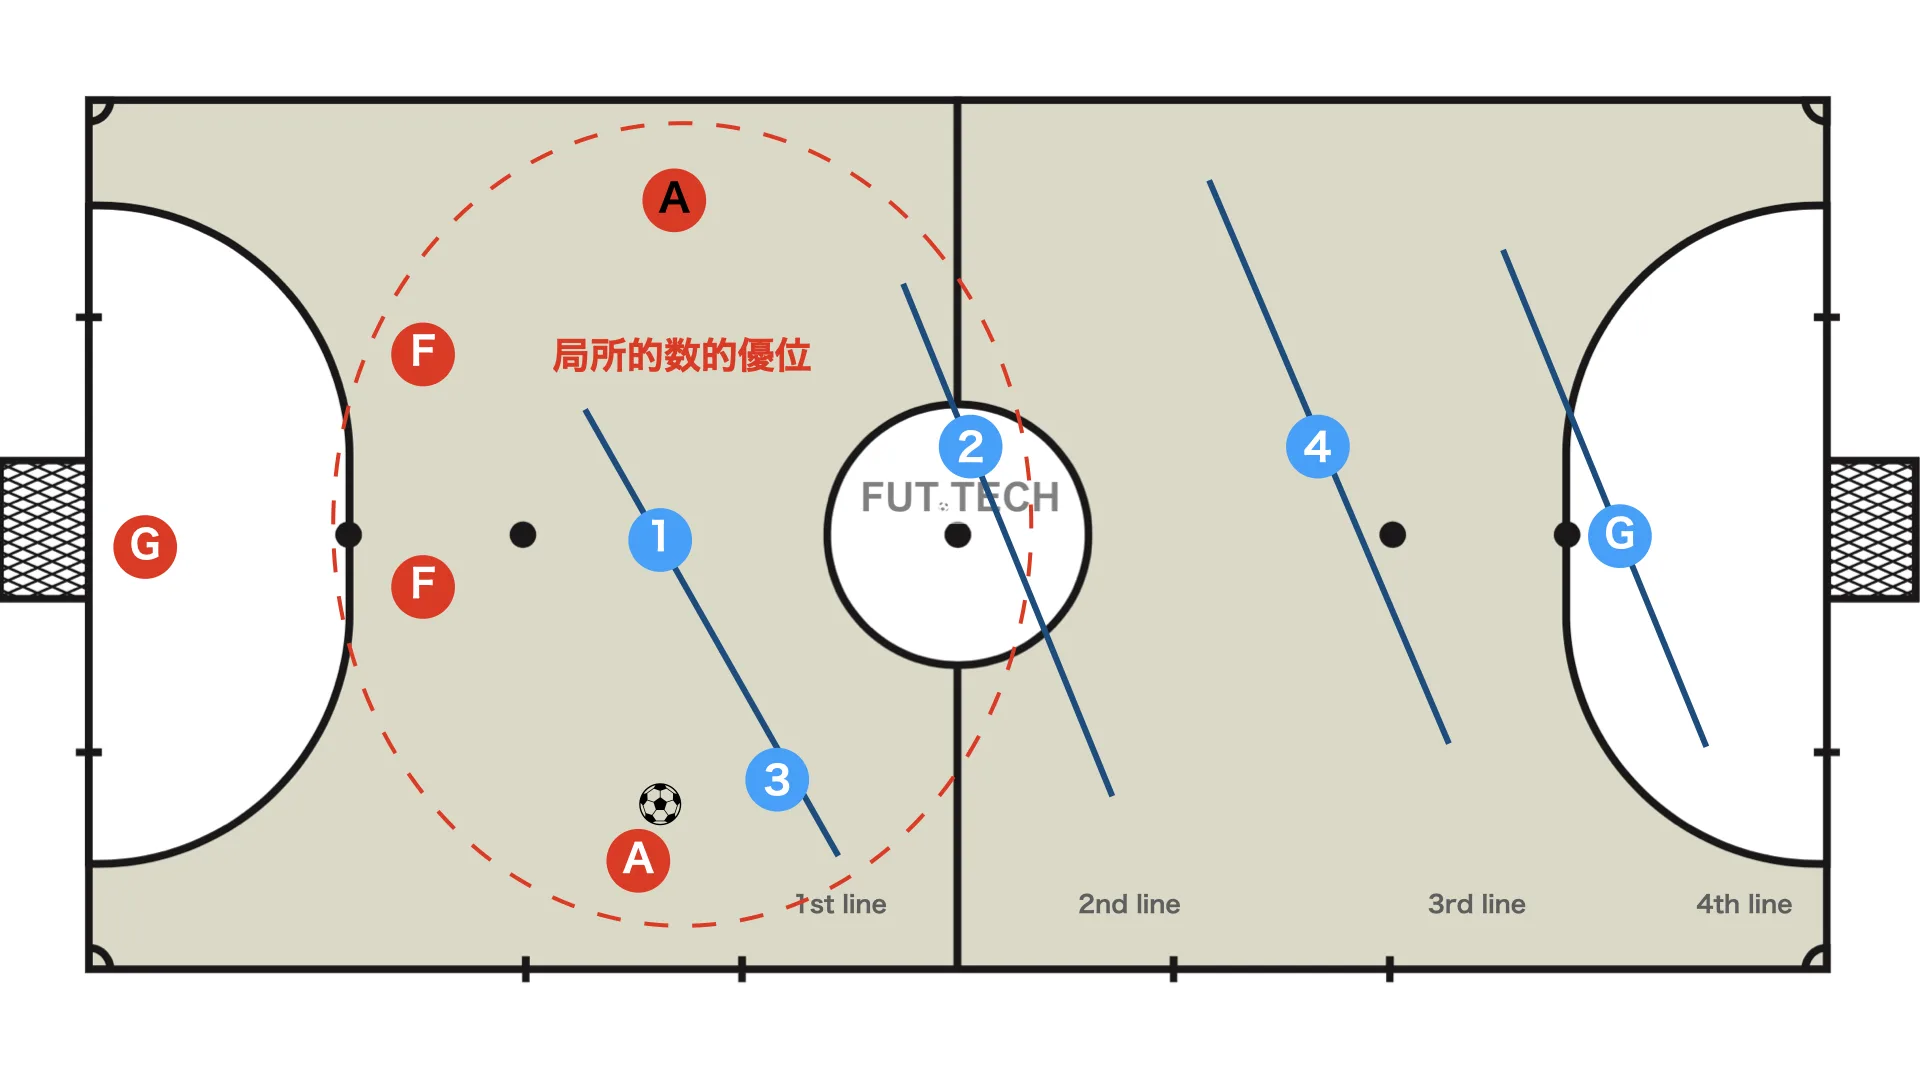
This article does not explain it in detail, but there is also a more zone-oriented Y-shaped defence that can be used against quatro, and quite a few teams defend that way.
However, because it naturally gives the opponent a numerical advantage on the 1st and 2nd lines, I do not recommend it very strongly.
This article explained the box-shaped defensive approach against quatro.
Because the purpose of quatro is to make effective use of the space in behind, it is essential for the deeper defenders to stay constantly aware of protecting that space.
Attack and defence are two sides of the same coin, so understanding attack is also very important if you want to understand defence.