Half-Court Defence and the Rotating Diamond
Published: 2021.07.06Updated: 2026.05.03
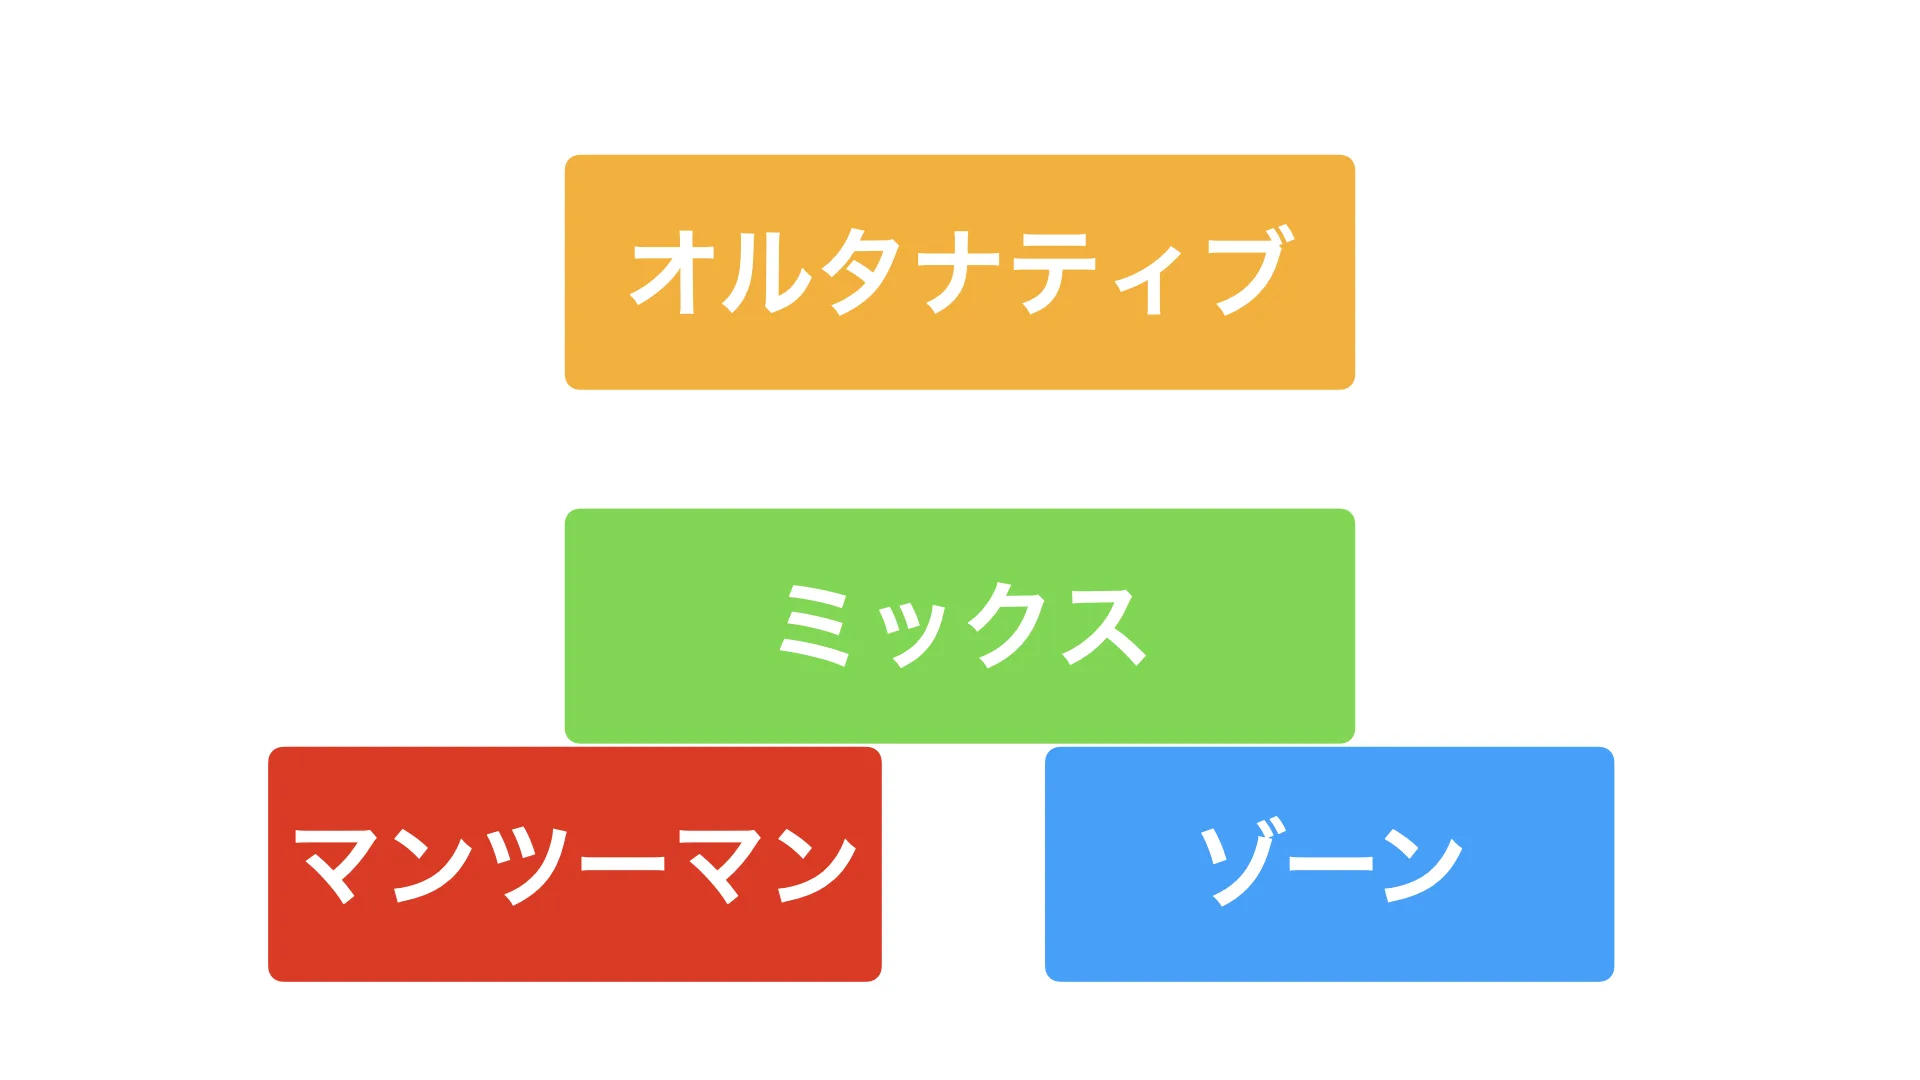
The rotating diamond is the most orthodox and best-known shape used in half-court defending.
This is an excellent tactic because even teams without strong individual defenders can use local numerical superiority to gain the upper hand.
In this article, I will explain half-court defending with the rotating diamond in a way that is easy for futsal beginners to understand.
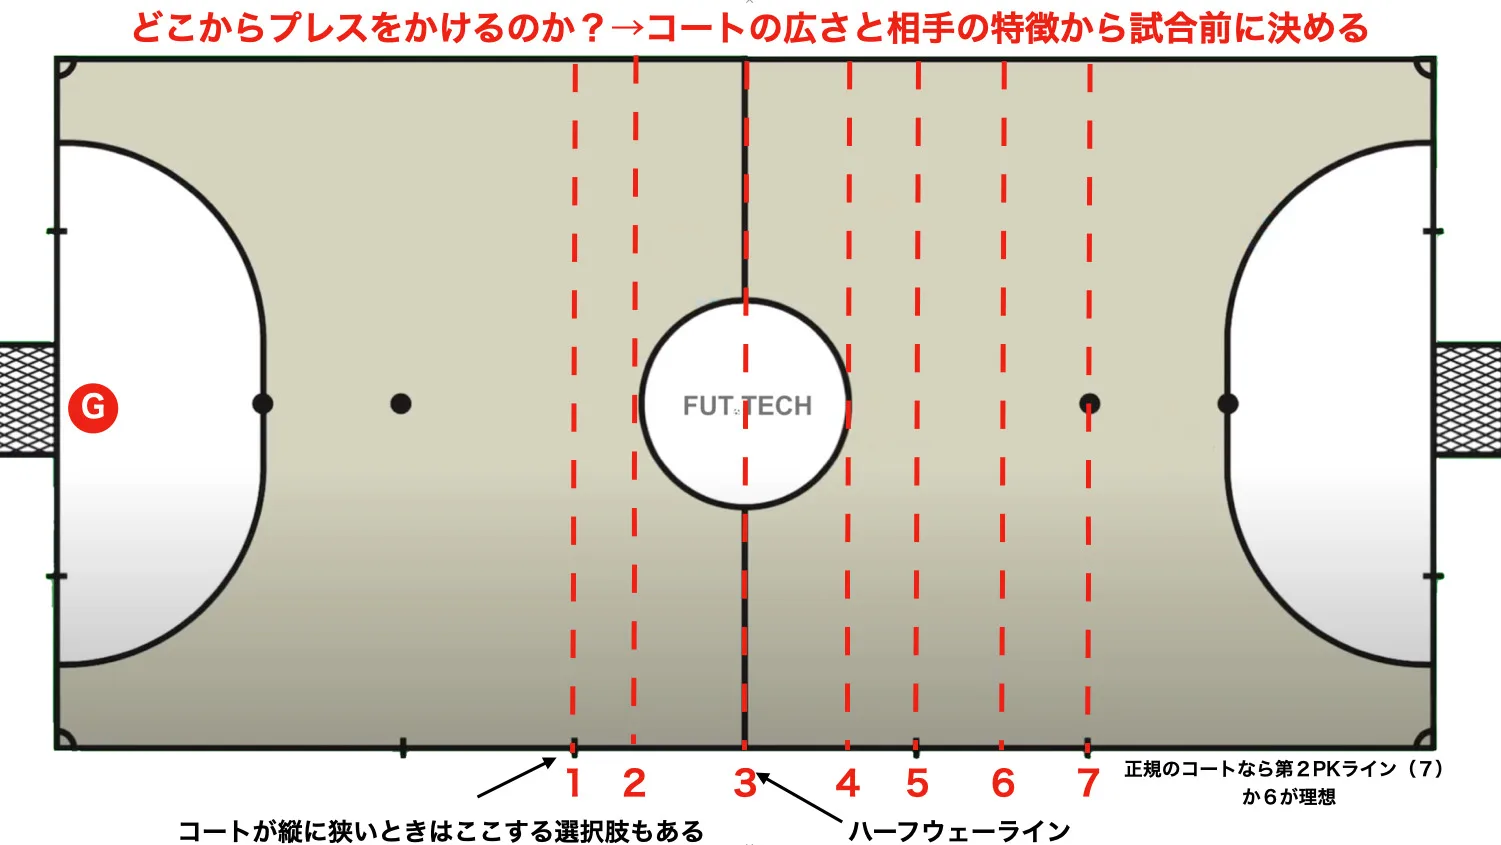
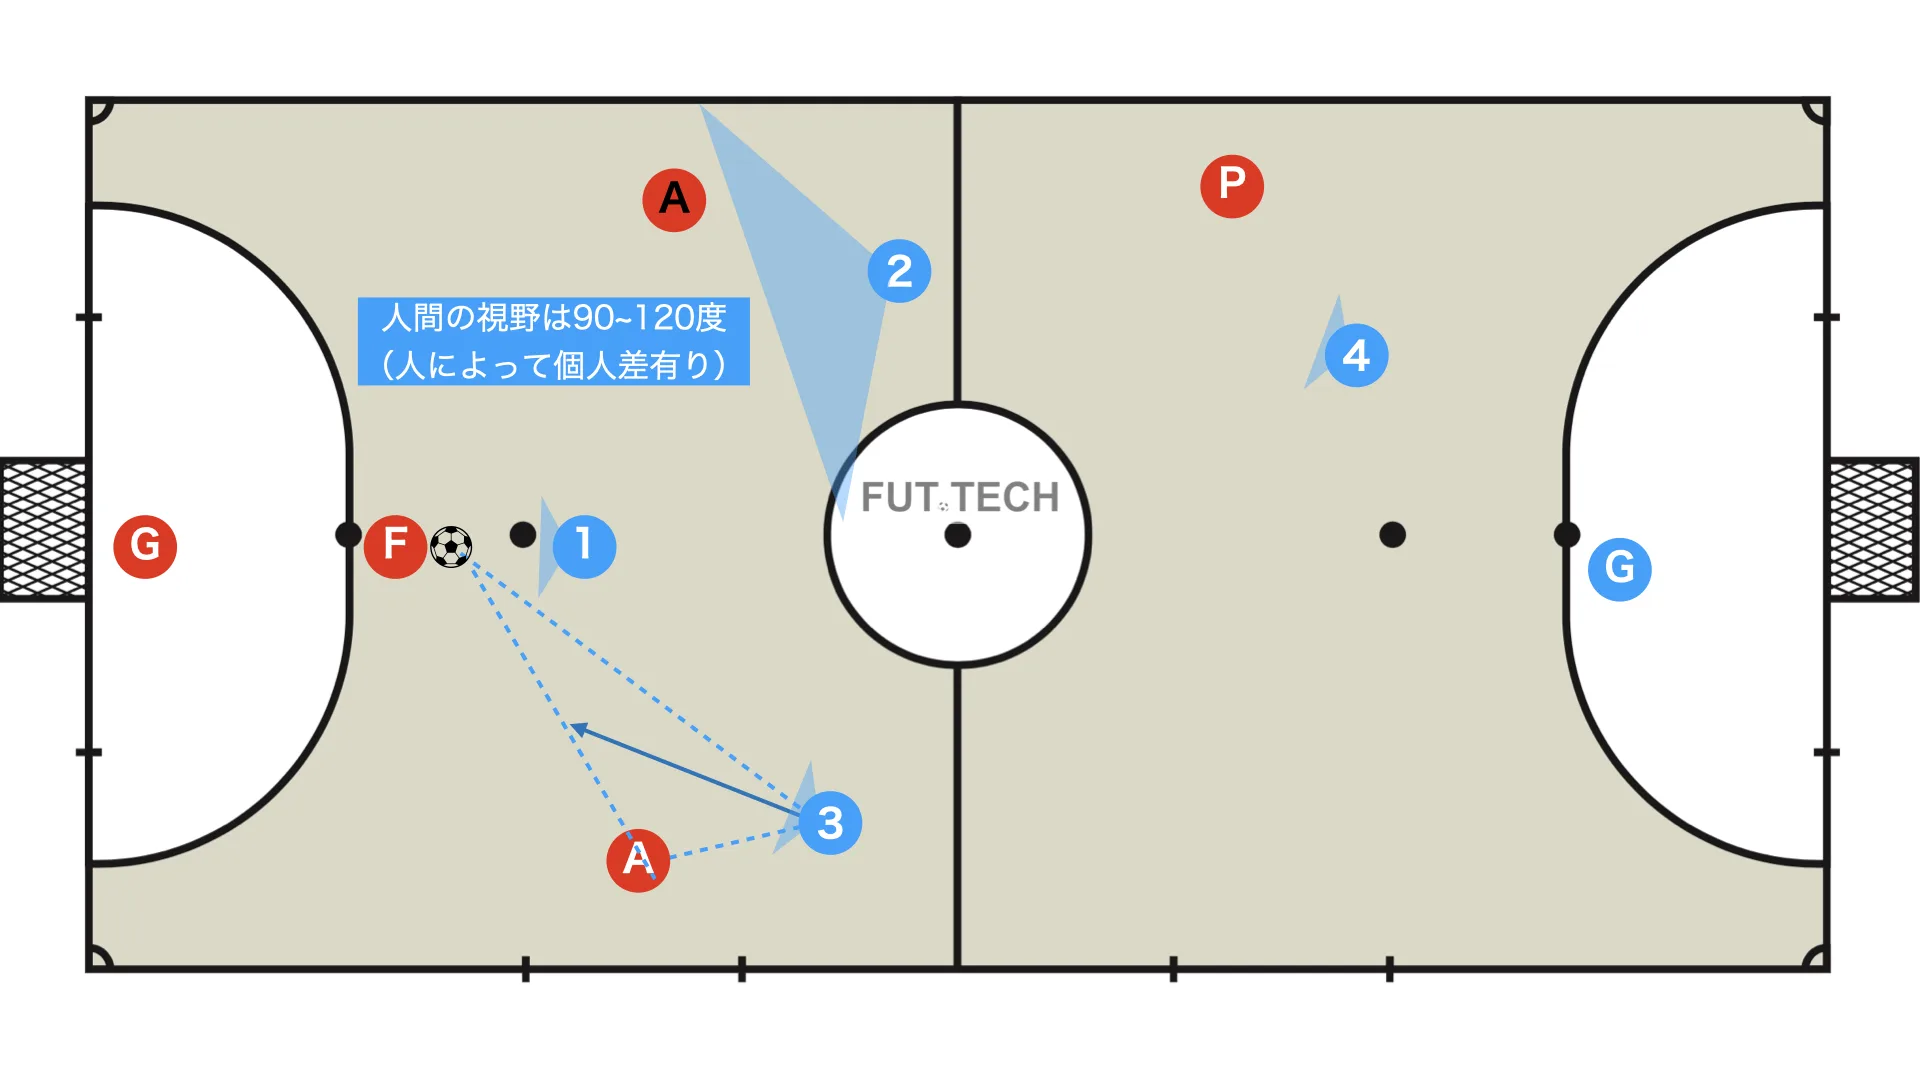
The pressing line should be set not only according to tactical factors such as the size of the court and the opponent's characteristics, but also using visual landmarks that players can recognize easily during the match.
Pressing line landmarks
- substitution zone marks
- the edge of the center circle
- the halfway line
- the second penalty mark line
- original choice (other)
Because this is called half-court defending, the halfway line is often used as the pressing line.
The higher the pressing line is set, the farther the opponent is kept from goal and the easier it becomes to remove shooting options. On the other hand, the defence becomes less compact. The key is finding the right balance.
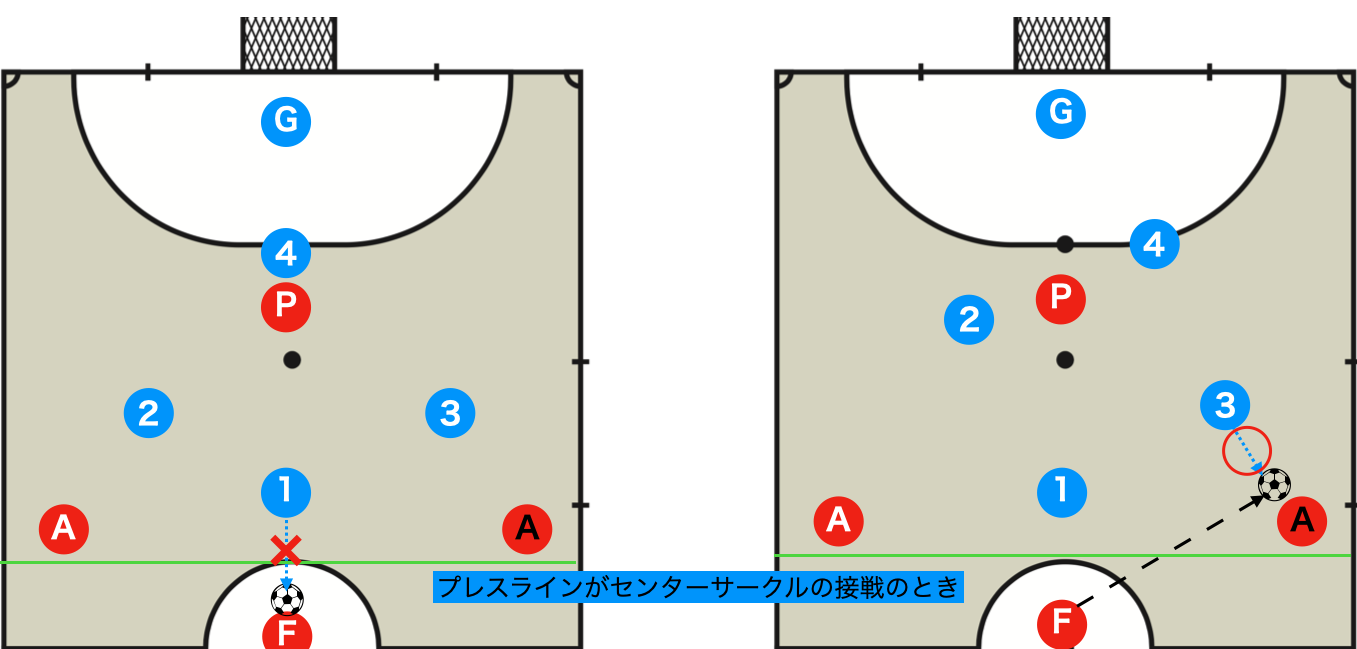
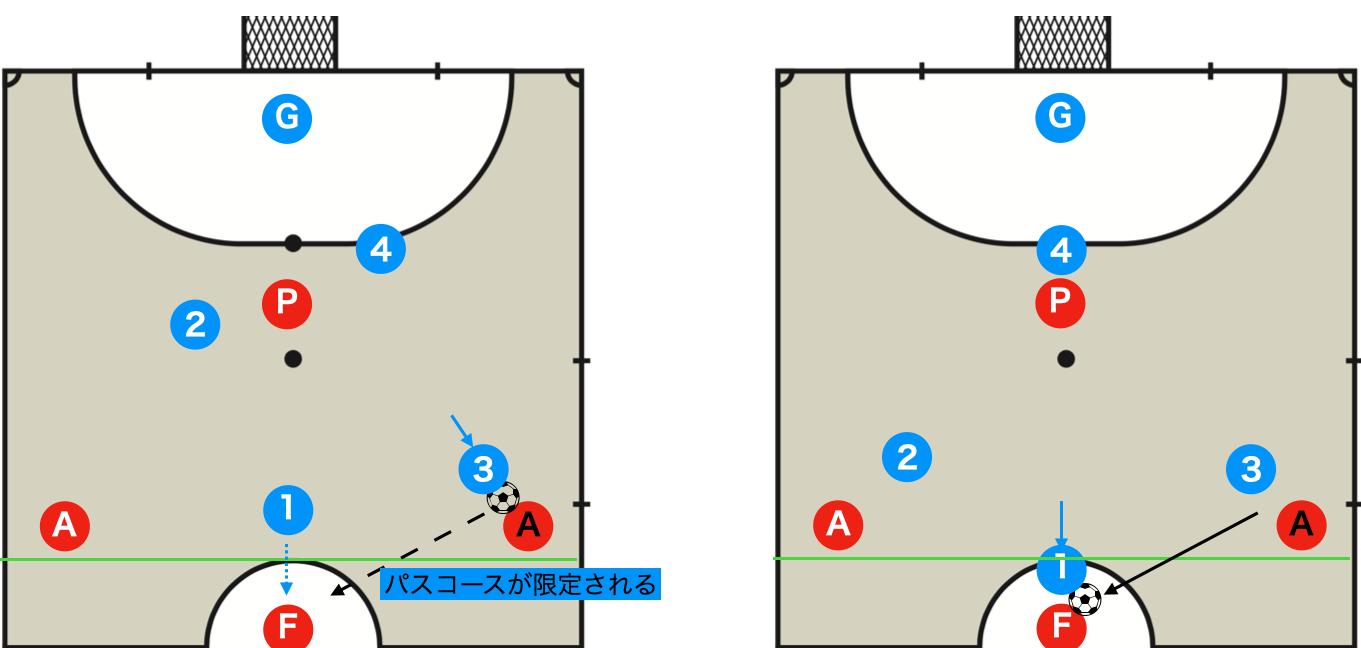
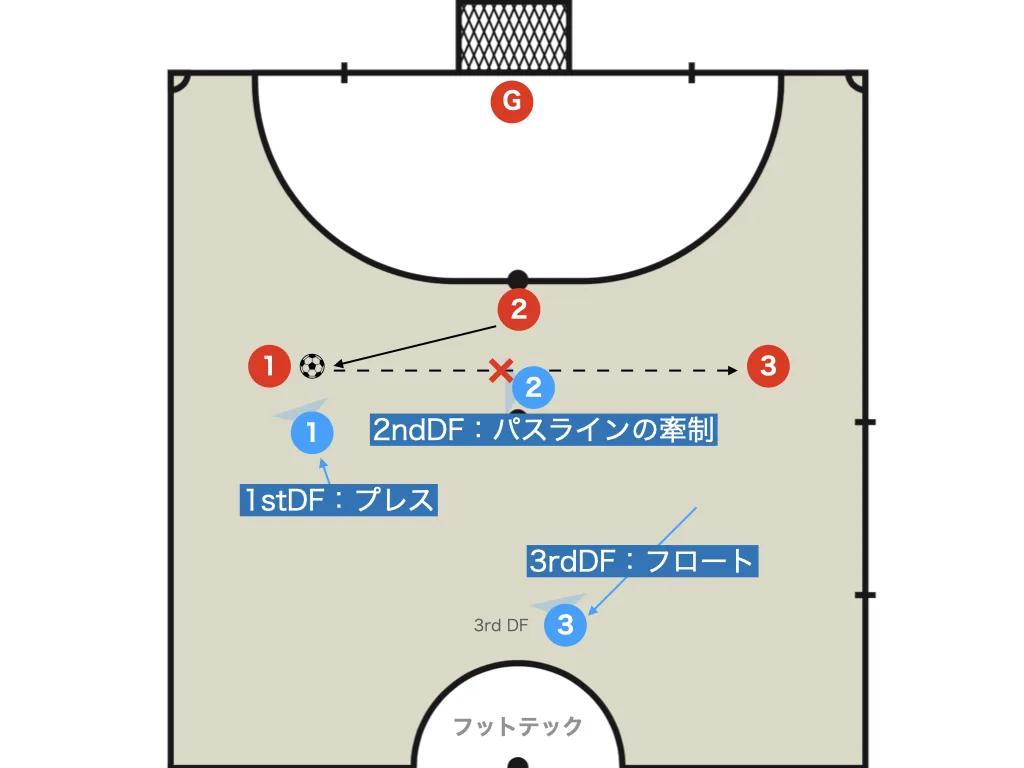
If the 1st defender can apply strong pressure to the ball carrier, the passing options become limited, so the second defender can react and go to remove the remaining passing lane.
When the press has locked the opponent in like this, the defence should aim to win the ball, so the pressing line can be ignored.
- The defenders stay close together, so the defensive organization remains compact and cover is easier
- It reduces the space the opponent can use
- It leaves plenty of space to counterattack into
- Because the goal is closer, it is easier to give the opponent shooting opportunities
- After winning the ball, you are still far from the opponent's goal
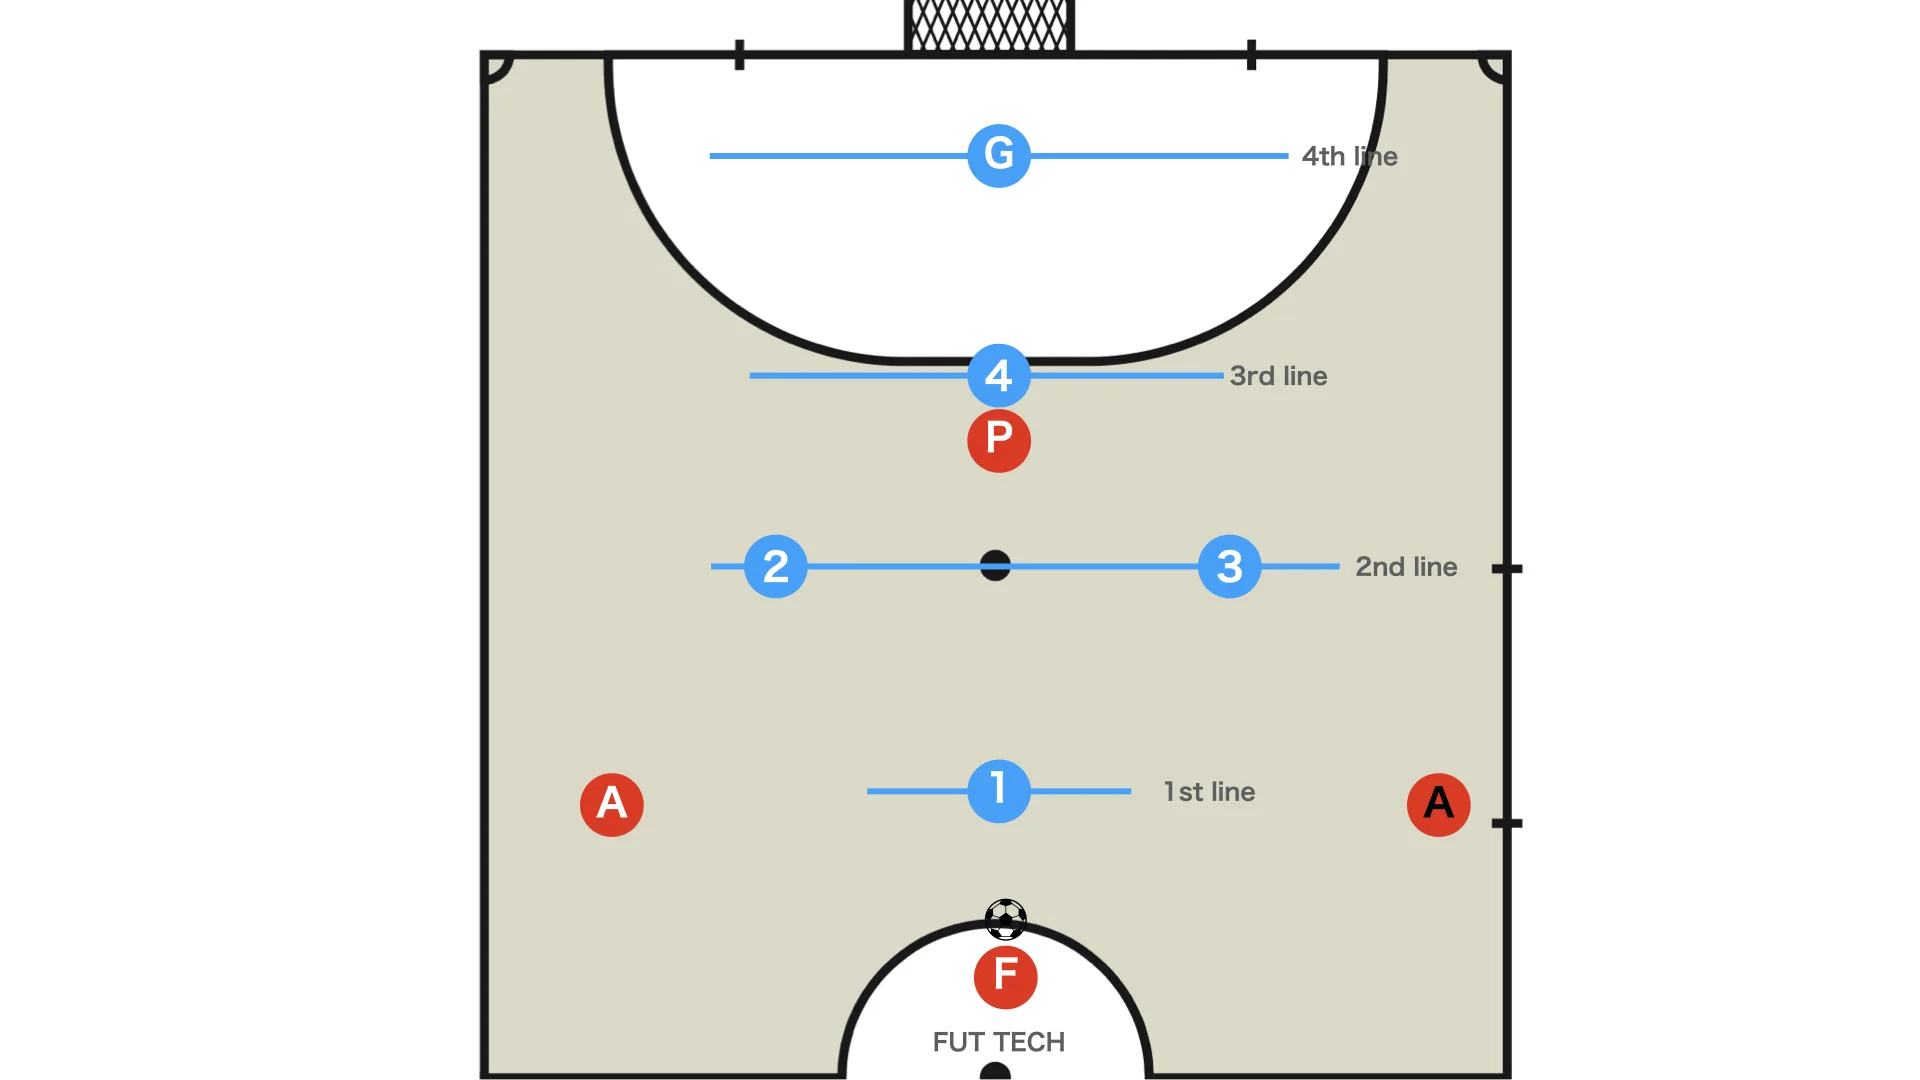
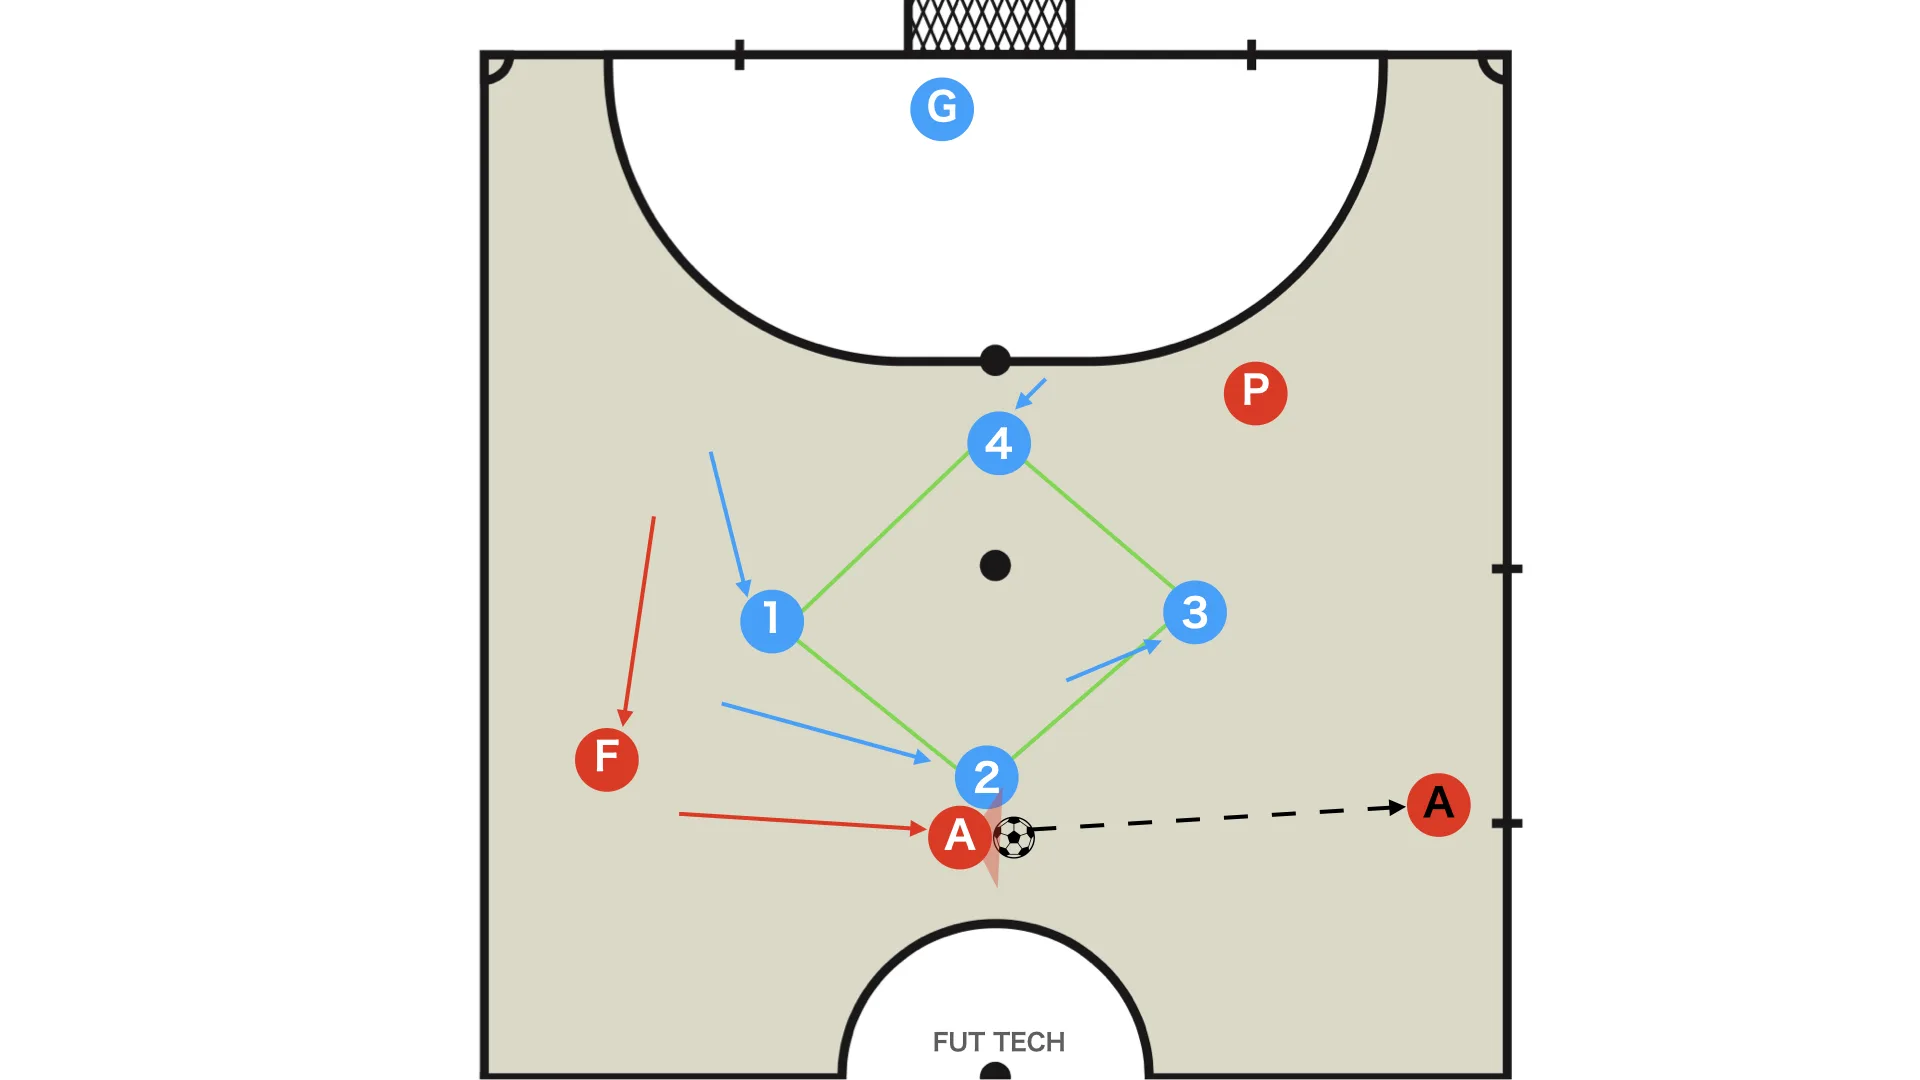
Including the goalkeeper, build four defensive lines.
- 1st line: blue 1
- 2nd line: blue 2 - blue 3
- 3rd line: blue 4
- 4th line: goalkeeper
関連記事

Zone Defence Basics: Building Multiple Defensive Lines and the Ala-to-Ala Pass
A guide to a core concept in futsal zone defence: building multiple defensive lines. This article ex…
続きを読む →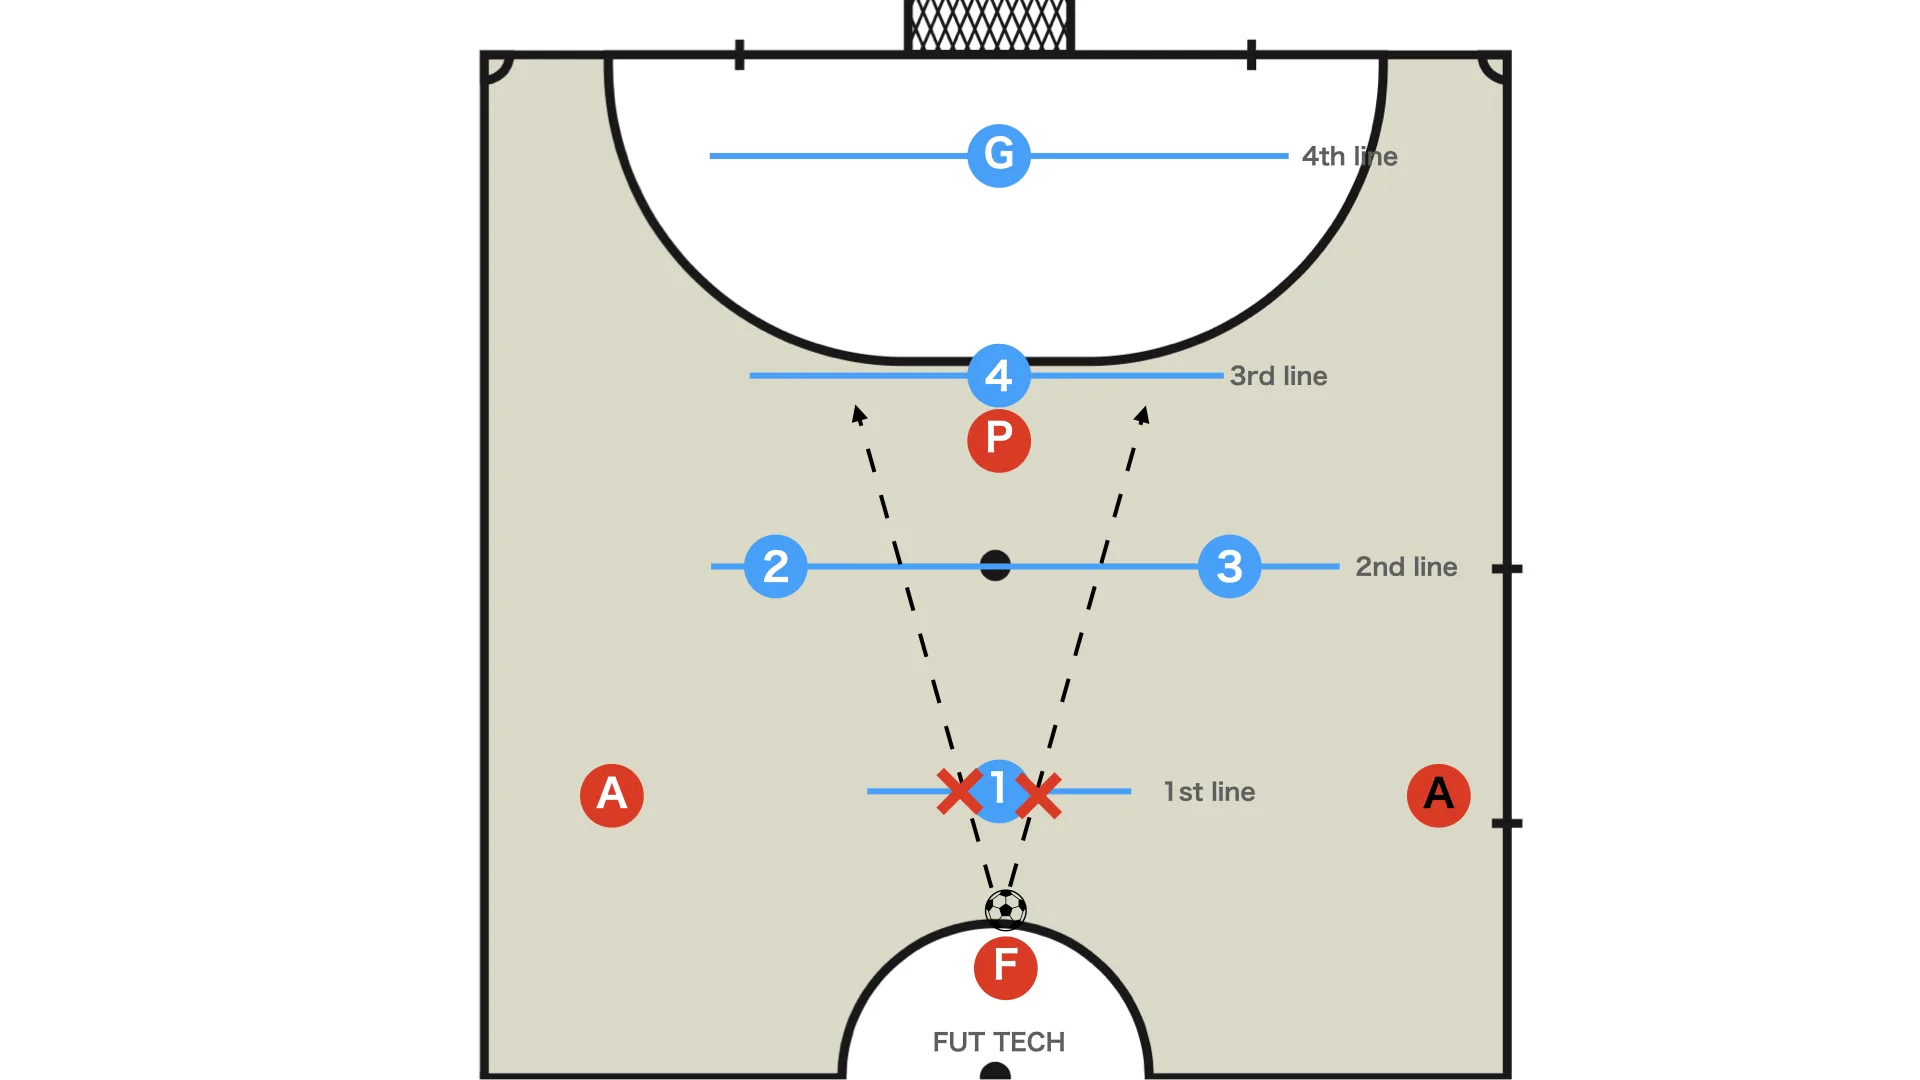
The 1st line and 2nd line work together to cut the passing lane into the pivot.
If blue 1 is not screening that lane well enough, the 2nd line can pinch in and discourage the remaining passing line.
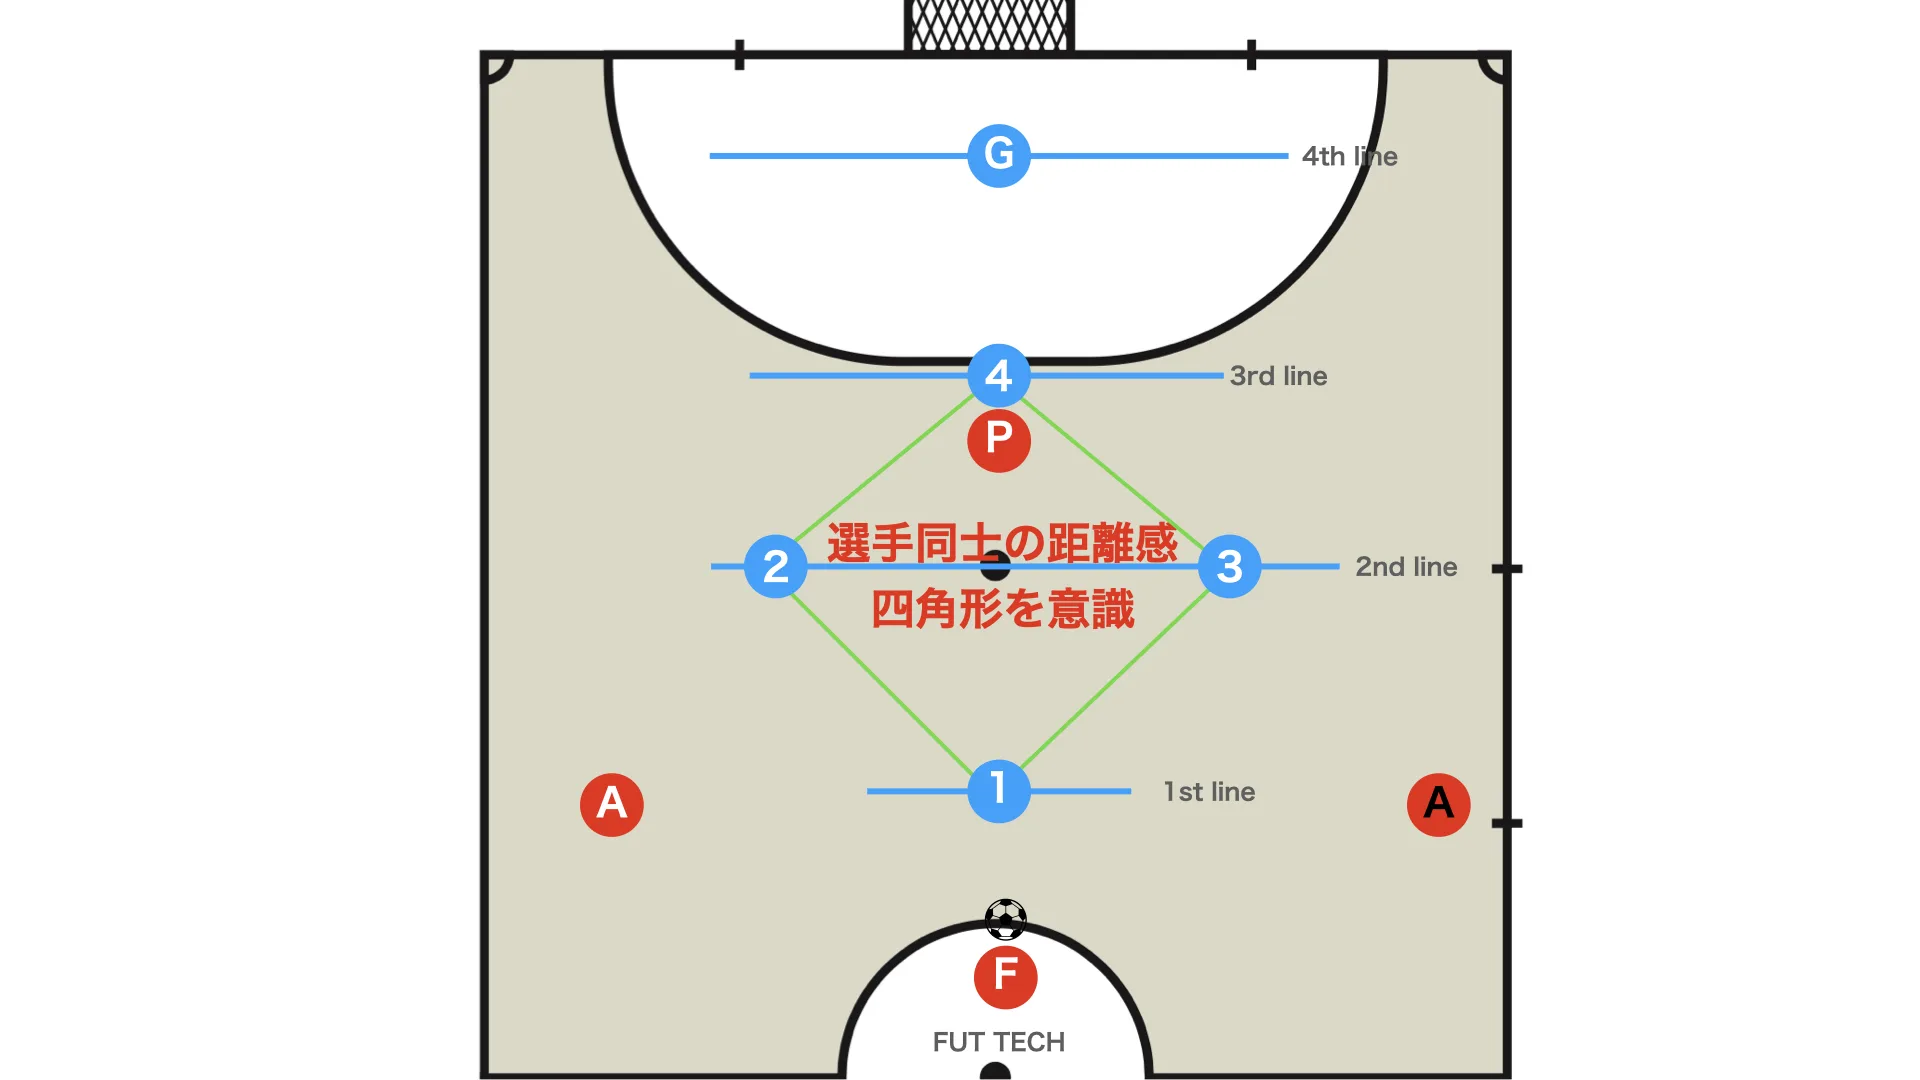
Not only in this situation, but at all times, the players should stay aware of their distances from one another and maintain a compact diamond.
That makes it possible to provide cover if someone gets beaten by a dribble or similar action.
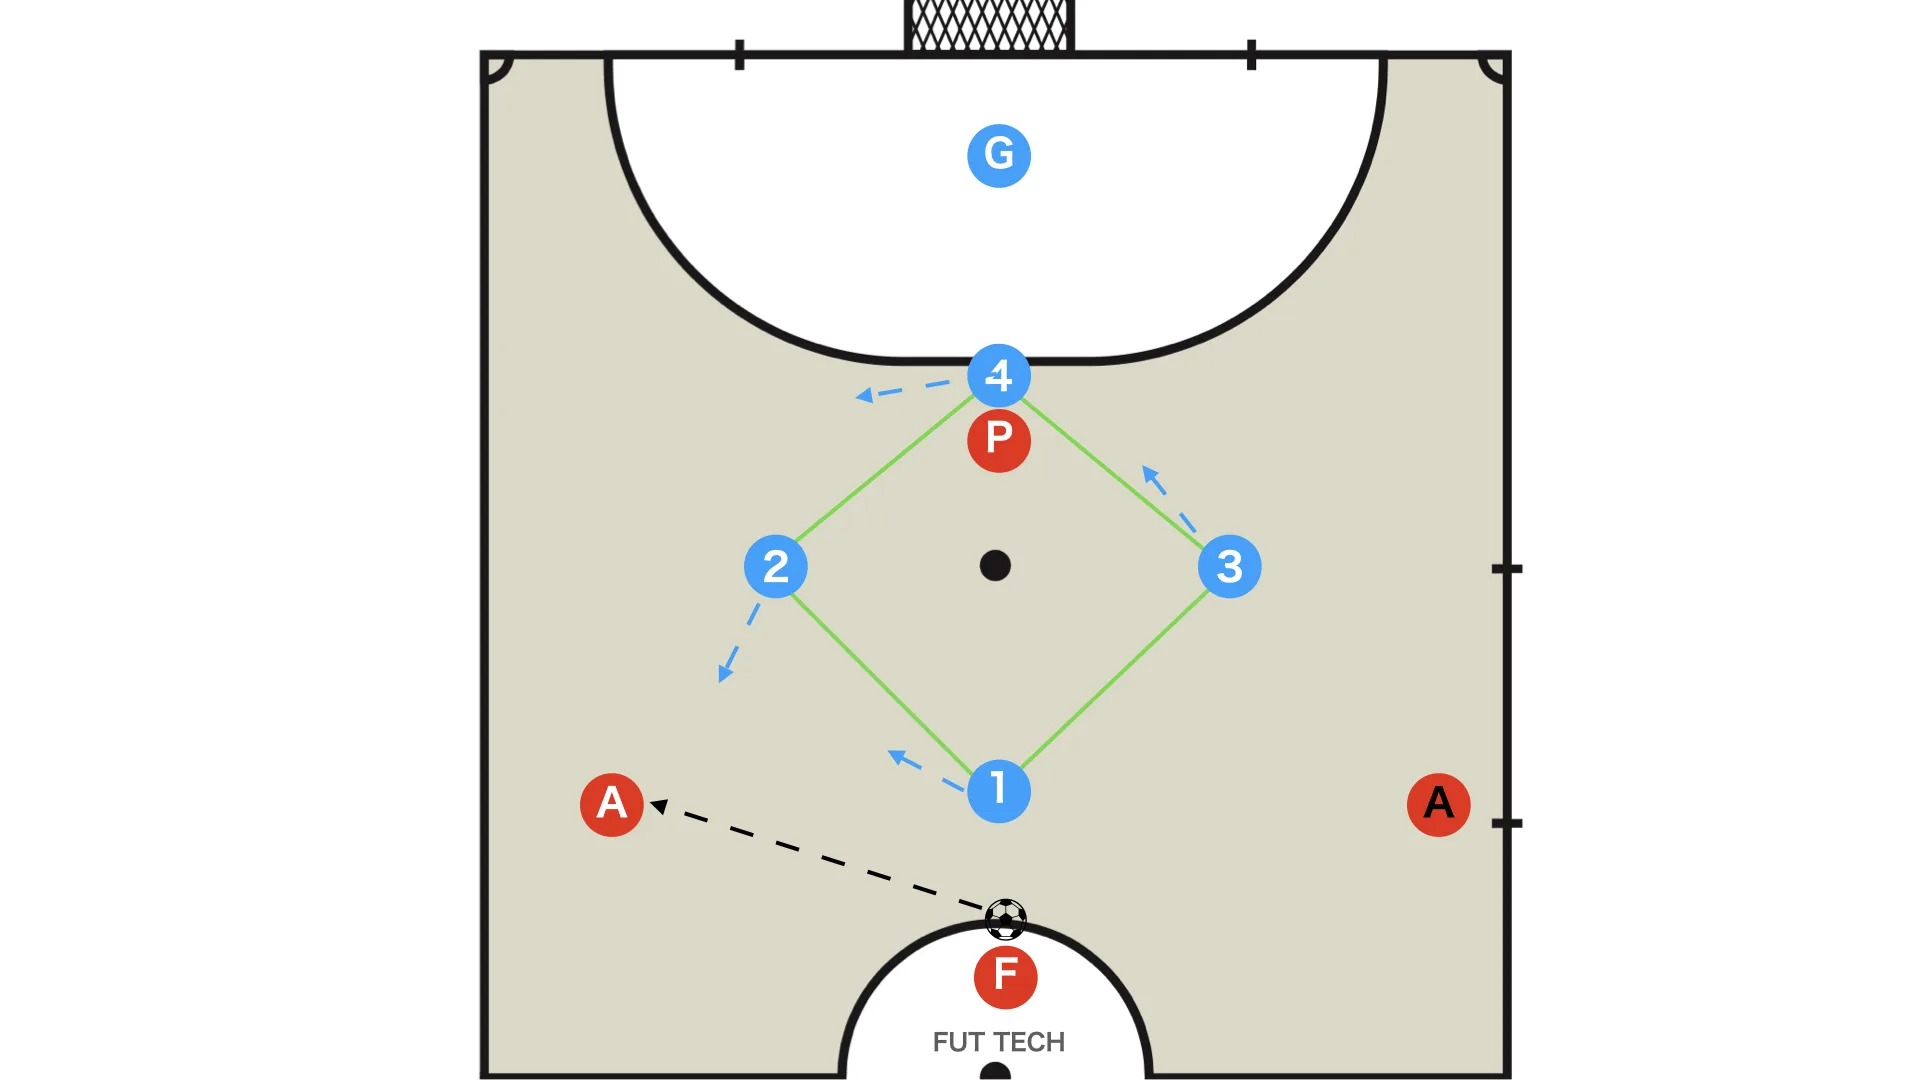
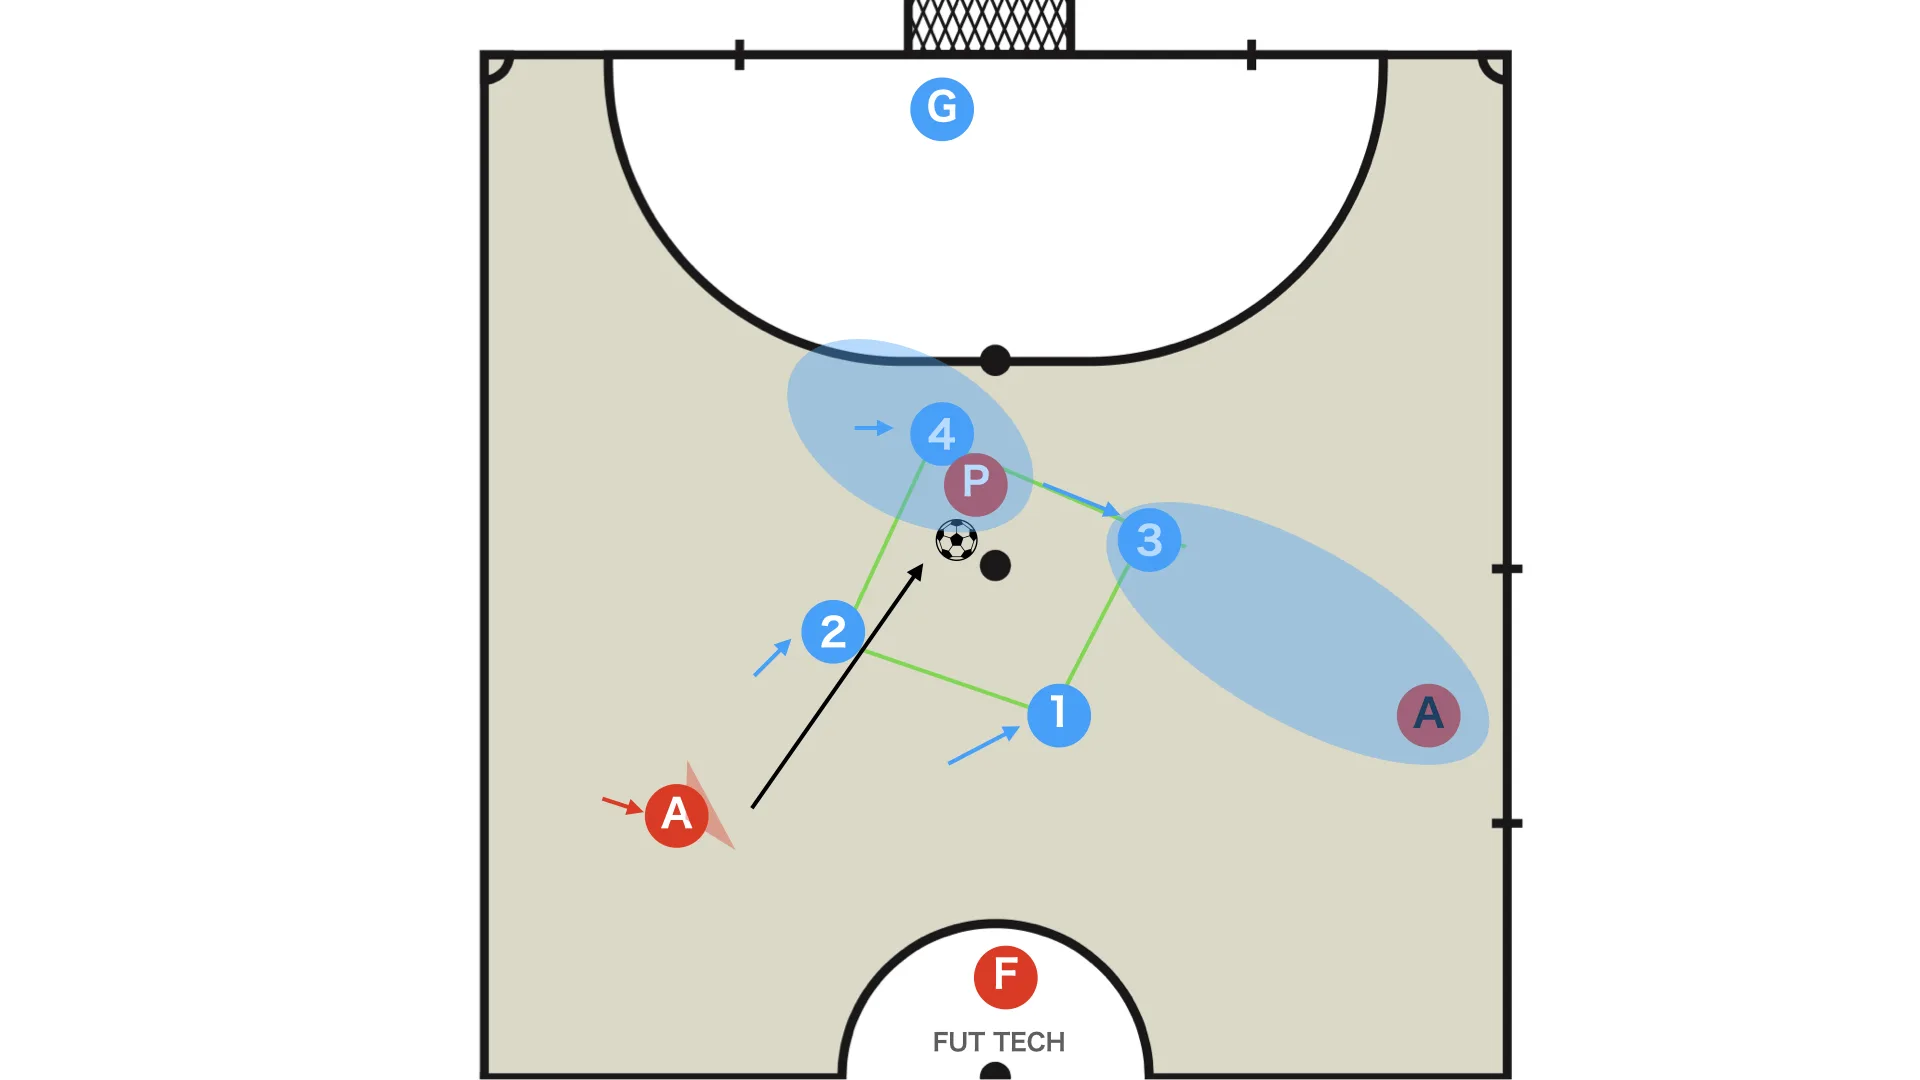
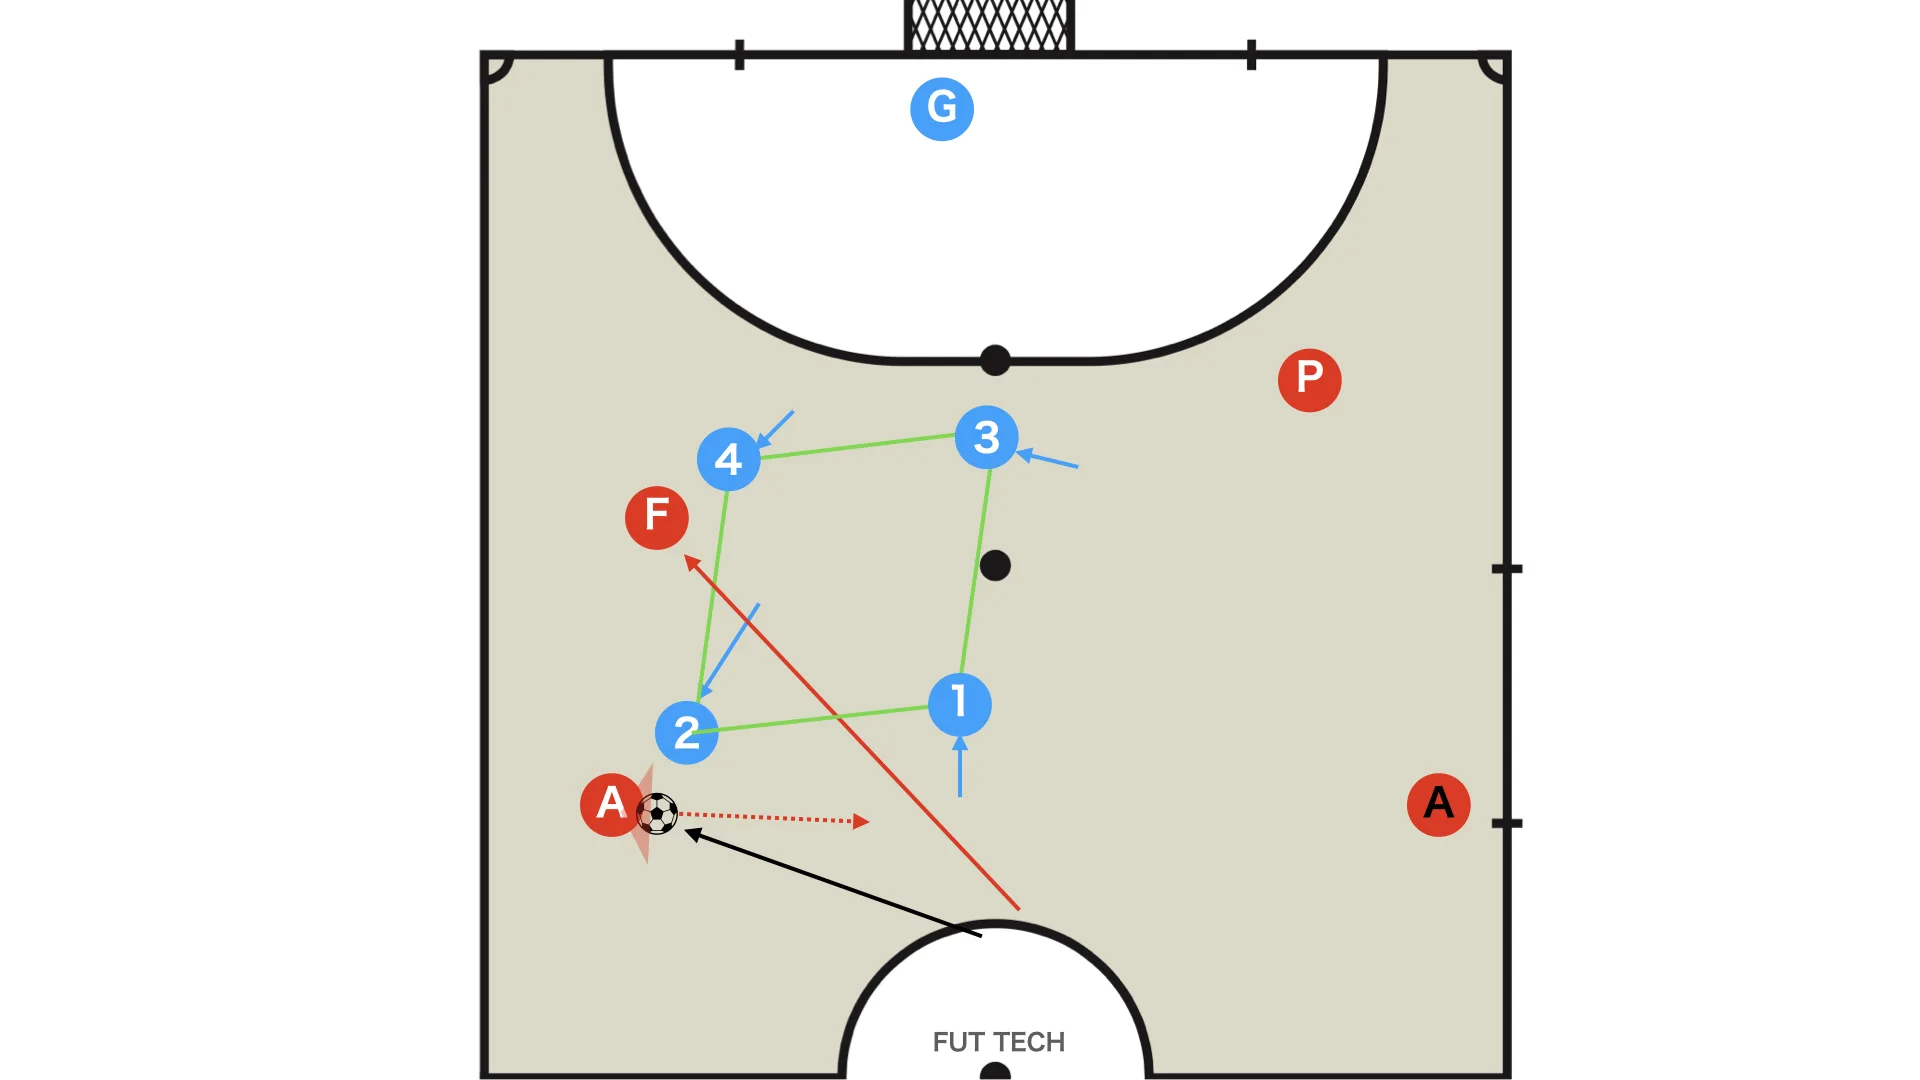
While watching the ball carrier's eyes and body movement and the movement of the other players, the defenders should anticipate where the next pass will go and start moving the moment the ball is played.

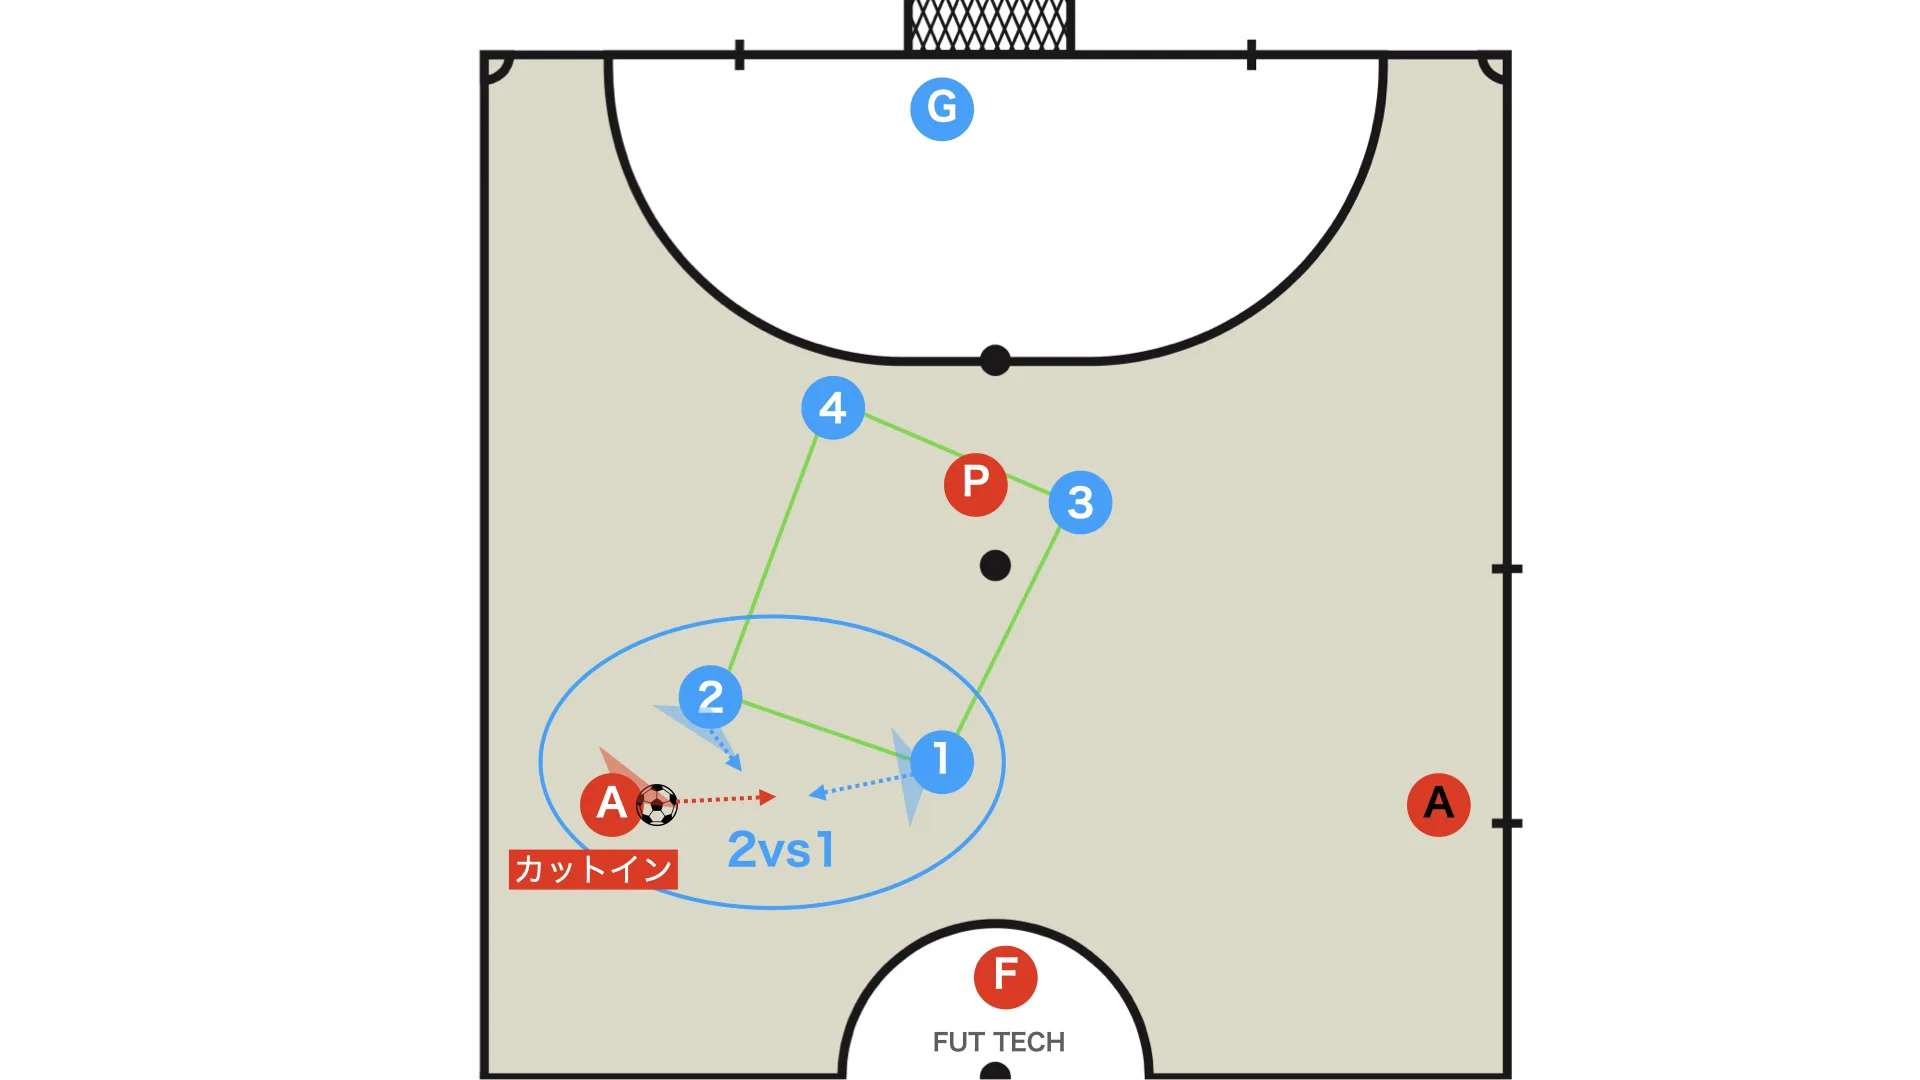
Just as when the fixo has the ball, the team should continue to maintain a compact diamond.
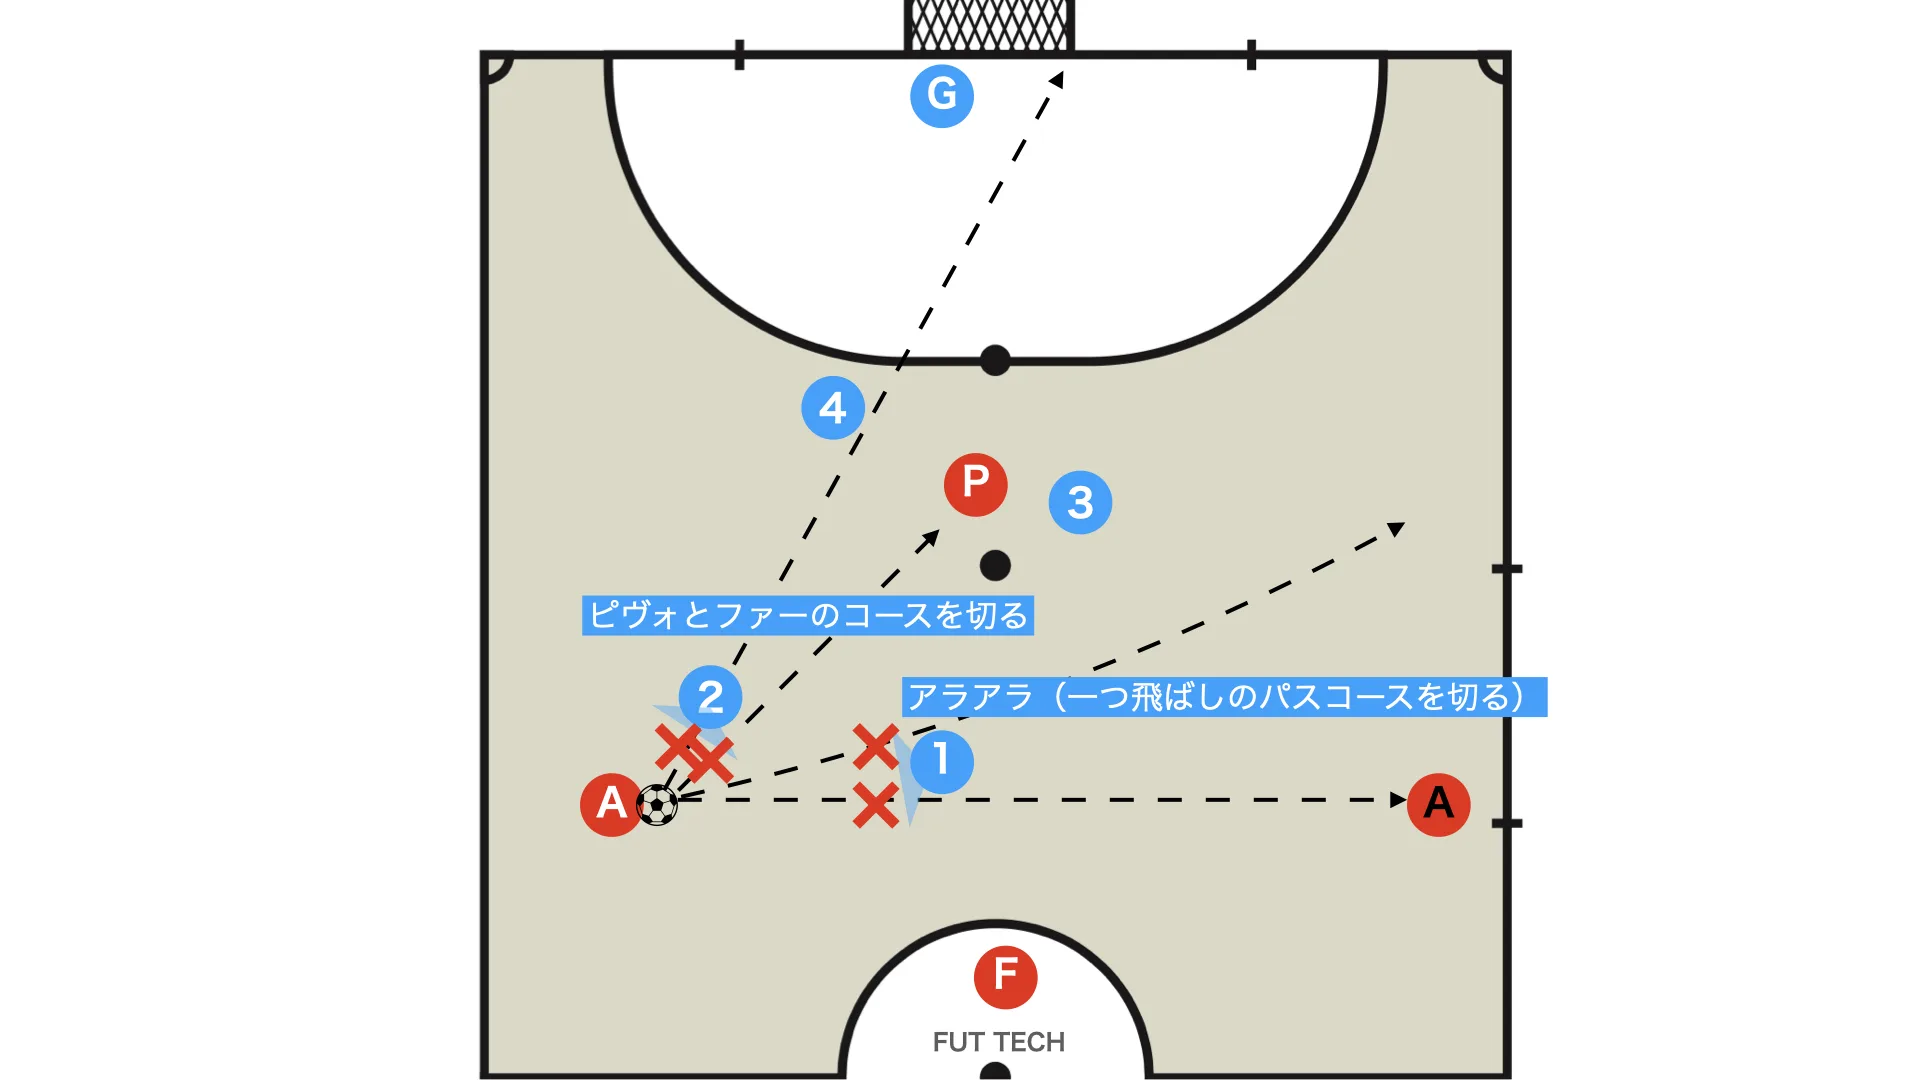
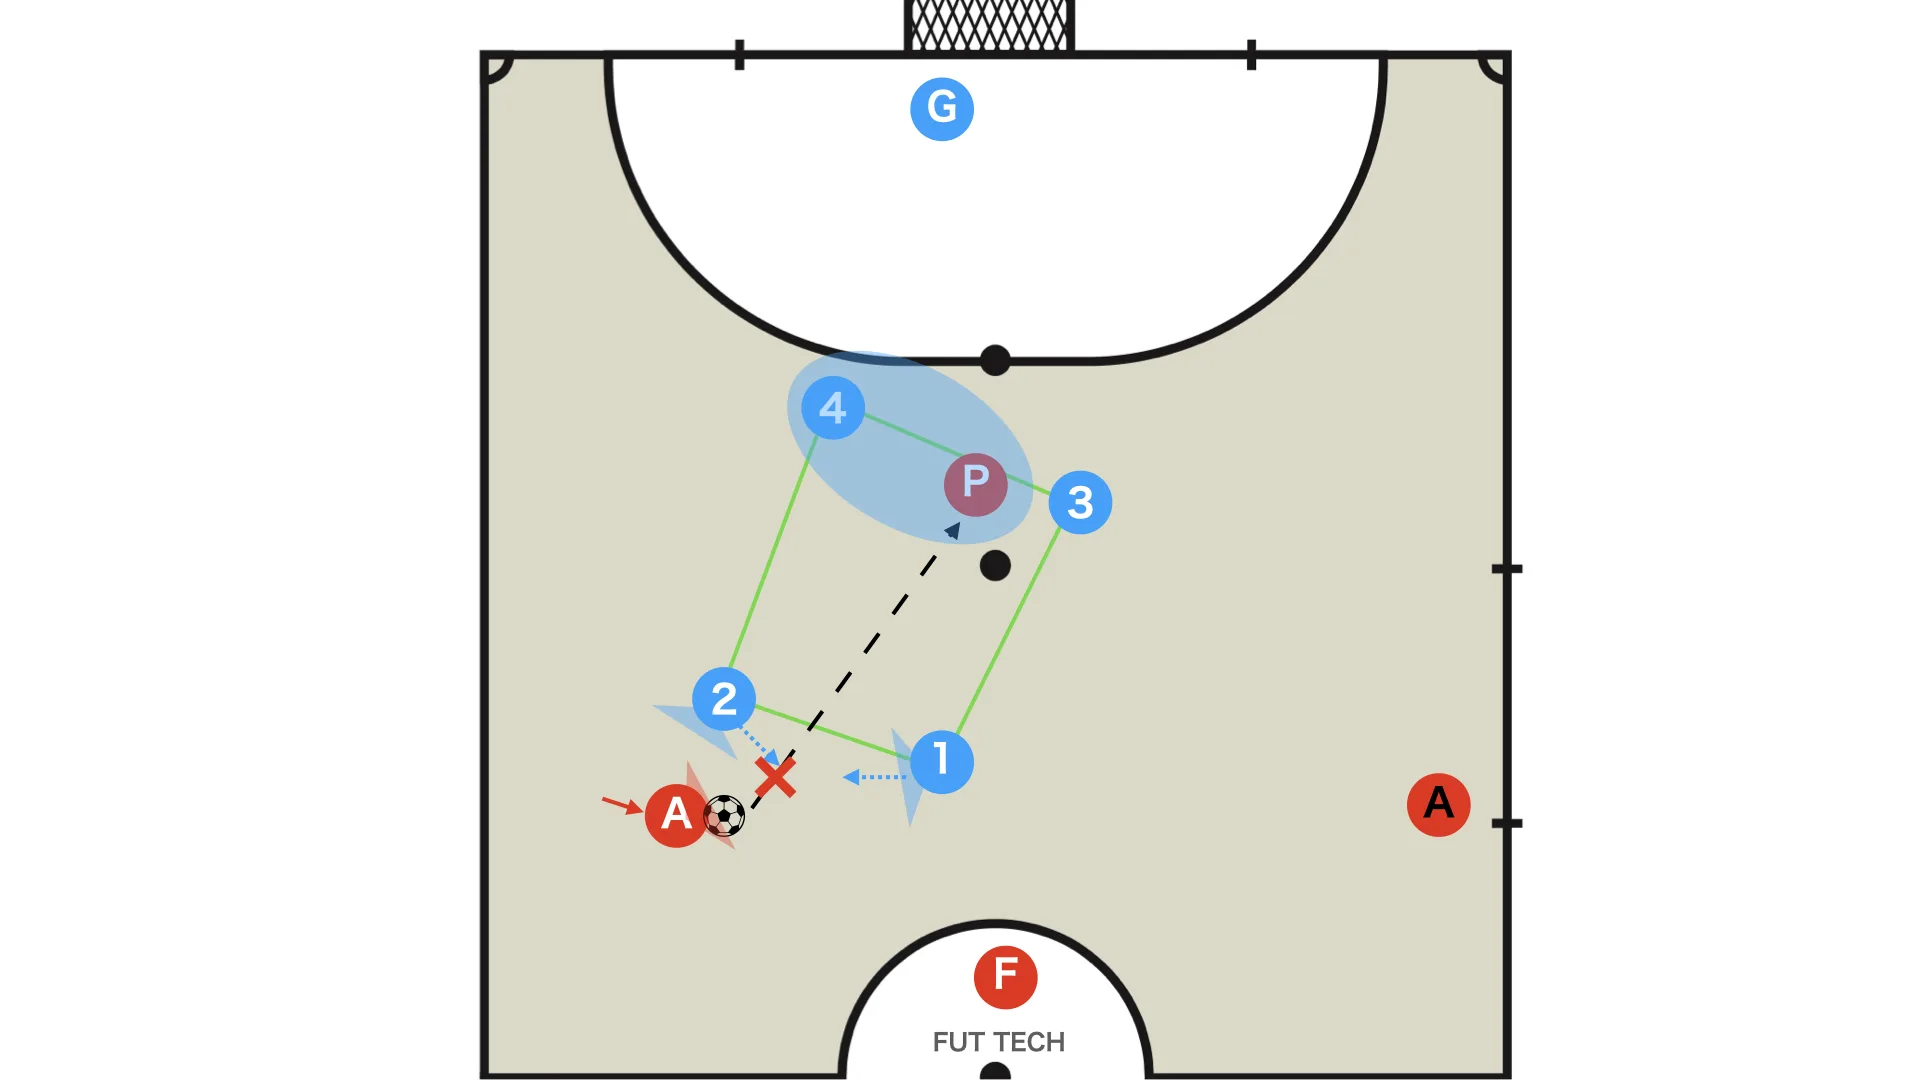
- 1st defender (blue 2): first cut the lane into the segundo (the goalkeeper covers the near post)
- 2nd defender (blue 1): cut the ala-to-ala skip pass lane
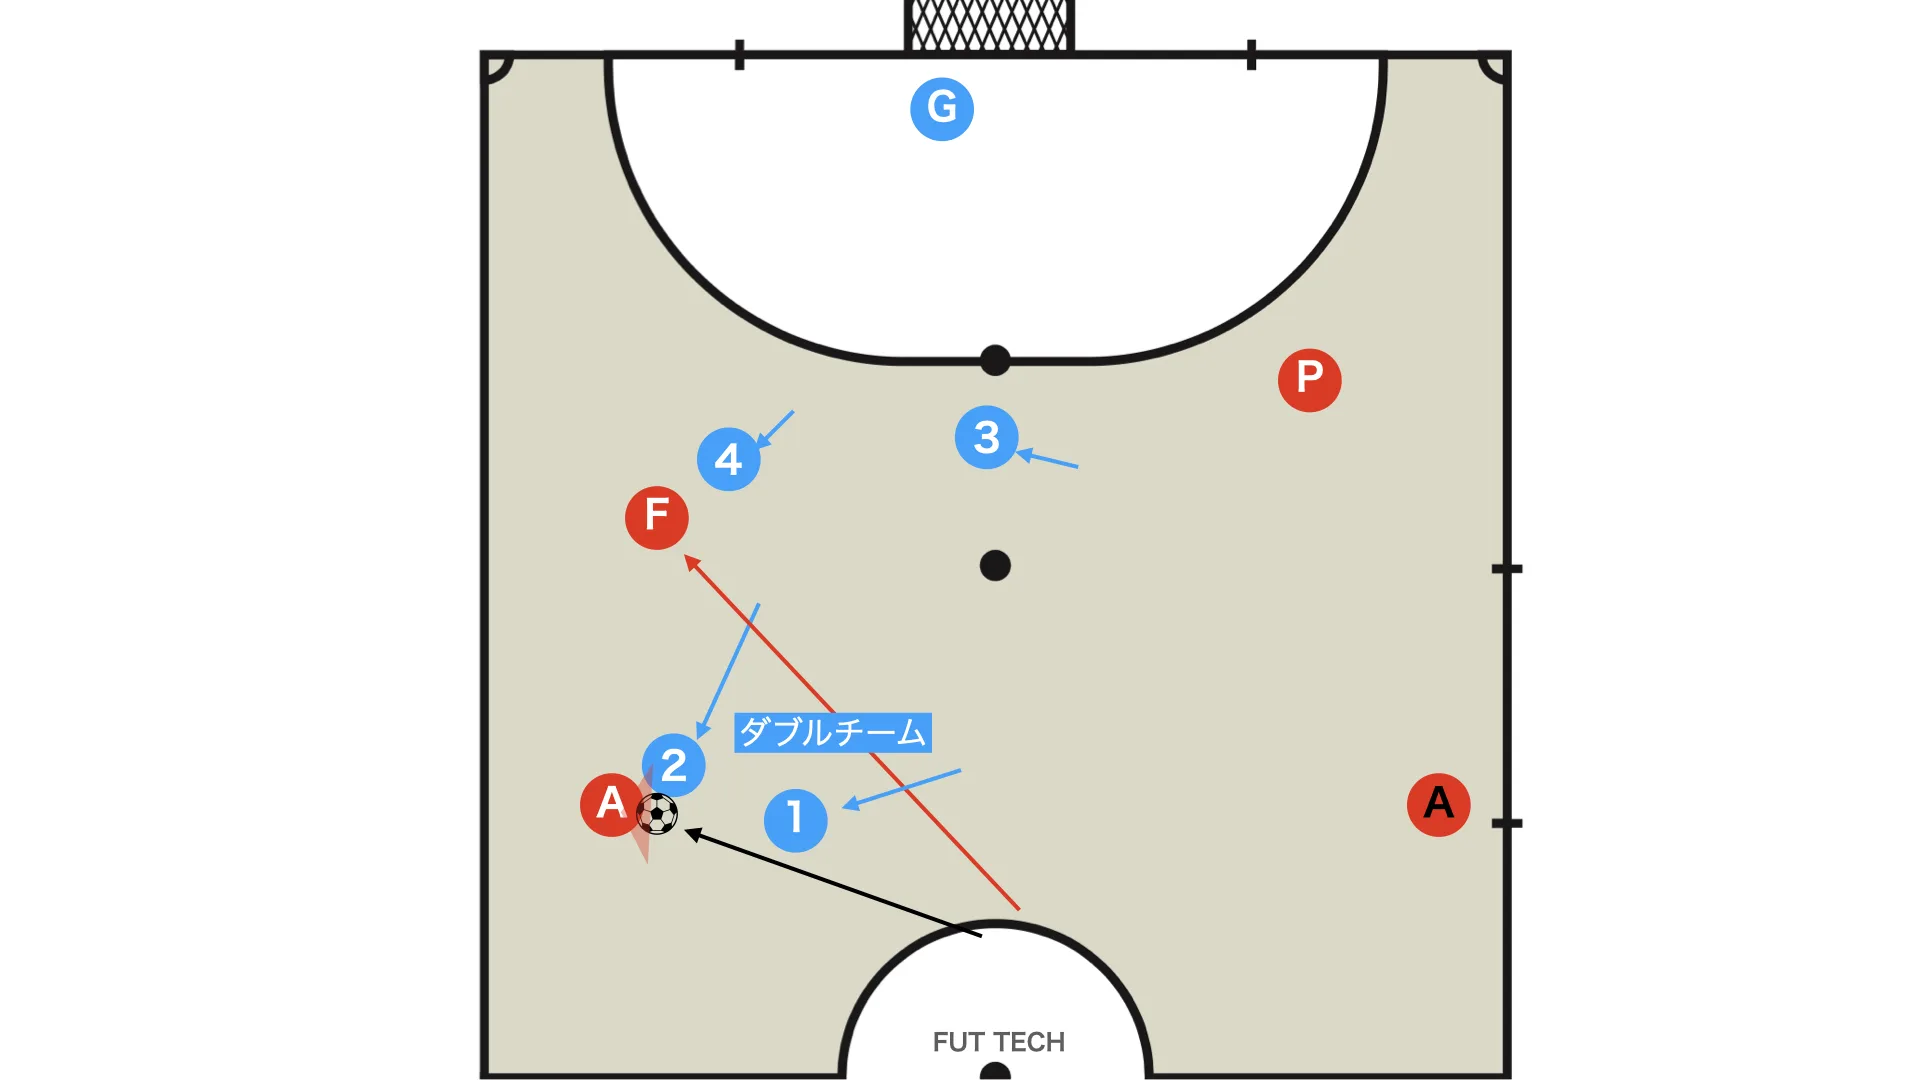
If the opponent cuts inside, blue 1 and blue 2 defend together. (2v1)
If the cut inside becomes bigger, they can form a double team and go win the ball.
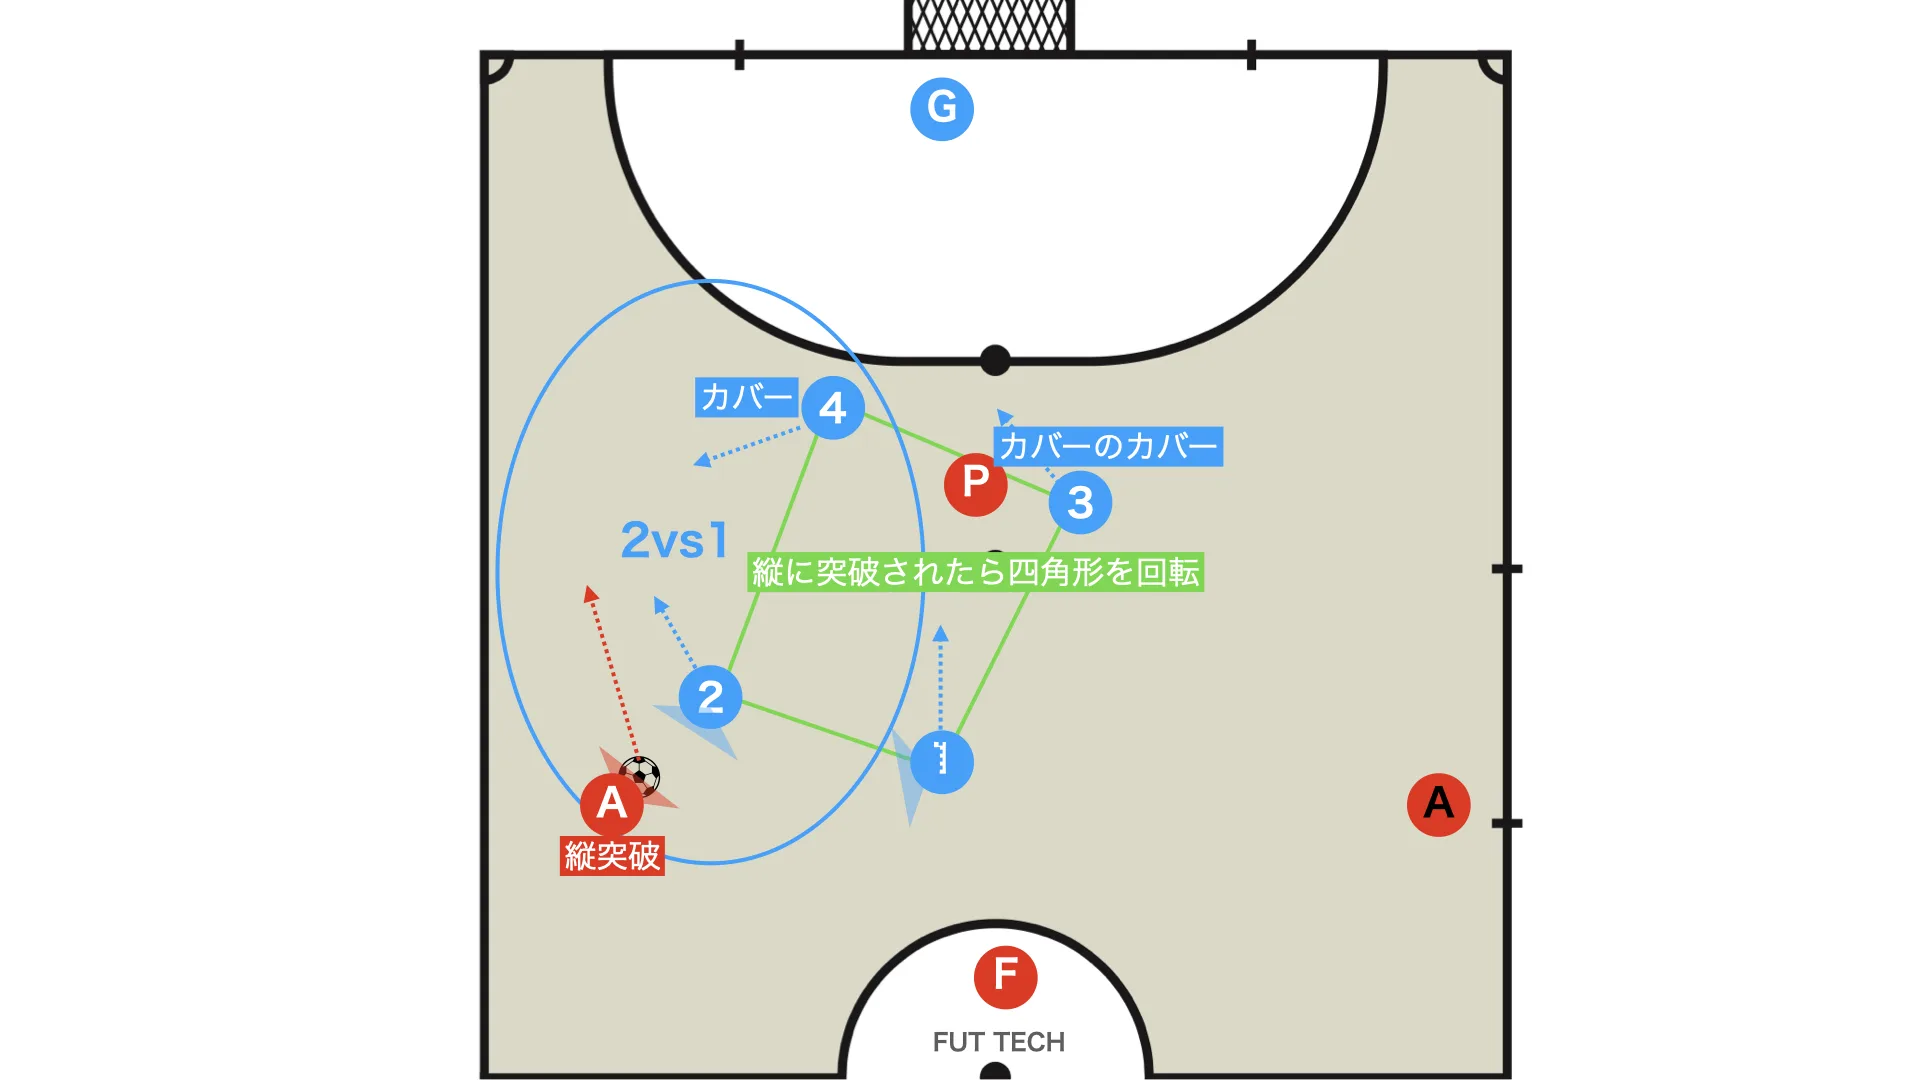
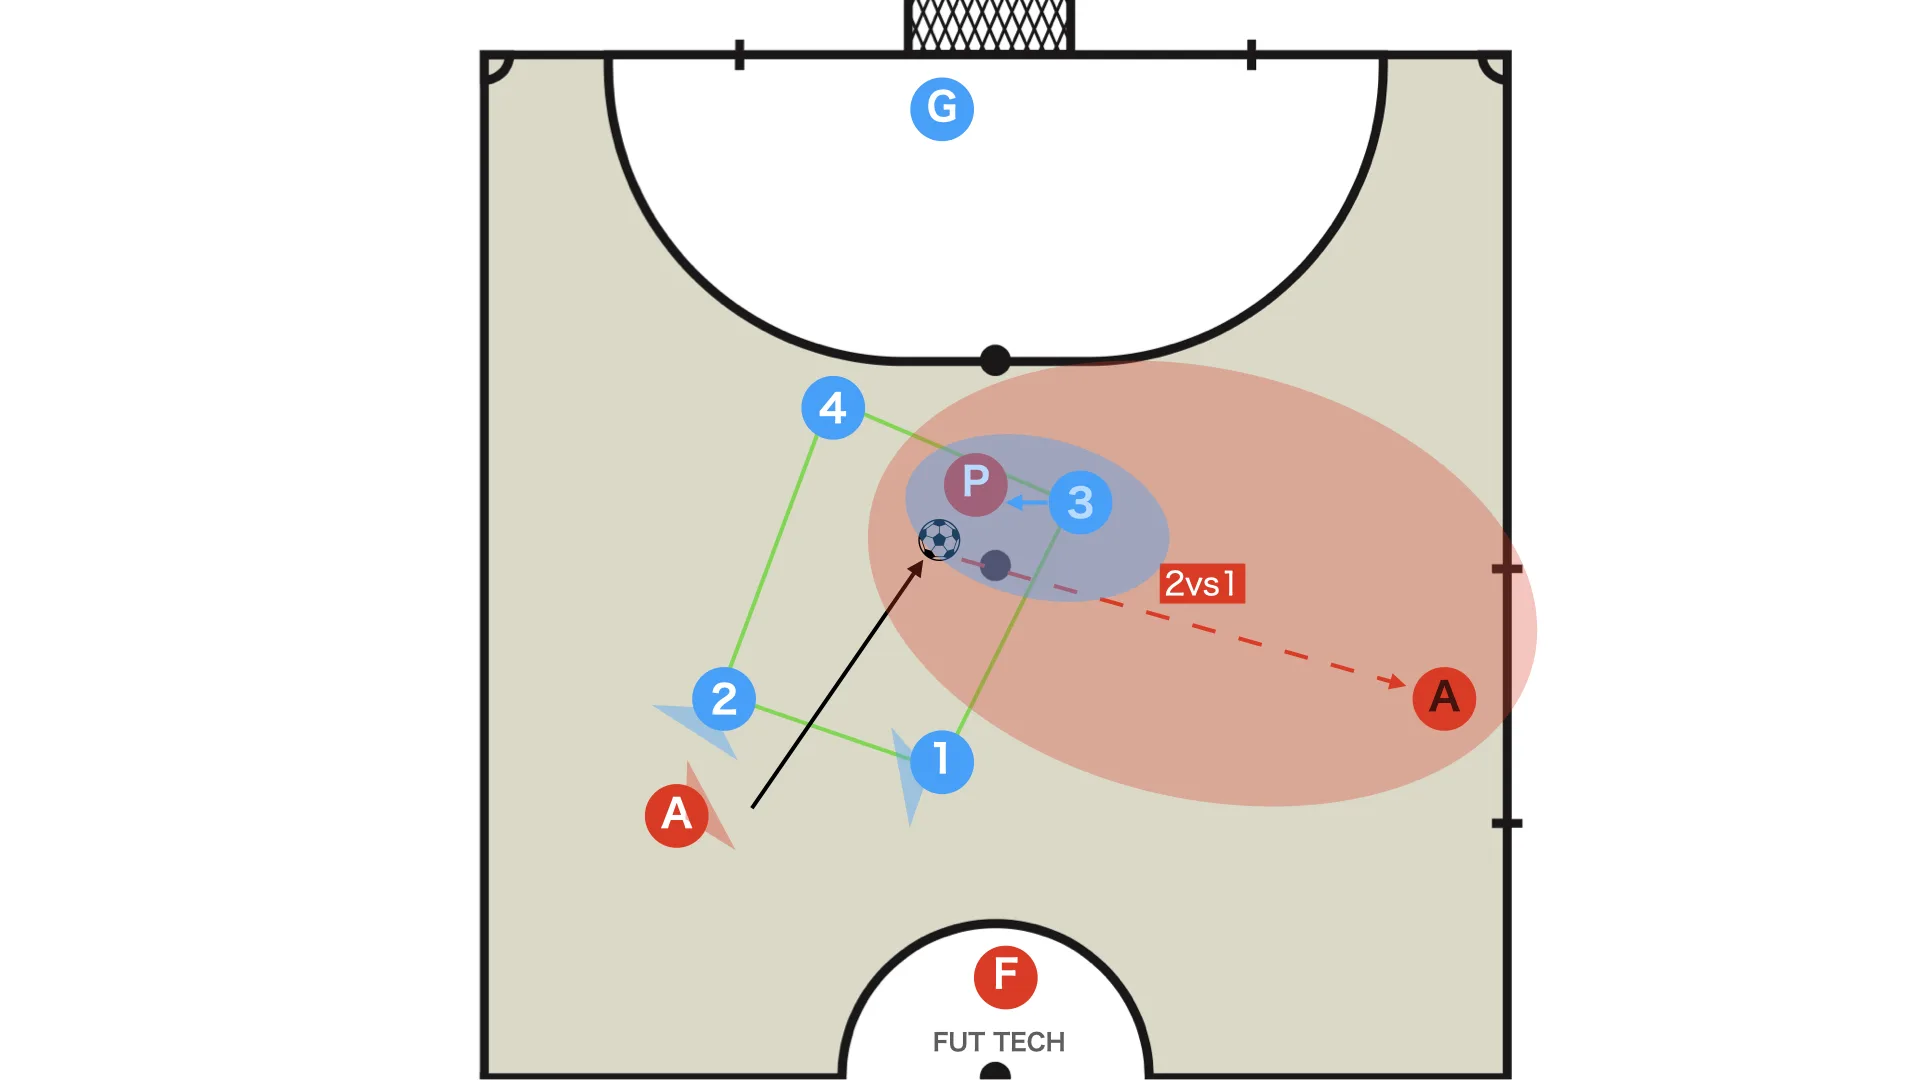
If it looks like the dribbler is about to break down the line, the defenders should anticipate it and rotate together.
Blue 2 and blue 4 deal with the line break together, so just like before, the defence creates a 2v1 numerical advantage.
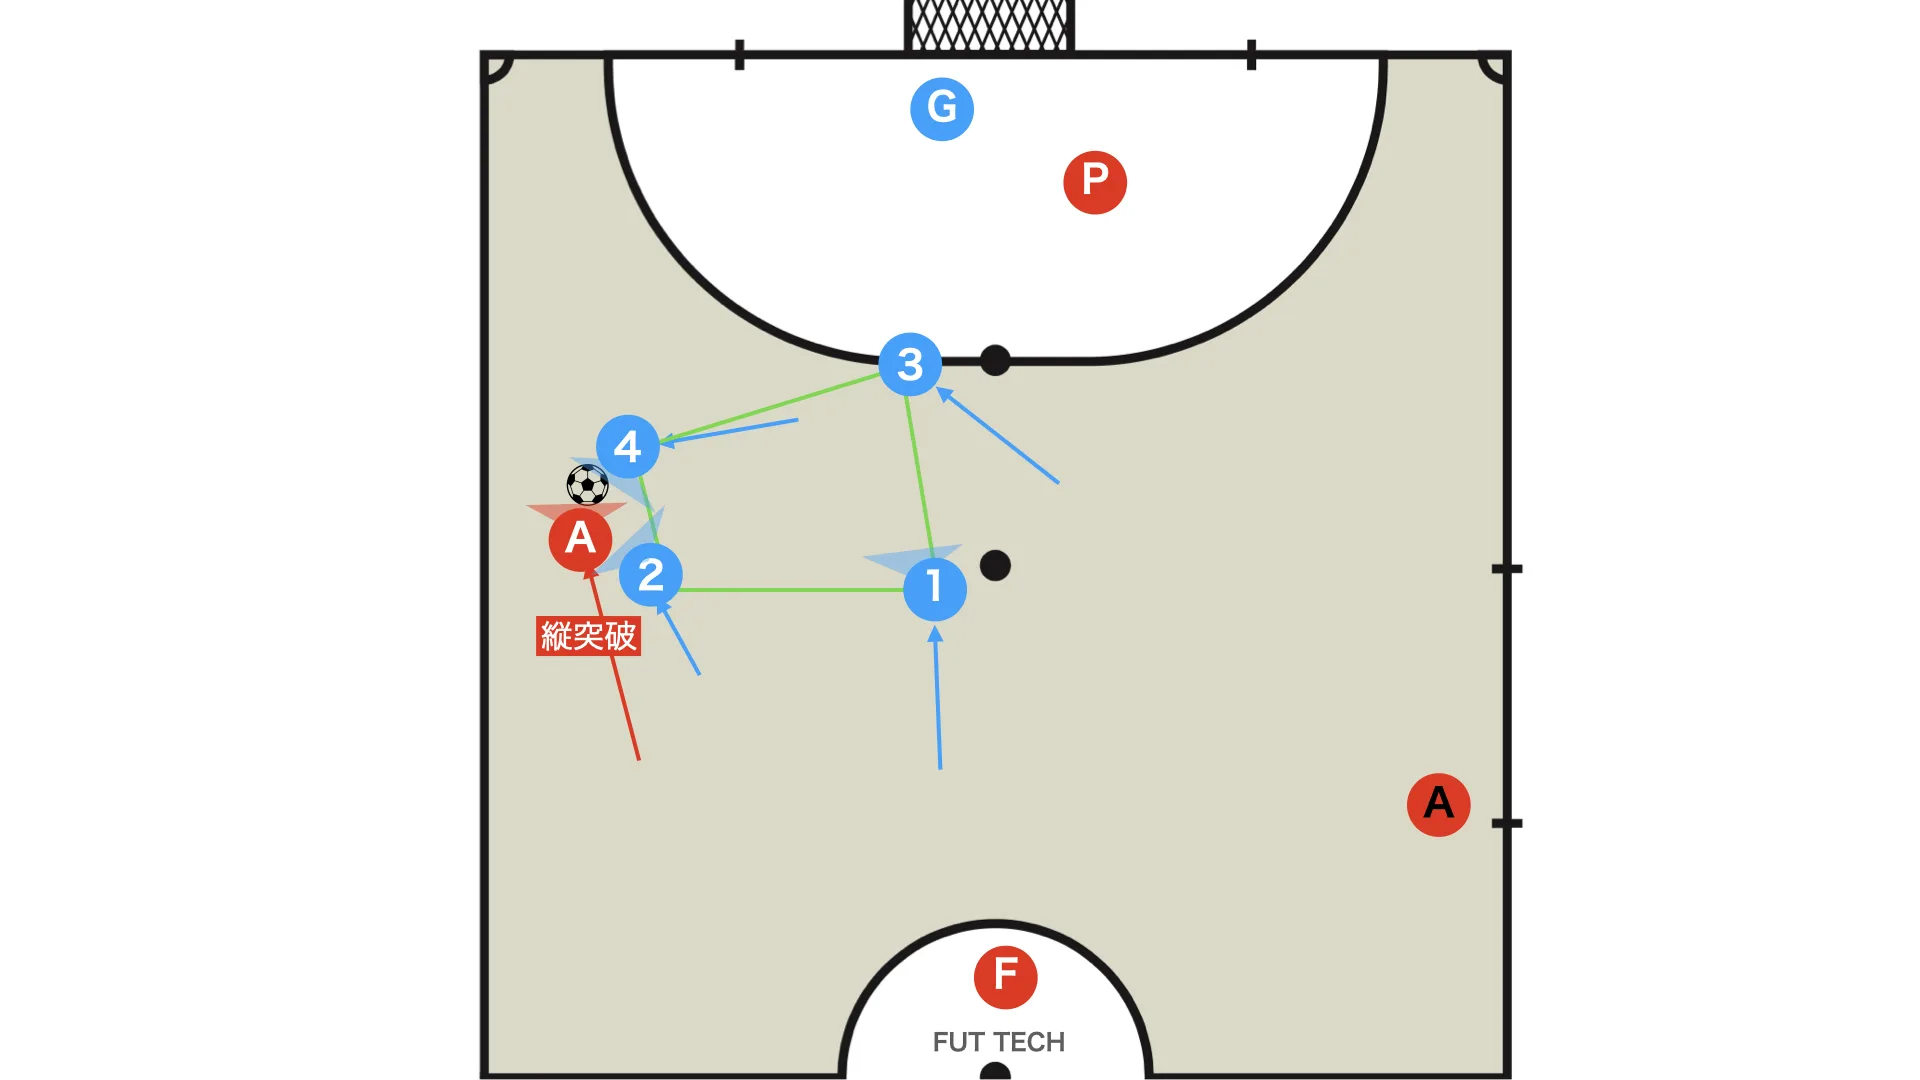
Even if the defensive shape looks like it might break down, the team should always maintain a compact diamond.
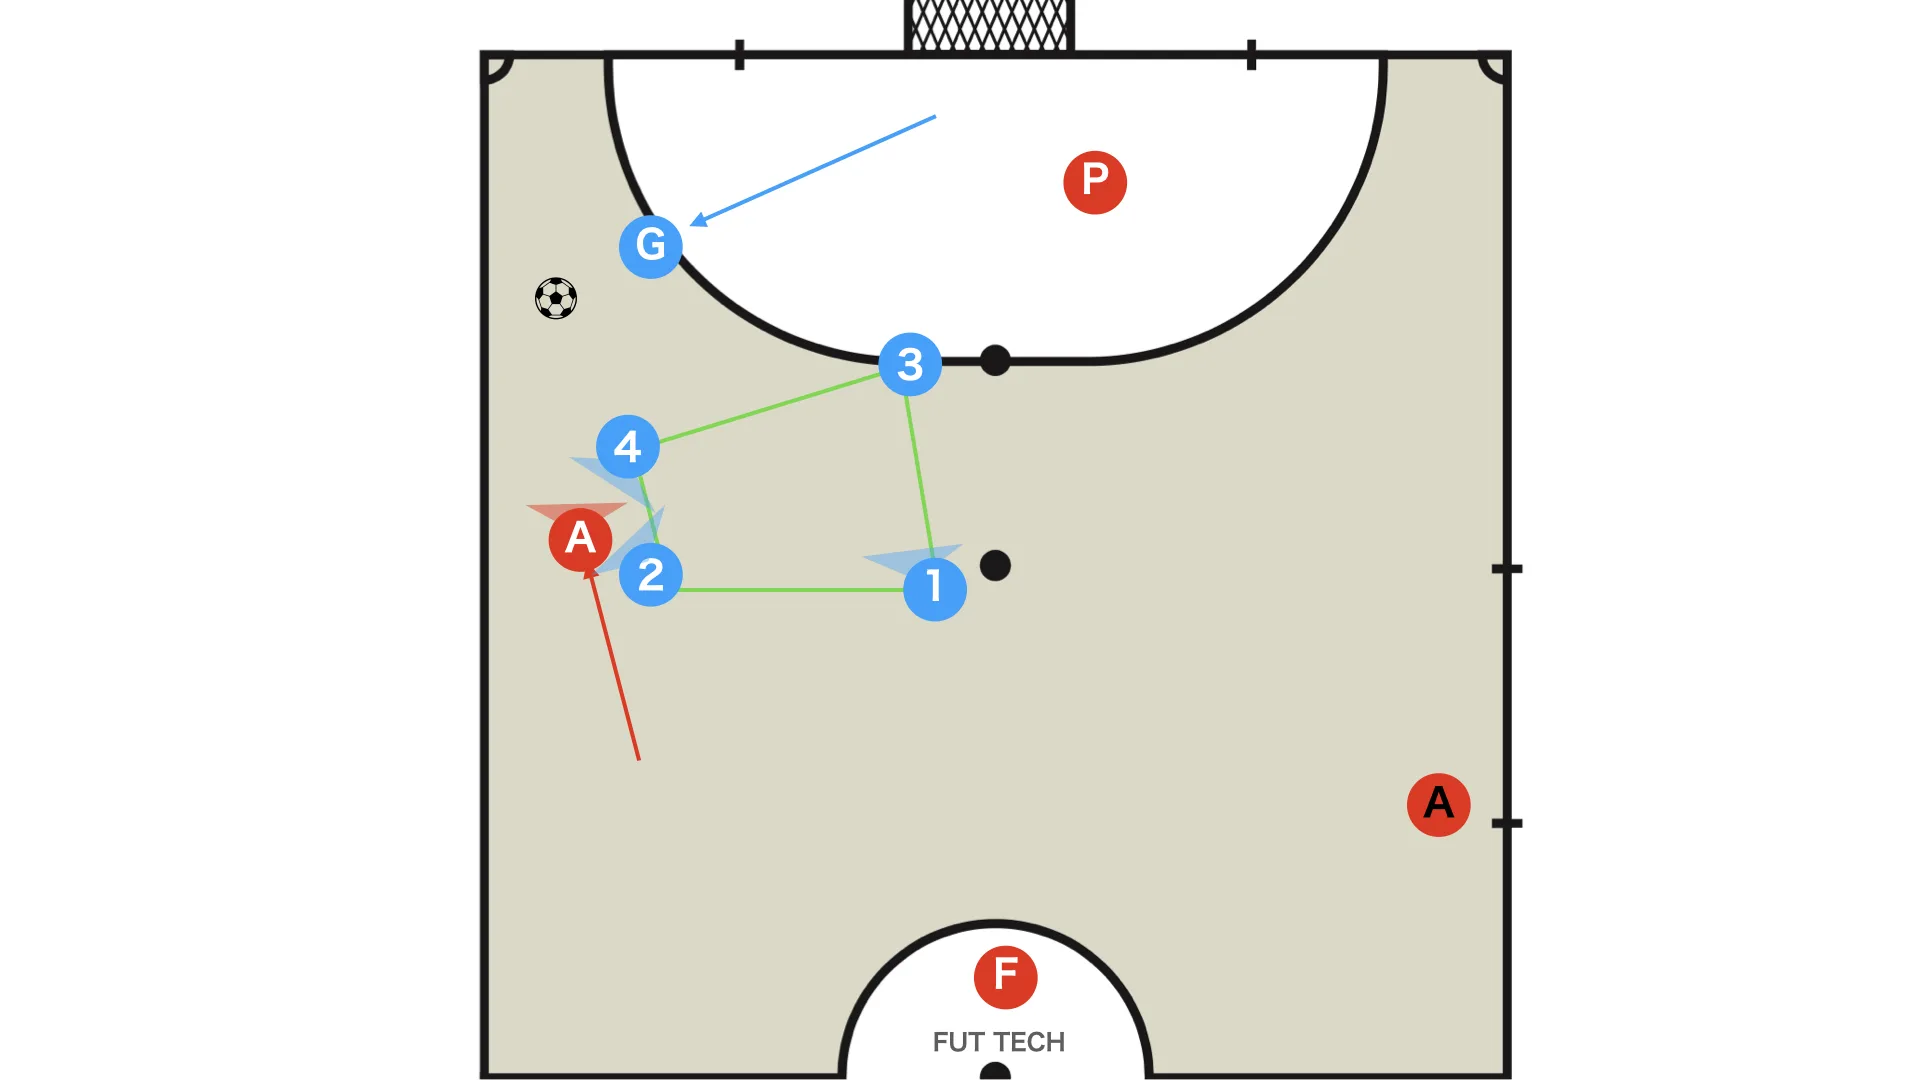
If the opponent's dribble gets too big, the goalkeeper can come out as well. (From the goalkeeper's body orientation, they may have a better angle to judge the play, but the downside is that the goal is left open.)
It is best for each team to decide this in advance.
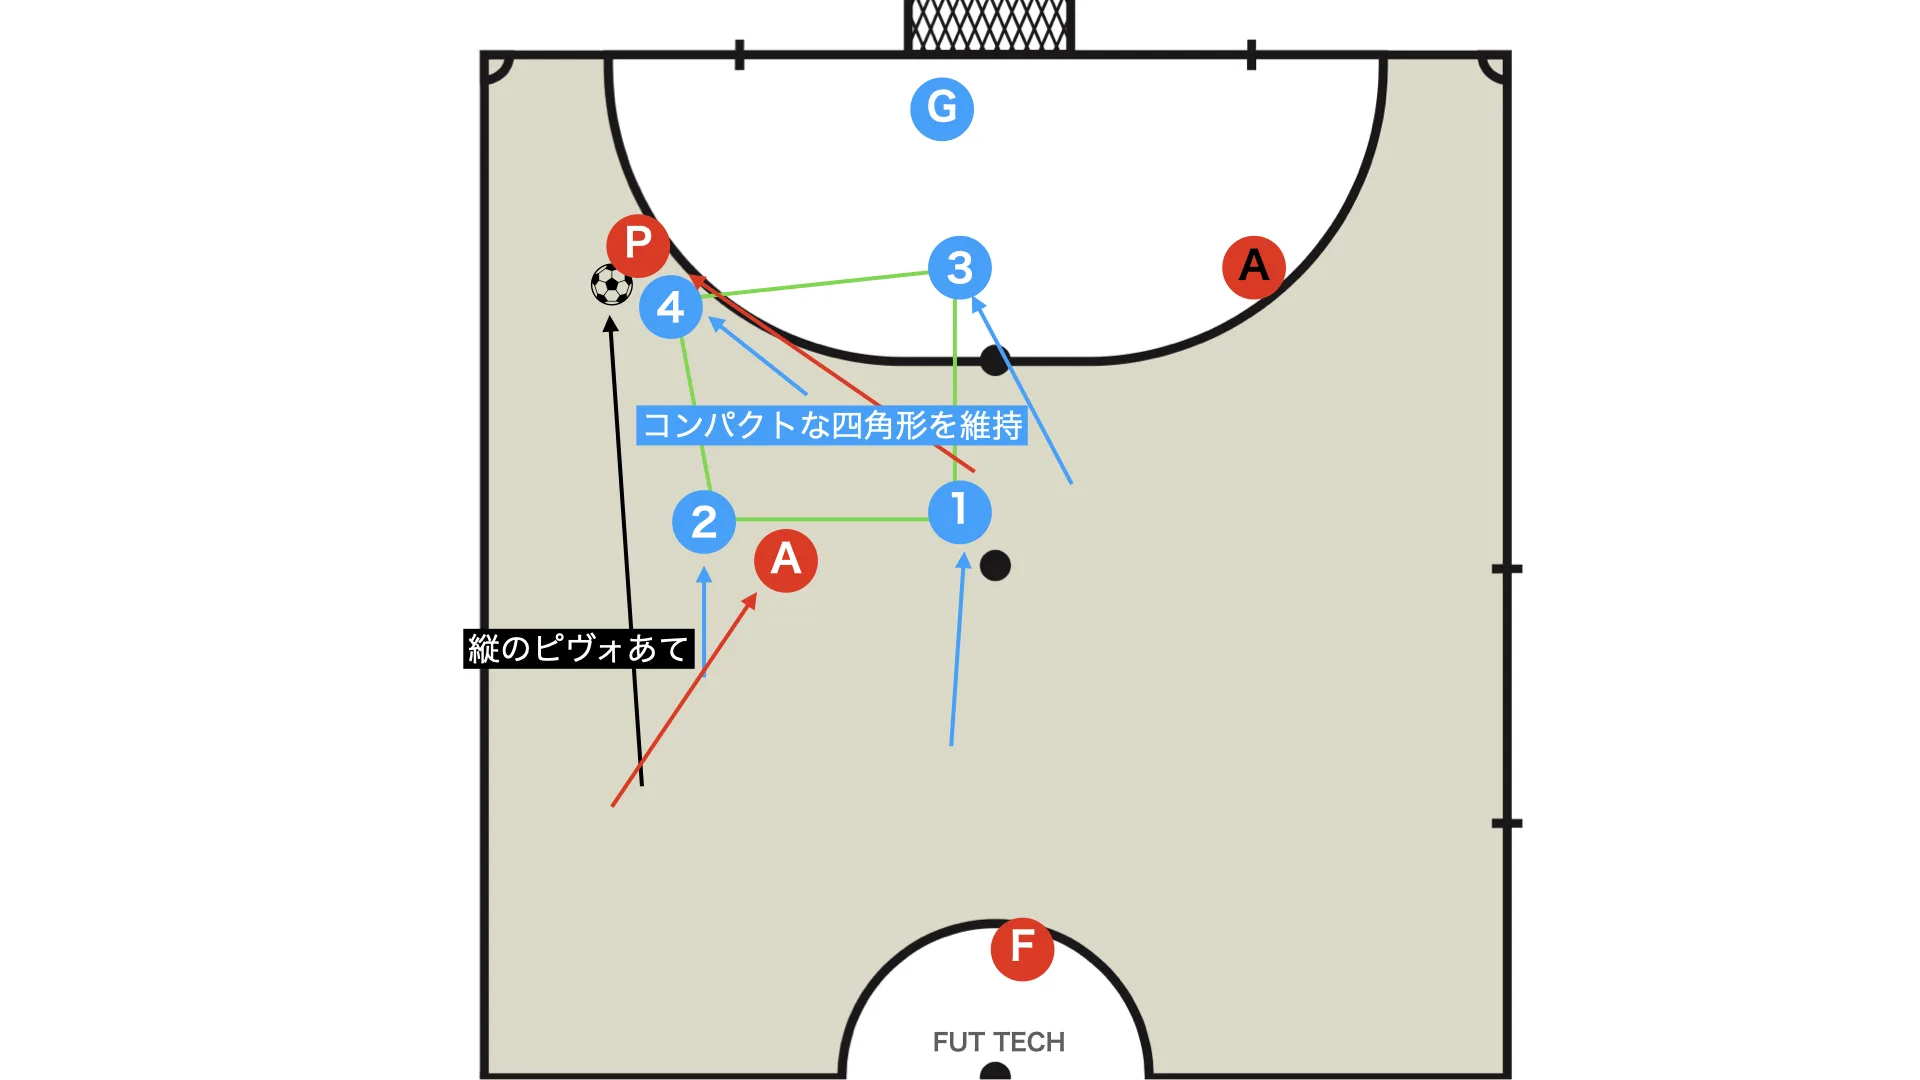
If the opponent's pivot drifts toward the corner and receives a vertical pass, blue 4 deals with it just as in the previous example of defending the line break, and the other defenders rotate with the play.
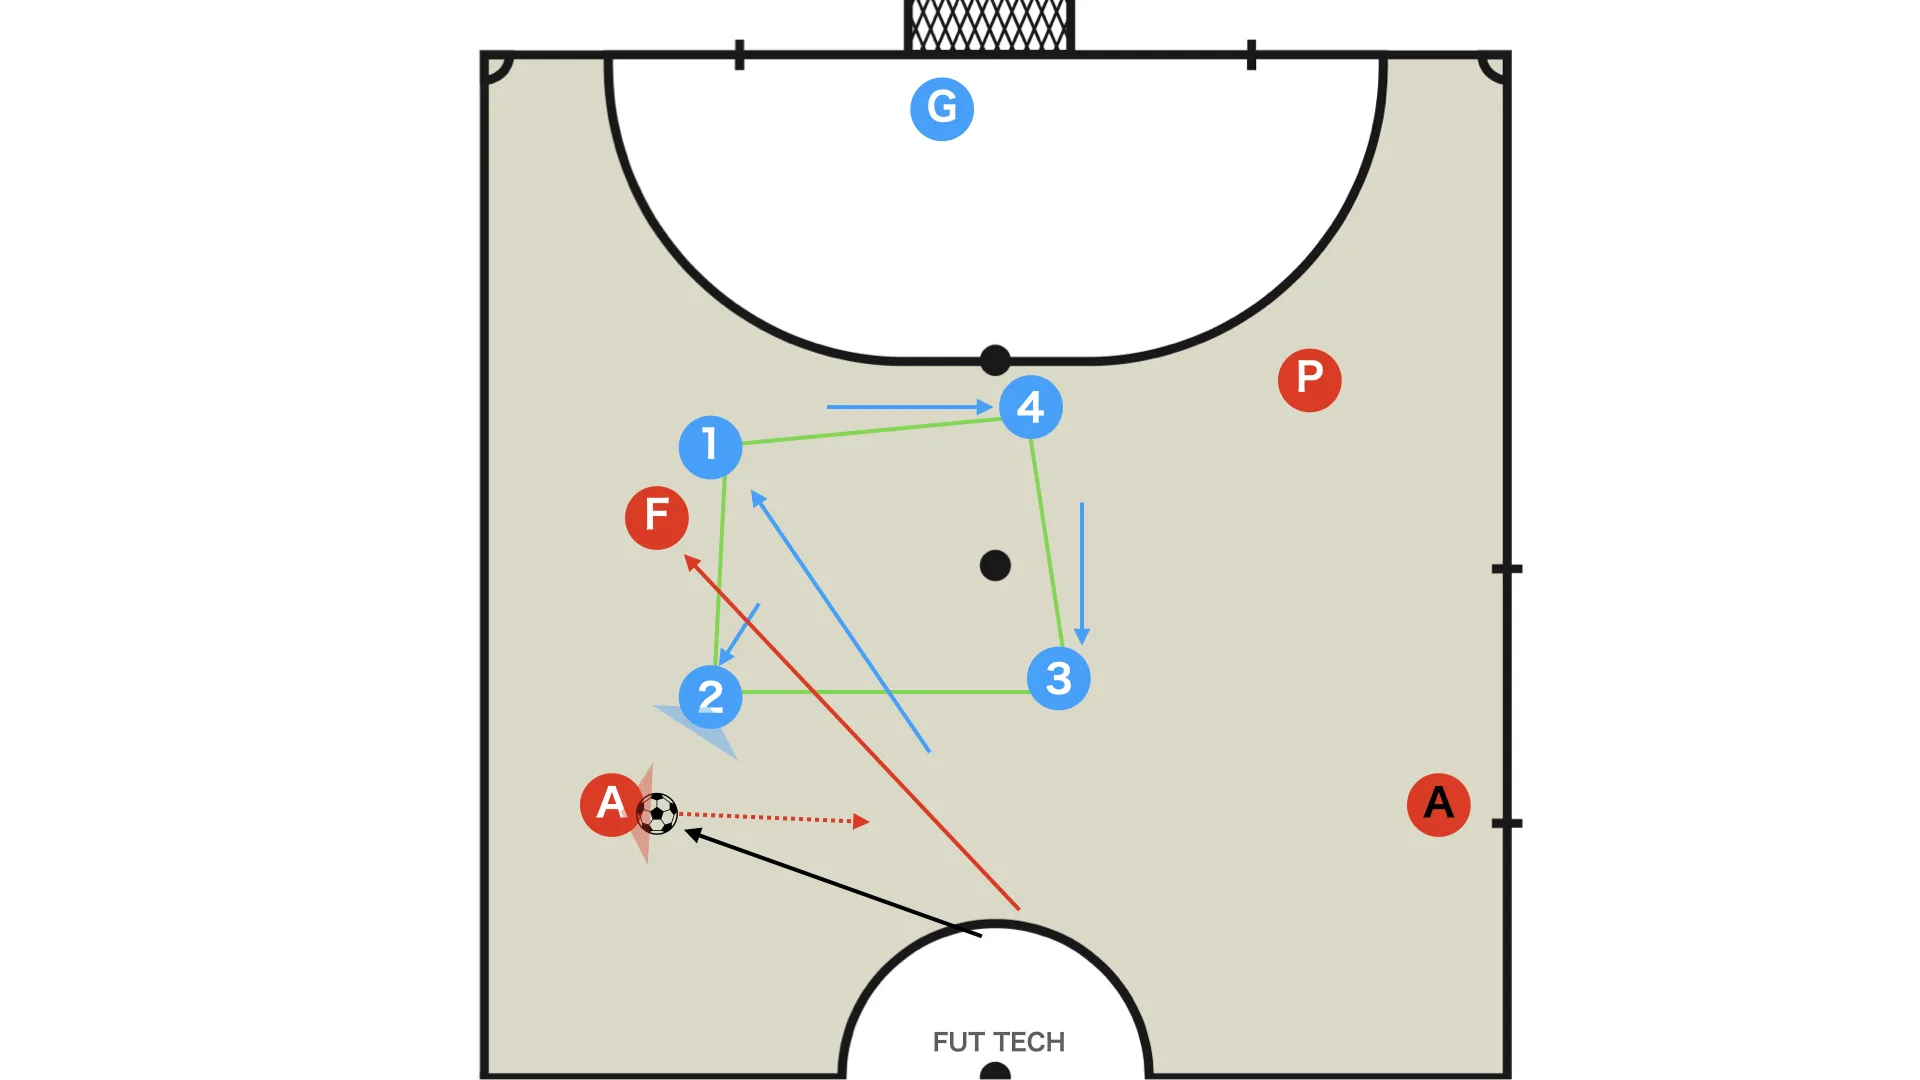
When the opponent tries to find the pivot from a cut inside with an ankle pass, blue 1 and blue 2 should try to shut it out.
If the pass still reaches the pivot, blue 4 should step out to press.
In that case, blue 1 and blue 2 should check their own marks while recovering to the ball line and, if possible, close in and win the ball.
If blue 3 goes to deal with the pivot, the far-side ala becomes free, so this is not a good solution.
If the opponent carries the ball inside and restores the floor balance, the defence returns to its original shape.
The downside is that the marker on the pivot changes, but the advantage is that it reduces the risk of the opponent using space with a parallel.
If the 1st defender is able to press, the team can ignore individual marks and send two players to win the ball.
If they win it there, they can break into a counterattack from a very good situation.
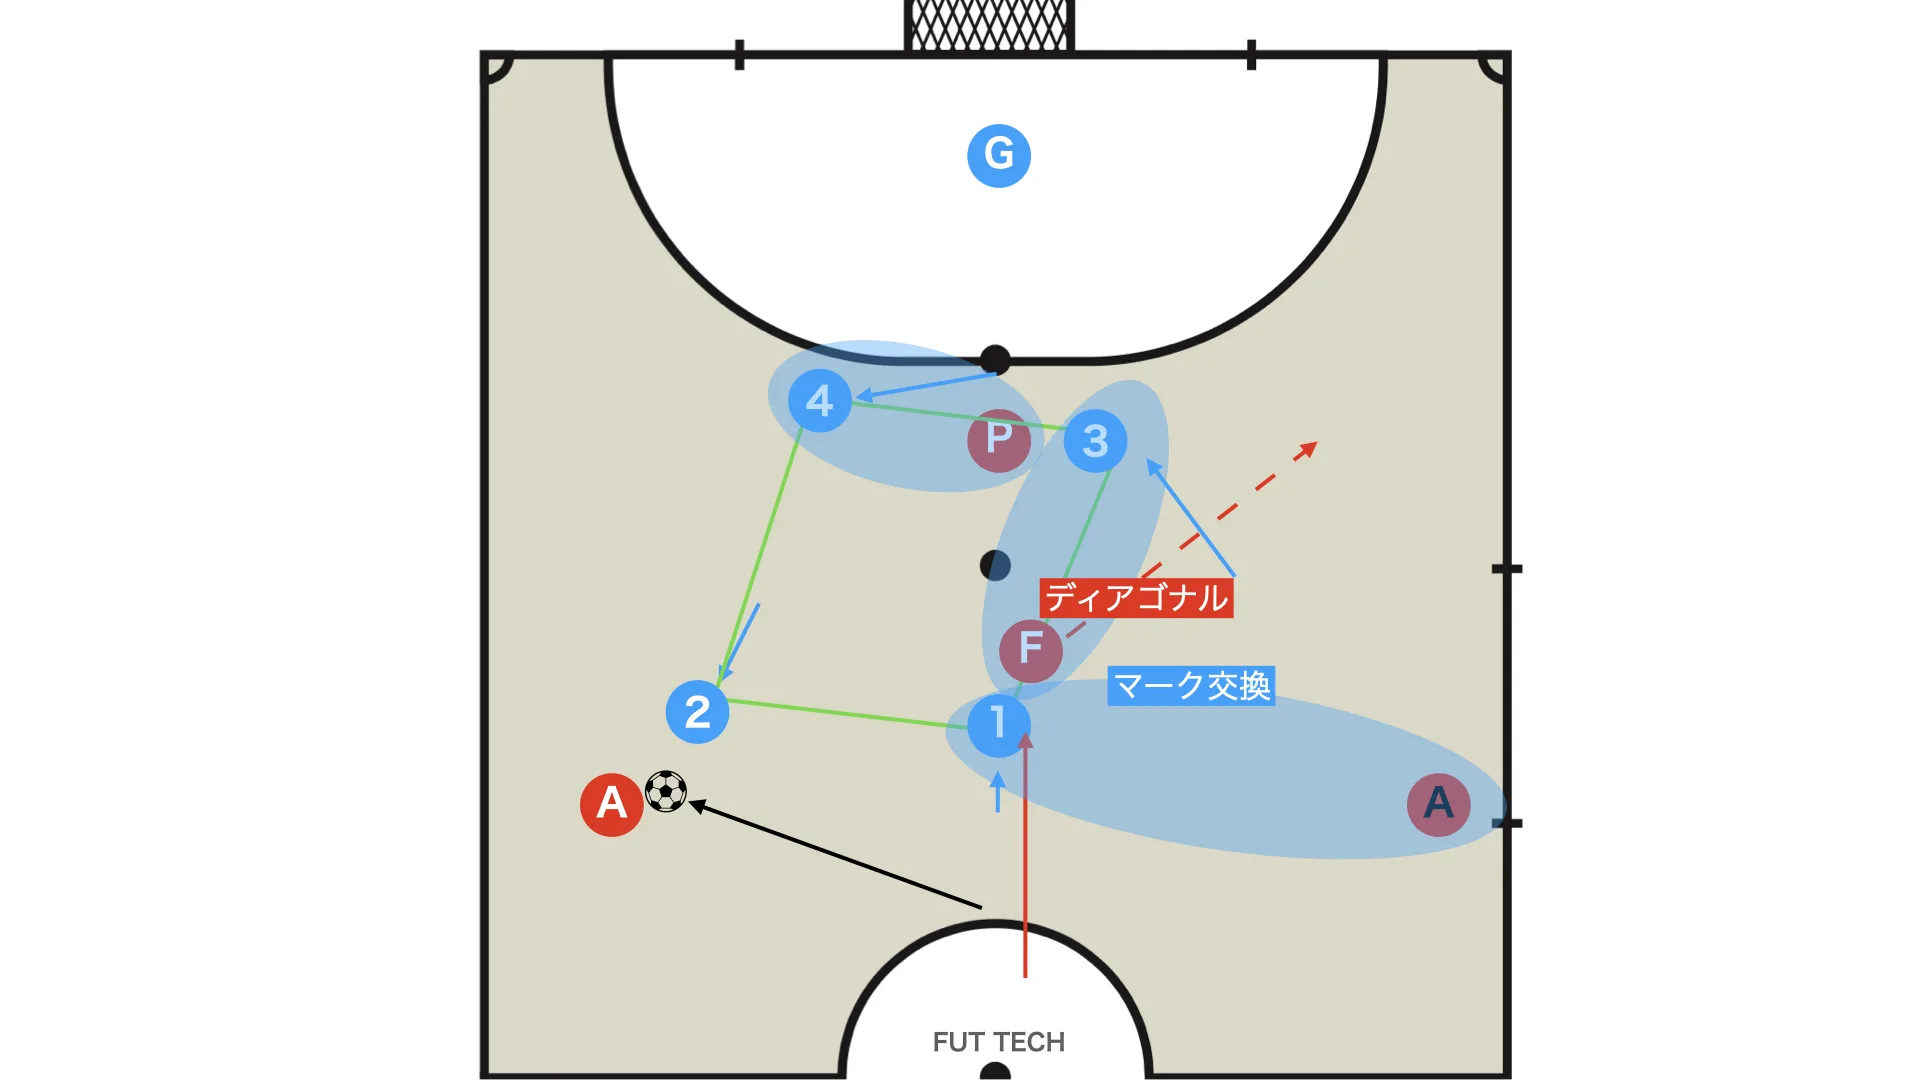
If the opponent makes a diagonal run through, blue 1 and blue 3 switch marks to maintain the diamond.
(The marking assignments are shown in light blue.)